


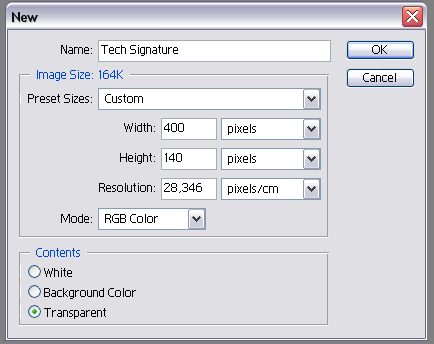
We start off with opening a new document:
Now that we've made our new image, we can start making our borders.
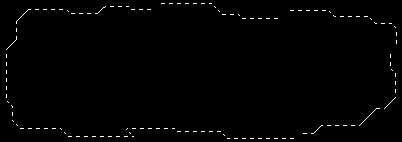
Step 1
Fill your background layer with black, press 'D' on your keyboard to reset the colors to it's original default ones. Name this layer top border. Now grab your polygonal lasso tool and start making a selection like the one below:
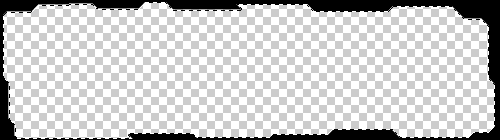
Step 2
Now with the selection still active press delete on your keyboard so you'll end up having a black border:
Step 3
We're going to add a nice style to our border. Find a style you like, make one yourself or get one from our downloads section:
Use a dark grey style or a light grey, it doesn't really matter. If you like it better, you can use some color aswell.
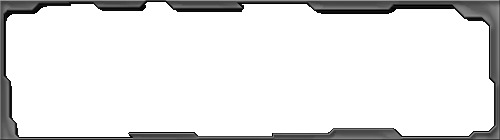
Step 4
Now comes the tricky part. If you've never done this before, that is. Get your lasso tools and your marquee tools and use the fixed size to be more accurate. Start deleting some stuff in your signature border to get a 'tech-ish' look to it. You should end up having something similar to mine:
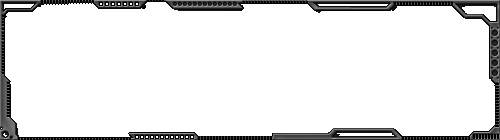
Just play around untill you get something you like. It's not hard, you just have to find a good way to do it.
Step 5
We're going to add another border to our signature. Make a new layer below your top border layer and name it bottom border. Make another selection again using the polygonal lasso tool:
Once again press the delete tool and add a nice style to it, with some color this time.
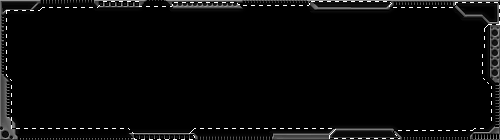
Step 6
To this border we're going to play around with the marquee tools and lasso's again. You should have something like below:

Step 7
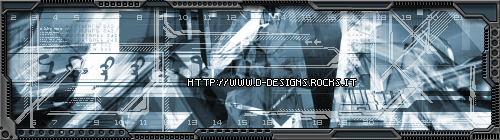
We're going to look at our downloads section, to find a cool background we can use that fits our signature. If you found one you liked, paste it just below the bottom layer. Make a new layer above the background layer and make sure the foreground color is set to white. Press 'D' and then 'X' to make sure.
Now, get some nice tech brushes and start adding them into your signature. Once you're done, lower the opacity and you should end up having something like mine:
Step 8
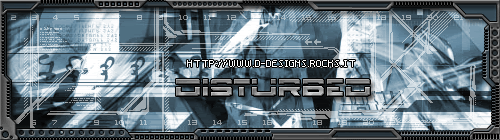
Adding some tech text. Get a good tech font you like, for this tut I used Borg9. Someone told me this was a good font to use

Once you've typed your text, add a cool style to it. I've used the style from the top border:
That's all there is to it! You could add an image to it, add some more text, add animations...
If you have any questions or comments about this tutorial please post them below. And don't forget to register

©Copyright Disturbed


