


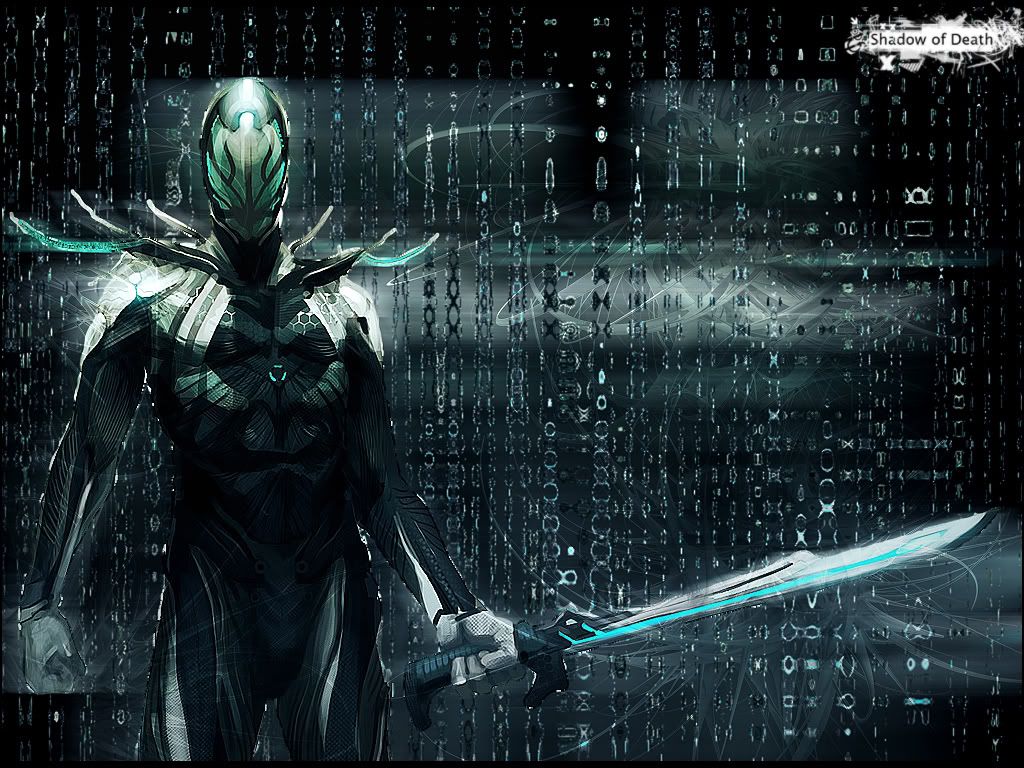
outcome:

tutorial:
start by making an image of your chosen sig size with a black background..

now open your render.. i used this one:
if you didnt cut your render out properly, go to layer> matting> defringe.. choose 1px..
to make the render fit in your sig, press cntrl + T for the transform tool.. make the render fit..
dupilcate the render layer 4 times..
with the top layer, set the blending mode to overlay and the opacity to 50%..
leave the second layer..
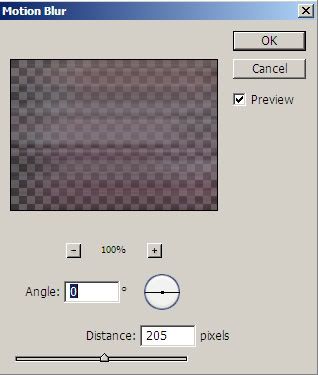
with the third layer, go to filter> blur> motion blur..
on the fourth layer, go to filter> distort> shear..
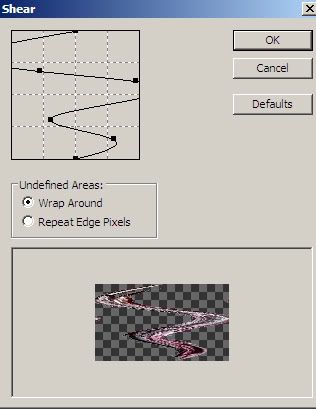
on the same layer, go to filter> distort> wave..
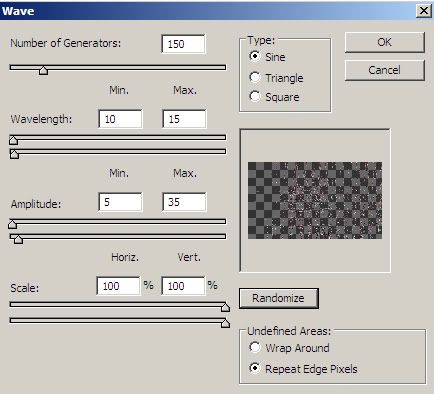
now the last thing on this layer is to go filter> blur> gaussian blur..
play around with the slider bar until it looks something like this:

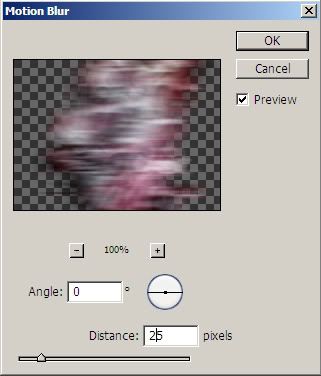
with the fifth layer, go to filter> blur> motion blur..
duplicate this layer twice and use the move tool on the 2 new layers to put the blur on the left and right sides of the sig..
it should look like this:

make a new layer above the rest of the layers.. choose a nice brushset to suit the style of your sig.. i suggest [click] for decorative or [click] for c4d..
brush around the render on the background but not on the render itself.. it wont look nice but it will soon.. it should look like this:

set the blending mode to overlay.. it will now look like this:

now we need some touch-ups.. it doesnt look so appealing yet..
make a new layer above the rest and go to image> apply image.. use default settings..
in this layer, go to filter> sharpen> sharpen.. set the opacity to 50%..
make another new layer and go to image> apply image..
press cntrl + B and use these settings:

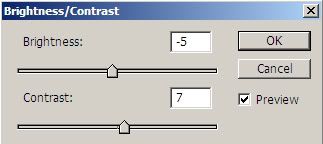
go to image> adjustments> brightness/contrast.. use these settings:
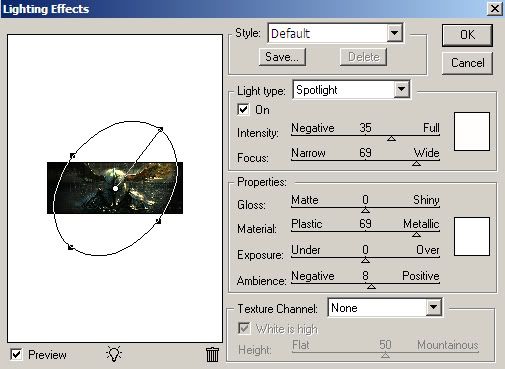
make another layer and apply the image.. go to filter> render> lighting effects.. drag the box at the end of the line until you get an angle like this:
set the opacity on this layer to 20%..
put your text on the sig..
now make one last layer and hit cntrl + A and then edit> stroke.. choose 1px one the inside with the colour as black.. after this, get the single row marquee tool and zoom the image to 1600%.. highlight the line under the stroke at the top of the image.. fill it with black.. do this for 4 lines under the stroke at the top and over the stroke at the bottom.. leave the sides as they are.. and youre finished your sig.. heres how it should look..
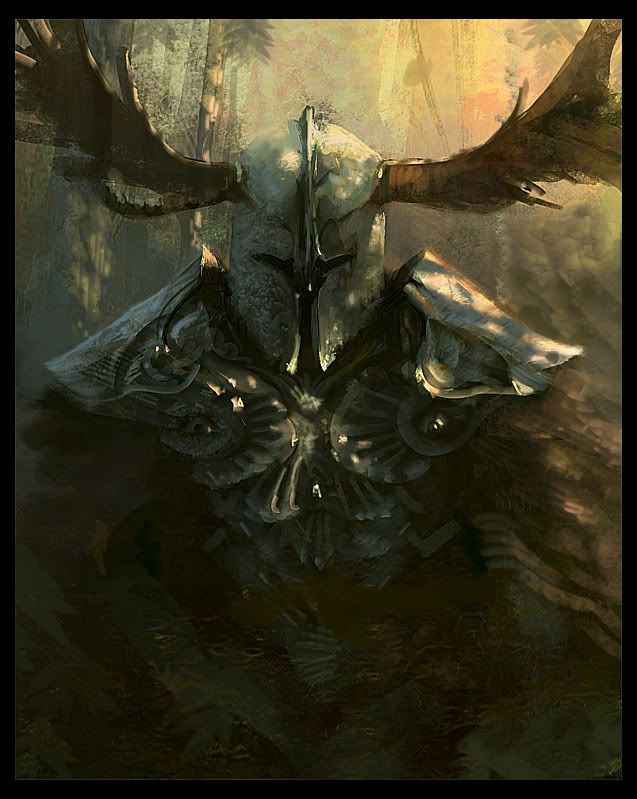
and if you really put some work into it you can get an outcome like this one


