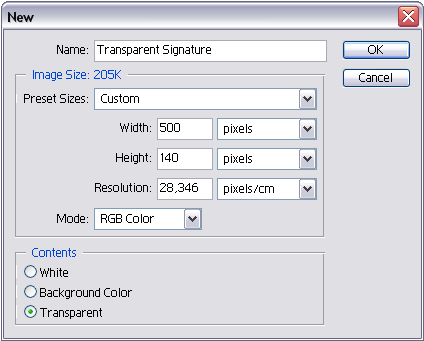
In this tutorial I am going to show you how to make a signature with transparent borders and text, for a nice looking effect. First, we'll start off with opening our new document:

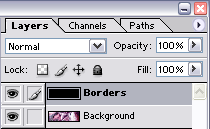
Fill the background with black and name this layer 'Borders'. Now look for a nice background you want to use. When you found one, copy the background and paste it below the 'borders' layer. Name this layer Background. Then select your borders layer again:

Step 2:
Select your poygonal lasso tool and make a selection like below:

Anything will do, small borders, large borders. It's in fact the background you're using that makes the effect.
Step 3:
Now that we've made our selection hit the delete key on your keyboard to erase the selection. Your image should look like below:

Press CTRL+D to deselect it.
Step 4:
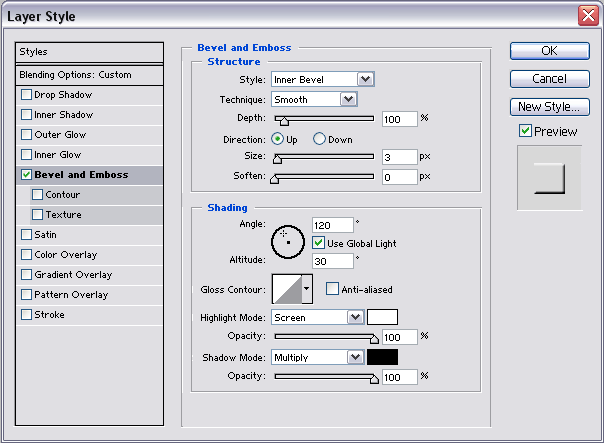
Now it's time to add a bevel and emboss style to our layer. Go to Layer->Layer Style->Blending Options.
Add these settings to your bevel and emboss style:

Press OK and then press CTRL+U to colorize your layer, use anything you like.
Your image should look something like mine:

Step 5: *Optional*
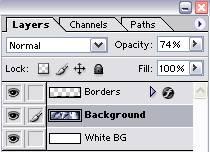
You could make a new layer(CTRL+ALT+SHIFT+N) and put it below your background layer and fill it with a white color. Press 'D' on your keyboard to set the default colors and hit CTRL+BACKSPACE to fill it with white. Now you can lower the opacity of your background layer so your borders will stand out a little more:


Step 6:
Now above your background layer make a new layer. CTRL+ALT+SHIFT+N. Select your type tool and type something, like your name for example. You should have a pretty bold text to make this work best, I've used Borg9. Now use the same settings on your text layer as you did before to your borders:

Your final image would look like below:

That's all! For any questions just reply to this thread, comments are always welcome, especially the bad comments, so I can make my tutorials better in the future.
© Copyright Disturbed