 Hi everyone! Check out my blog: http://crazyphotoshop-shockwave.blogspot.com/
To get started, you're going to need to download a few things like brushes, stocks and stuff like that.
You need Adobe Illustrator to open this, the main reason is so you don't lose the sharpness of the shield when you transform it.
Some basic fire brushes.
A set of vector line brushes
A set of brushes we're going to use for the background
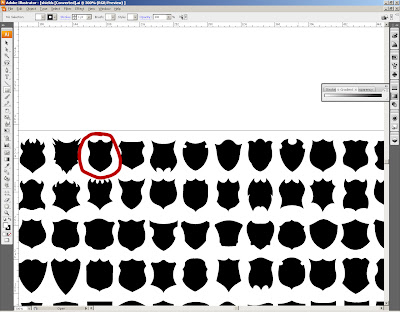
Now, let's start with the cover. Open up your shields in Adobe Illustrator.
I'm going to take this shield because it looks kinda sinister and that's what I'm pretty much going for. Createan 850*314 canvas in Photoshop because that's the ideal size forFacebook covers, at that size it doesn't get cut or anything like that. Just click on the shield, copy and paste it in Photoshop and set it as a "Smart Object". That way, you won't lose the quality. Now you want to give it some color. I was going for a fiery emblem so I choose these colors:
Set the gradient tool as Reflected and you'll get something like this.
Let's add some effects to the shield so it doesn't look as plain. Iadded another gradient on top so I get a cool burning effect. Selectyour shield layer, press ctrl + LMB and create a new layer. On the newlayer, select your gradient tool, set it to black and transparent andjust pull it down.
Thenext thing we're going to do is make it shiny, polished metal and thatstuff. You can use this trick on lots of metal things and it'll lookreally nice. Once again, press ctrl+click on the shield thumbnail,create a new layer and with the black color selected, press alt +backspace. You should get the exact copy of your shield, just black. Nowgo to Filter>Noise>Add Noise, select Gaussian, Monochromatic andbring it up to 400%. Ctrl + click on your shield and go toFilter>Blur>Motion Blur, set it to 45° and the distance to about50 pixels. Set that layer to soft light and the opacity to about 50%. If you've done everything right, you should get something like this.
Nowfor the flames and that wicked stuff. Load your fire brush and selectthe one that's 297 pixels in size.What you wanna do now is change thebrushes' size and color to fit it in. Don't worry if it's too big orsomething, we'll take care of that later.
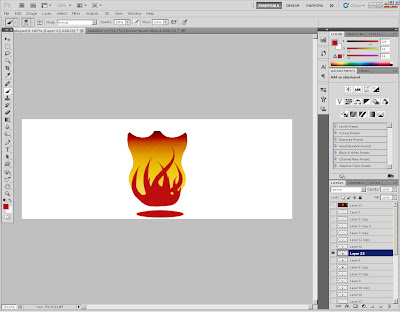
Youshould start by doing this, ctrl+clicking the shield, pressingctrl+shift+I to invert the selection and deleting the pieces that areout of the borders. You can do that a few times and it'll make anice some kind of a 3D effect. That should leave you with this. (I addeda splatter brush at the bottom, it's not necessary, but it looksbetter. You can use any splatter brush.
Now, to enhance that 3D effect, we need to add some shadows. Todo that, you just select a fire layer, press ctrl+J, ctrl+click thelower layer, press alt+backspace with the black color selected. Thatshould leave you with two layers, one after another, with the bottom onebeing black. Reposition the black one so it's like a shadow, down rightis where I usually put them. If needed, delete the stuff that got outof borders like I explained before.
Totop the shield off, we need to add some borders, make it stand out andall that. Go back to your Illustrator, take the exact same shield andmake it slightly bigger in Photoshop. Ctrl+click the original, smallshield and with the big shield selected in your layers, press delete todelete the inside of it.
Nowmake a copy of that border by pressing ctrl+J. Make one of thoseinvisible and resize the other one so it fits your shield perfectly (atleast the bottom half) and delete the top half with your eraser. Colorthe half-border using the alt+backspace shortcut with #e5a407. Set it toMultiply and lower the opacity to 79%. If you got that right, you'll get this.
You can leave the other border like it is, just make sure it is on top of all the other layers.
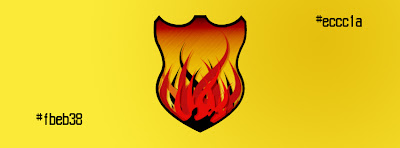
That's the shield part. I wasn't too sure what I wanted for the background, so I just improvised. Take your beloved gradient tool, set it to Linear and just pull it from one corner to the other.
Copythat yellow layer using ctrl+J, press ctrl+shift+U to desaturate it andmove it on top of your yellow layer. Now go toFilter>Sketch>Water Paper and move the sliders until you get thedesired effect. After you've done that, set it to Overlay and you shouldget this.
Nowwhat you wanna do is take your tempera & water paper brush andclick a few times with #ae140d on a new layer. Put the layer in betweenthe water papered layer and yellow layer. Now set the layer to Multiply. You can also add some black behind the shield with your brush. Just make sure to set the opacity to 15% and click a few times.
Nowuse your vector line brush and place it like it's coming out of theshield. Of course, it should be on a new layer, black color and be surethat you've restored your opacity to 100%. Make the layer Soft Light andthat should be enough.
I'vejust added some shadows behind the shield so it blends in better. Ifyou forgot, ctrl+J on your shield, paint it black, put it behind theshield and set the layer to Soft Light.
Notice how I made two layers so I cover more surface.
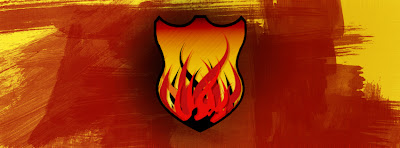
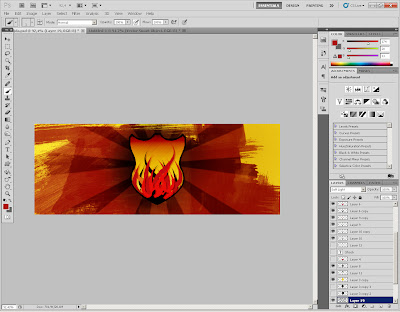
We're almost over, woo! Createa layer on top of all layers and go to Image>Apply Image. Press OKand set the blending mode to Multiply. Lower the opacity the 57%. Thelast step you do is go to Filter>Render>Lighting Effects. Set itto Omni and make it like the shield is glowing and the rest is kindafading. (I usually leave everything like it is, except intensity.)
And that's it! You can add your nickname or anything if you want, it's optional. Now you can reward yourself 'cause it took a whole lot to do it. If you've got any questions, ask away, I'd be happy to help. Also, post your outcomes!
Love, Shock.
Visit my blog : http://crazyphotoshop-shockwave.blogspot.com/ 
|


