Even if you are not familiar with the term ‘sample and hold’ it’s pretty likely you have heard one of these effects in action. If you know the classic track ‘Rez’ by Underworld then have most certainly come across the technique, as the entire track is based around a resonant synth line modulated by a sample and hold LFO.
Sample and hold circuits were originally used on the front end of digital to analogue converters to stabilize data streams, but they have been put to much better use in the LFO sections of many synths. Basically, a random sample and hold LFO (low frequency oscillator) works in the same way as any other LFO on a synthesizer, except that instead of using a uniform waveform, such as a saw or sine wave, it use a more random approach, creating ever changing, stepped values. The result is a very pleasing random effect that is perfect for use with resonant synth patches.
I am going to demonstrate a few different ways of creating S&H effects using Reason, but of course you will see sample and hold LFOs on many synths, so with a bit of luck this tutorial should be useful to most budding synthesists.
Step 1 - The Easy Route
There are a couple of ways of creating S&H effects in Reason, an easy way, and a harder, geekier way! The first route is really straight forward and is the method you would use with any synth that has a sample and hold LFO available. This is the technique we’ll look at first and then I’ll run through the more complex approach.
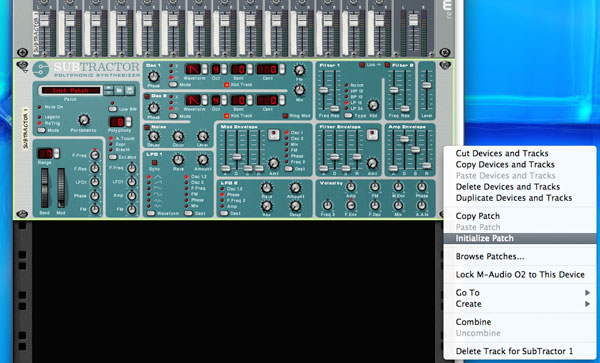
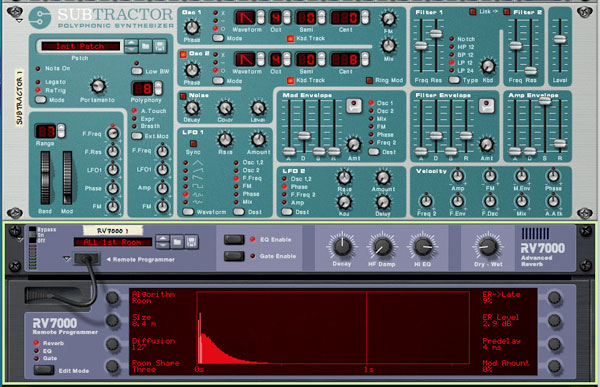
Start with a blank rack and add a single Subtractor synth. I’m using this one for this simple version as it’s the most straightforward of the synths in Reason and meets our requirements here. Before we do anything else the synth must be initialized, so right click and hit the initialize option in the drop down menu.
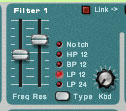
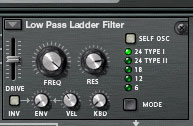
Now, you should hear a pretty basic saw wave with no filters or modulations applied. To set the sound up so we are ready to apply the S&H effect, let’s tweak the filters and oscillators a touch. I’ve knocked the cut off frequency down to about half way and the resonance up to around 90%. These settings will just get us started and can be tweaked later, so don’t worry too much about being super precise yet.
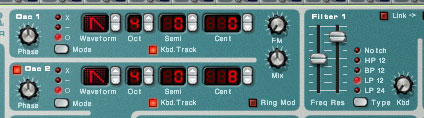
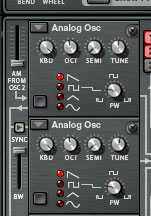
I have also added a second saw tooth oscillator and de-tuned it slightly to give the whole patch a slightly fatter feel.
Step 2 - Setting the LFO to Random S&H
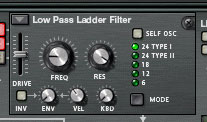
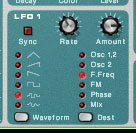
When we first look at the LFO section of the Subtractor in its initialized state we can see that it is turned right down and not assigned to the filter. So the first thing to do is assign it to the filter cut off and turn up the amount knob.
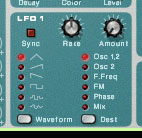
At this point we also need to change the LFO mode so that it is set to random or S&H. The Subtractor uses symbols to represent the waveforms here and the one we want is the second from the bottom. You can see that the symbol clearly represents a stepped, random wave.
On playing back your sound on a keyboard you should now hear some S&H modulation taking place, although it might not yet be perfect. It’s now a case of finely balancing the amount and rate controls on the LFO with the filter frequency and resonance settings. With a little bit of time invested here you should be able to get things sounding nice.
Step 3 - Adding Some Effects
A small amount of room reverb can work great with these resonant effects and I have added some using Reason’s RV7000 advanced reverb unit. I’ve then played a few simple chords and you can really start to hear how this sort of sound can be used musically.
As you can probably hear by now this method doesn’t create a very defined sound between the steps and often the curve between steps feels a little rounded. For something a little more hi-fi we need to use the super geeky method. Read on.
Step 4 - The Geeky Route
To create the perfect customizable sample and hold effects in Reason takes a little bit more work, but not much, so it’s well worth the effort. For this example, we’ll use Thor and set it up in the same manner as the Subtractor patch we used.

Again I emptied the rack, inserted the synth and initialized it. Then I simply copied the patch from the Subtractor by using two de-tuned saw tooth oscillators and identical filter settings. It sounds a little different but this is to be expected as it’s a very different synth.
Step 5 - Adding and Routing the Matrix
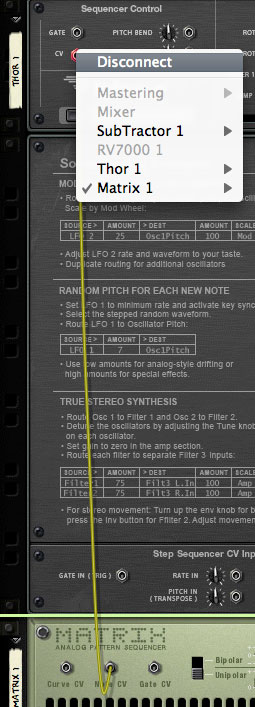
The trick here is to use not an LFO to generate the S&H effects, but the Matrix step sequencer instead. To set this up you need to add a Matrix to your rack and immediately flip it over to change the routing.
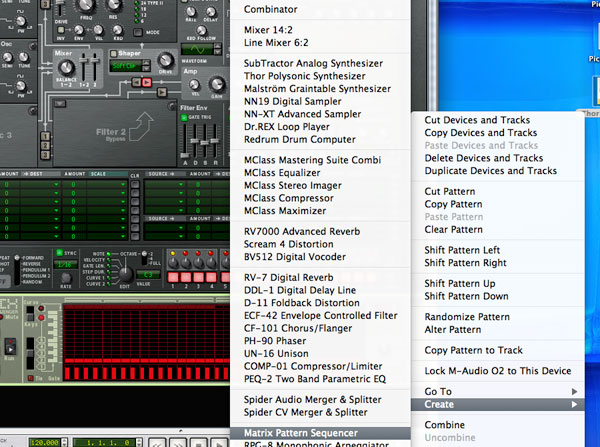
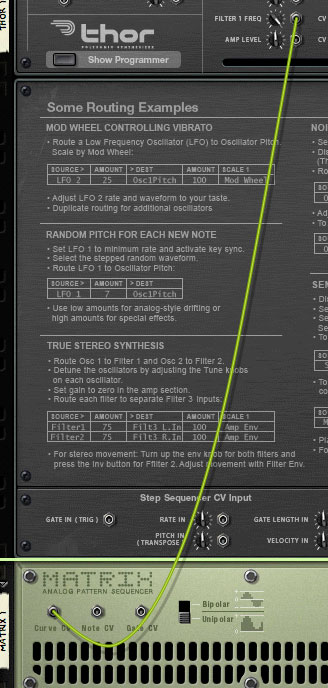
You’ll see that the Matrix has automagically connected its CV and Gate connections to the corresponding inputs on the back of Thor. These need to be disconnected as we will not be using the step sequencer to control Thor’s playback. Instead, route the Curve CV output to the filter frequency input and turn the sensitivity knob all the way up. We are now ready to start creating the effect within Matrix.
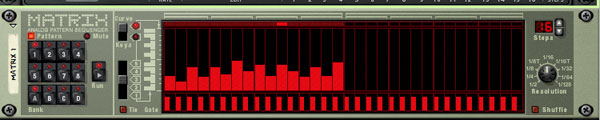
Step 6 - Tweaking the Final Sounds
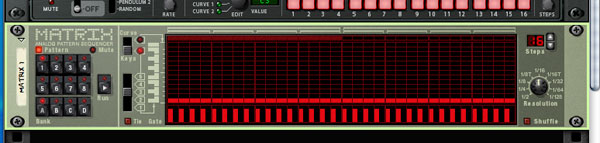
Switch the Matrix to ‘curve’ mode on the front panel and start to draw in some random values. You will soon start to hear the effect on Thor’s sound, if you don’t hear anything then go back to Thor and make sure the cut off frequency is turned pretty low.
You will soon realise that this is a far superior way of creating the effect and it’s also totally customisable. You can use this with any synth or sampler with a CV input for cut off frequency.