
Following my recent tutorial on creating classic synth FX, I thought it may be helpful to some of you to see some other sounds constructed using the same basic format. This tutorial focuses on building a wide synth string sound, with some interesting modulation routing.
First you will see the sound constructed step by step using the FAW 'Circle' soft synth and then the patch will be recreated using a number of instruments from popular DAWs. Obviously the recreations may not be exactly the same as the original patch but they should show that any synth can be used to create a good range of sounds.
Step 1 - The Desired Sound
What we are aiming for here is a warm, analog-style synth string sound. If we can add some modulation to the sound in some way to create an evolving texture, then we will create interest and we'll surely be onto a winner.
It's always a good idea to visualize your sounds in this way before you start programming so that you have a plan in mind as you go. Of course once you have programmed the sound you aimed for, you can create further variations and save them as new patches.
With this patch in mind, let's look at its creation step by step.
Step 2 - Changing the Voice Mode
In my last synthesis tutorial I discussed how to start with an initialized patch. I have done exactly the same here and have used the identical patch that was used in the last session.
As the last sound was monophonic, the voice mode (under the settings tab) was set to '1'. We are creating a pad/string patch here and it is likely that it will be used to play chords, so I have raised the value to 16, as this will allow plenty of scope for playing chord sequences.
I have played a basic chord sequence using this initialized patch with the altered voice mode so you can hear the sound in its basic form.

FAW Circle initialized patch
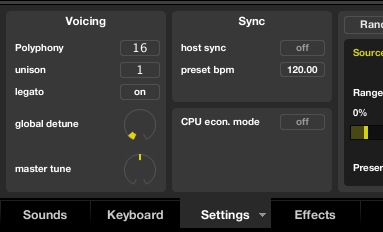
Changing the voice mode
Chords played with Initialized patch
Step 3 - Altering the Amplitude Envelope
Currently the sound has an attack and release value of zero as this is how the initialized envelope is set up. This gives the sound a very artificial quality and resembles a clav. To bring the sound closer to a string or pad, we must first edit the amplitude envelope and soften things up a touch.
By simply raising the attack and release settings we create a softer, slower sound. I have used pretty high settings here and you can hear that just this small alteration has totally transformed the chord sequence when played.

Envelope 1 routed to VCA
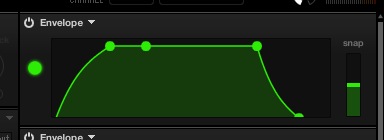
Edited envelope
Patch with edited amplitude envelope
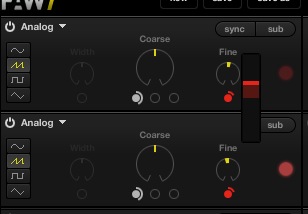
Step 4 - Adding an Oscillator
With the sound's dynamic signature sorted we can start to think about its other sonic characteristics. To add width and dimension to the sound I have added a second saw wave oscillator. I then detuned this oscillator to create a thick chorus effect.
Again, with these new settings in place the sound is once again transformed and the sequence sounds much richer.
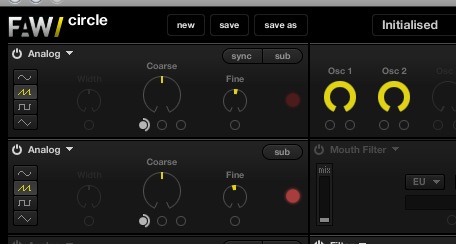
Extra oscillator added
Extra detuned saw wave
Step 5 - Unison
To add even further width and dimension I've added a unison effect to the sound. This is present on most synths and works in a similar way to detuning oscillators. The major difference is that unison adds a stereo widening effect to the sound.
You can often dial in exactly how many voices of unison you would like to be introduced to the sound and in this case i have only opted for two. This only adds a subtle effect but you can hear from the example that it is present.

Unison activated
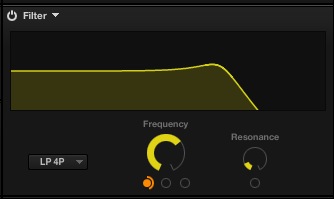
Step 6 - Filter Envelopes
Although the sound now resembles a synth string patch it is perhaps a little static. To create some initial movement I have utilized the secondary filter envelope to create a subtle sweep of the filter frequency. The filter envelope is set with similar settings to the amplitude envelope, with very slow attack and release values.
You can see that the cutoff has been lowered slightly to allow the envelope room to work, the resonance value has also been raised to emphasize the whole effect. This simple modulation routing makes the sound much smoother and slightly mellower in character.
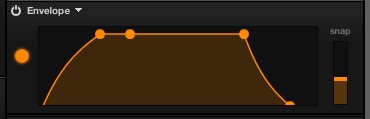
Filter envelope edited
Filter modulation routed
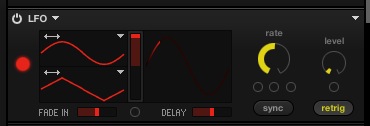
Step 7 - Pitch Modulation
To add some extra movement I thought some gentle pitch modulation would be nice. I have used a delayed sine wave based LFO to modulate the pitch of both oscillators. The effect is a vibrato that fades in as the envelopes open up. This causes the vibrato to only become audible in the later section of the sound as it develops.
The speed of the LFO is then modulated by the filter envelope. This causes the vibrato speed to slow down as the sound enters its release phase. All of these modulations and changes in speed create a very organic texture and make the sound more interesting as the chords are played.
Pitch mod routing
Pitch mod LFO
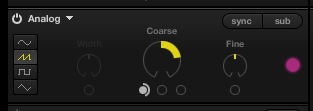
Step 8 - One More Oscillator
A final touch to the sound is an extra saw wave oscillator playing at an octave above the others. This is then mixed in at a lower level than the other two. This just adds some extra harmonics to the patch and a little emphasis.
Extra oscillator
Oscillator mix
Final synth string patch
Step 9 - Patch Recreation
Here is the sound recreated using Reason's Thor, Logic's ES2 and Ableton Live's Analog instruments:
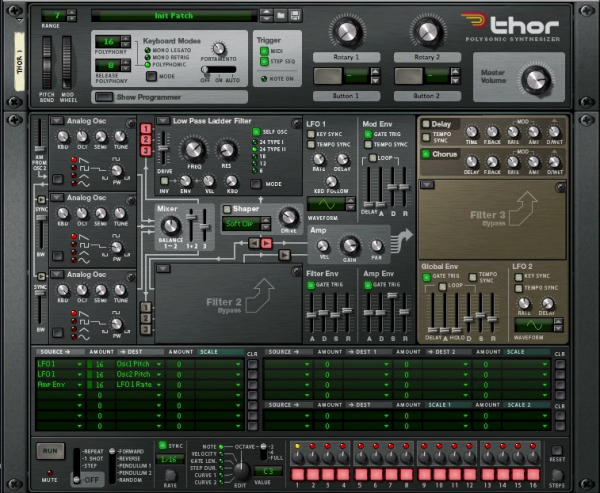
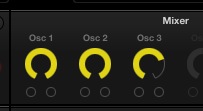
Reason's Thor

Logic's ES2
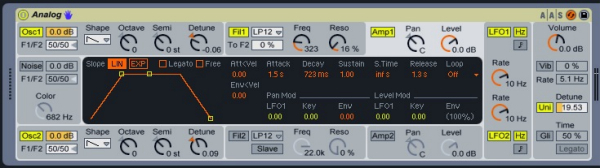
Ableton Live's Analog
Download the Play Pack for this tutorial (396KB)
Contents
- Reason Thor Patch
- Logic ES2 Patch
- Live Analog Patch


