Beth Jansen‘s journey into photography is a familiar one. What started out as a hobby for capturing great pictures of her family and making a little extra money on the side escalated into a successful portrait photography business. But Jansen isn’t “just another mom with a camera.” Combining artistic vision with innate fashion sense regarding colors, patterns, textures, and the like, Jansen has created a vibrant, trendy style of portraiture that is all her own.
In the following video, Jansen speaks about how to successfully shoot portraits for clients of all ages and shares compelling insight about the necessity of staying inspired, owning and marketing one’s style, and mastering the technical aspects of one’s chosen niche:
Stay Inspired or Burn Out
Photographers are artists, and if anything is collectively true about all great works of art, it’s that they were created with deep passion. Unfortunately, many artists who try to take their art into the business sphere end up resenting their crafts. Jansen understands this first hand and highlights the importance of maintaining a sense of creativity and inspiration to prevent burn out.
Perhaps the easiest way to ensure that you love your work is to figure out what you love and incorporate that into your art. Jansen found a way to infuse her photography with three of her passions: fashion, art, and design.
She styles the clothing and appearance of each one of her clients and then keeps a weather eye out for naturally-occurring and complementary patterns, textures, and colors in the locations selected for the shoots. She also prefers to shoot on location rather than in her home studio so that every photo shoot is a brand new adventure.
“When you get that new, fresh shot, it re-inspires you,” said Jansen. “There’s going to be a lot of repetition in what you do. If you can inspire yourself and be really proud of one image out of every session, that’s a good day… it’s important for you to continue to impress yourself.”
Prepare and educate your clients about timing, location, clothing, props, and posing
1. Timing is important. Certainly try to plan around your client’s schedule when selecting the time frame for the photoshoot, but make sure to explain that morning light (before 11:00 am) and evening light (after 4:00 pm) are best for portraits.
2. Select the location carefully based on the style and age of the client and the lighting situation. For example: a newborn photoshoot should probably be conducted indoors in a controlled environment, but senior portraits of a senior who enjoys hiking should probably be conducted in a natural setting.
3. Help the client pick out their clothing according to their style and the environment you’ll be shooting in. For photographs of more than one client at a time, advise them to coordinate but not to match. Senior boys are particularly notorious for wearing simple t-shirts and pants, so encourage them to layer.
4. Ask the client to bring props that mean something to them. This makes the photos much more personal to the client and guarantees you more sales.
“It means a lot more to them when they bring a quilt that’s been around in the family for twenty years versus my quilt I’ve used on twenty families,” said Jensen. “When they’re responsible for bringing the rocking chair or the box… it’s definitely a lot more personal for them. I want to make their shoot feel as much like them as possible.”
5. Use pre-positions when you pose your clients to generate unique shots. For example: have him stand behind the railing, then peek between the bars, and then lean against the railing. It’s also important to show the client what you want them to do rather than simply give vocal commands. Mirroring the pose for the client will help them to feel more comfortable.

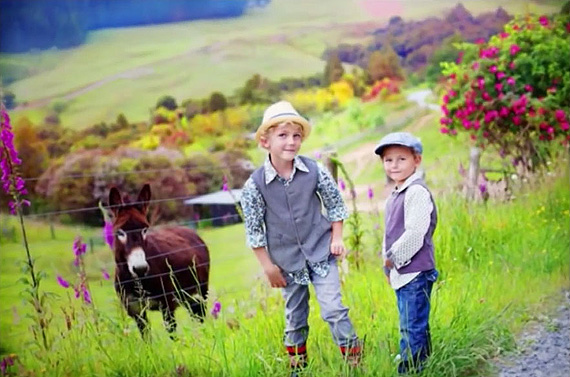
Jansen carefully orchestrated this photograph so that all of the colors worked together.
General Rules for Newborn Photography
Newborn photographs are usually taken within the first two weeks of a baby’s life. This is because the babies are still weak and sleep most of the time at that age. After two weeks, the babies gain strength and begin to fight poses and fuss.
1. Prepare and educate the parents about what to expect. Let them know that newborn sessions usually last 2-3 hours, that they will need to be very attentive during the shoot as assistants, that the room will be very hot, and that the mother might need to nurse the baby several times to keep the baby asleep.
2. Have a space heater and a bean bag.
3. Ensure that the room temperature is 85 degrees, which is womb temperature. This will help to keep the baby asleep longer.
4. Schedule the shoot in the morning. Babies like to stay up at night, so they’re usually sleepy in the morning.
5. Ask the parents to try to keep baby awake at least an hour before the shoot. This will guarantee that the baby will sleep for most or all of the shoot.
6. Ask the mother to feed the baby right before the shoot. This will make the baby sleepy.
7. Choose the best location. If it’s warm enough, you can shoot outside, but most prefer to shoot indoors in controlled conditions. Jansen prefers to shoot in her client’s homes to give the images a personal touch.
8. Be patient and take your time. It can take a full hour to get that perfect shot.
9. Hire an assistant or ask the parents to help. Sometimes the smell of the mother can keep a baby awake, so Jansen usually asks mothers to bring a family member or friend to help.
10. Practice your posing an ideas with a baby doll first. Newborns are fragile!
11. Details are imperative. Pay attention to your composition and every little finger.
“There are subtleties of newborn photography,” said Jansen. “The beauty is in the details and having all the fingers and toes be perfectly gentle and placed correctly.”
12. Offer a newborn package that includes birthing announcements. Families will want the announcements anyway, so this is convenient for them and ensures that you sell your work.
13. Use the four basic newborn poses. Jansen believes that there are four basic poses in newborn photography: chin up, lying on belly, on back, and fetal position.

Chin up

Lying on Belly

On Back

Fetal Position
14. Use the right equipment for your style. Jansen shoots with a Canon 5D Mark III and takes most of her newborn photos using a Canon 50mm f/1.4 lens with the aperture set at 1.8. She also sometimes uses a Canon 100mm f/2.8 macro for detail shots and a Canon 15mm f/2.8 fisheye for “fun” shots or for smaller spaces.
15. Capture three different types of images. Families want those classic soft images like closeups of their baby’s toes, but they also love fun whimsical images and photographs that depict the style of the family and the decor in their home. Jansen thinks of the third category as creating a new decoration for a family’s home.
General Rules for Baby Photography
There are fewer rules for baby photography, because babies 6 months to 2 years old are not as fragile as newborns.
1. Shoot in the family’s home or in a rural location where the baby won’t get hurt.
2. Get to know the parents first. It is important to establish trust when working with someone’s child.
3. Plan for 45 minutes. Babies’ attention spans aren’t the best.
4. Plan around nap time. Or the baby will likely have a meltdown. If the baby has a meltdown anyway, put them in a bubble bath. They love the water and you’ll be guaranteed 20 more minutes of shooting time.
5. Ask the parents to bring snacks and toys. Anything to keep the baby happy and attentive.
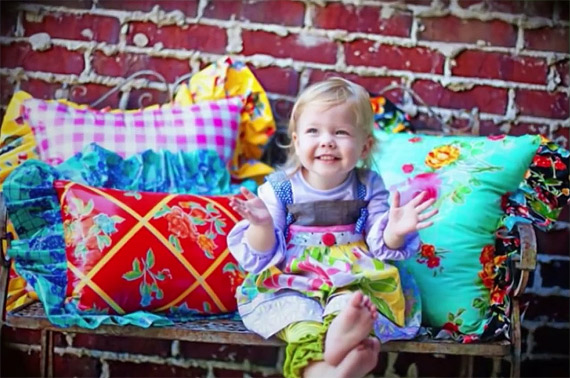
Jansen’s colorful compositions are widely recognized.
General Rules for Shooting Kids to Seniors
You have a lot of freedom when shooting portraits of older kids and seniors.
1. You can shoot anywhere. Some options are homes, parks, urban areas, or rural areas. There are advantages and disadvantages to each type of location, so keep them in mind as you select your location.
2. Carefully consider the time of day. Avoid the 11:00 am to 4:00 pm window if possible, but be prepared to succeed if you do have to shoot during that time.
“You should be able to literally make a shoot work at any time of the day,” said Jansen. “You have to make it work sometimes.”
3. Find “wide open shade” in urban areas. Jansen calls this the best lighting in the whole world. Moving a client to the very edge of that wide open shade will cause some of the light to be reflected onto the client’s face and, most notably, into their eyes.
4. Look for light, texture, patterns, color, and leading lines.
“Styling with the urban [shots] becomes a little bit more important because your spaces are more simple, so you want to tie in the clothing and the styling to what is surrounding,” said Jansen. “You train your eyes to see the patterns and lines this way to make the image.”
5. For every pose and angle, take a closeup shot, a full body shot, and a “halfway” shot. Variety is security!
6. Help your client dress for the photo shoot. Most importantly, encourage senior boys to layer.
7. Use posing to your compositional advantage.
“Automatically, people stand up straight when they’re in a picture. The more you can add dimension and angles to the image [through posing], the better.”
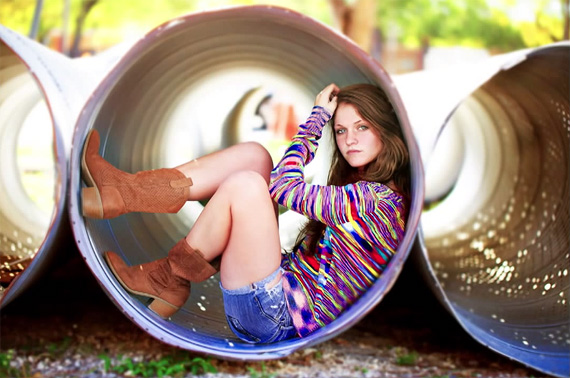
This photograph is an example of placing the client at the edge of “wide open shade.”
Market Yourself as much as your Photography
Clients are not simply looking to hire a photographer. They’re hiring a person, someone they’re comfortable letting into their lives and someone they want to hang out with for a few hours. With that in mind, Jansen believes that marketing your yourself—”owning your style”—is just as important as marketing your work.
“Let your client know you… it’s important to know your style, to represent your style, [and] to make your client feel and look like your work,” said Jansen. “And use social media. Everyone is going there… if you tag people on Facebook and their 900 friends see your images, it’s really an amazing tool to get your marketing out there.”
Like This Article?
Don't Miss The Next One!
Join over 100,000 photographers of all experience levels who receive our free photography tips and articles to stay current:


Leave a Reply