Back in the day, Ansel Adams created the zone system for seeing light, processing negatives, and darkroom developing to get really high contrast, beautiful prints. Since film and digital are so different, we don’t talk about the zone system so much anymore, but photographer Mark Wallace has come up with his own abbreviated version. Here’s how Wallace uses zones of light to convert color images into impactful, high contrast black and white prints in Lightroom 5:
Instead of using 12 stops of light, Wallace uses five zones—his own system is rooted in the zone system. He explains how the five zones of exposure—blacks, shadows, midtones, highlights, and whites—can be manipulated in Lightroom to create high contrast black and white images.
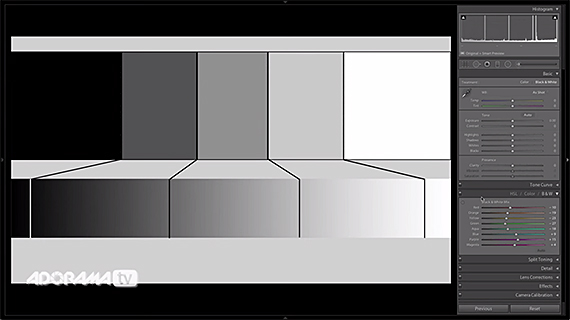
Wallace’s Five Zone System
Wallace edits three images in Lightroom to teach three important lessons: identifying where the different zones are; zone shifting; and color conversion shifting to see how color impacts black and white conversions.
There is a little trick that Lightroom has where you can get a visual cue that shows you where the absolute whites and absolute blacks are when you begin to edit your images. Click on the arrows in the top corners of the histogram to reveal the highlight clipping and shadow clipping. Anything that’s absolutely white will show up as red and anything absolutely black will show up as blue.
To begin, if you are editing a color image, first convert it to a black and white treatment.
The Lightroom Process
1. Adjust Midtones. You choose where the middle grey is by using your exposure slider to set your midtones.
2. Set Black and White Points. Bring blacks down and whites up to give your image a lot more contrast.

3. Adjust Shadows and Highlights. Bring shadows up and highlights down to bring the detail back that was lost when black and white points were increased.
4. Make Color Adjustments. When you convert a color image to black and white in Lightroom, by default the program determines color mix luminosities, but you can adjust these manually.

5. Fine Tuning. You can adjust contrast as you see fit, sharpen the image, or fix any imperfections you want.
While it’s not exactly Ansel Adams’s method, this abbreviated zone system can really make your black and white images shine.
Like This Article?
Don't Miss The Next One!
Join over 100,000 photographers of all experience levels who receive our free photography tips and articles to stay current:


Leave a Reply