Double Exposure Effect in Photoshop
Hello everybody and welcome to another tutorial by Layerform.com. Today we will be creating the infamous “double exposure” effect, as seen recently on many popular album covers, vinyl sleeves and poster / flyer designs, and now kinda easily generated by generative ai software. Its a short tutorial and achievable even if you only have a small amount of Photoshop Knowledge.
This double exposure photoshop tutorial will teach you some intricate techniques that you can apply to just about any of your digital ai creations, including vector masking and using the powerful, yet understated refine edge feature of Adobe Photoshop. (anyone asking for a GIMP version, you ain’t welcome round these parts ya hear?)
But what is a double exposure effect you ask? Well in Photography and Cinematography the Double Exposure Effect is created using images obtained through multiple exposures and combining them into a super creative image. This is obviously a modified version for Photoshop but gives you just as good of a result as if you would have shot this with your camera!
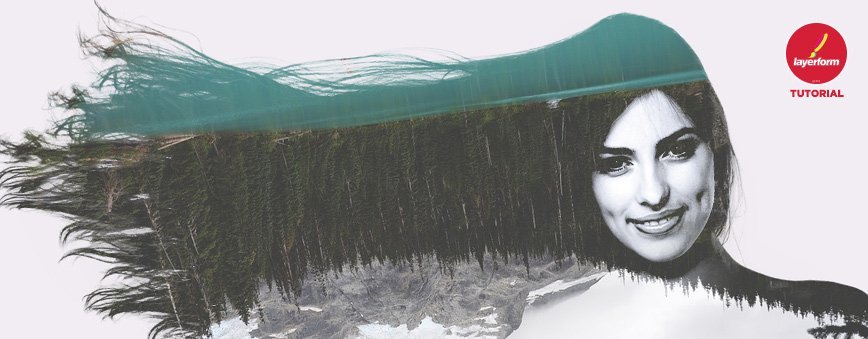
The Final Result:

Step 1: Prepare your Photo
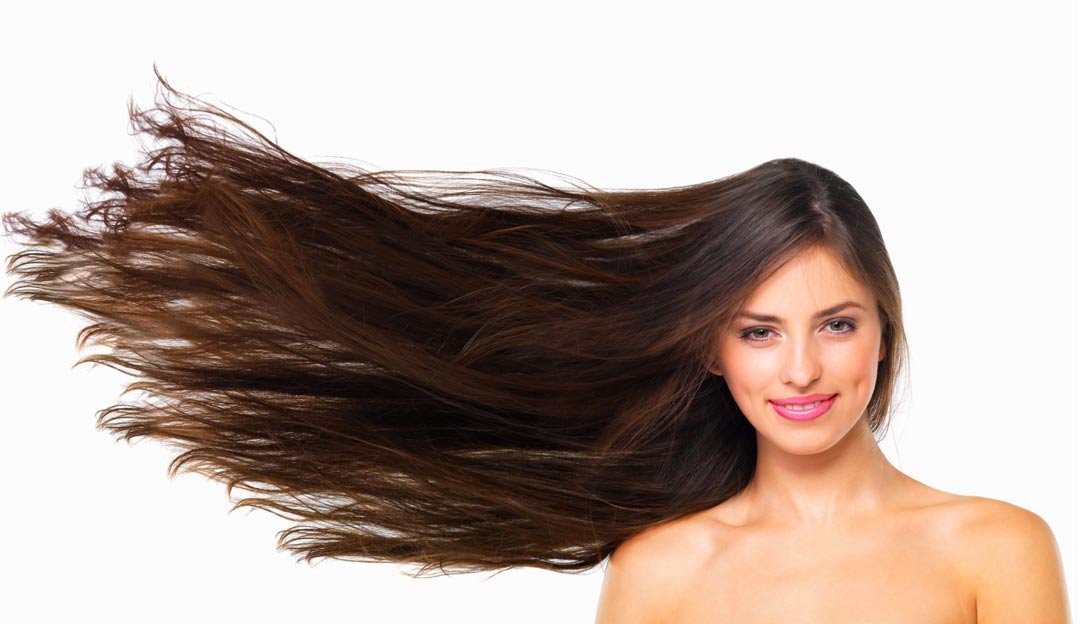
Here we go, the start of this double exposure tutorial! Woop woop! Open up your image, make sure it either has a neutral or white background. This image below is actually quite complicated to use due to the hair, but we will get to that part later in the tutorial! We got our photo from a free stock website Here, but any photo with a neutral colour background will do fine.
Step 2:
Press W and select the Magic Wand Tool, we want to select the white background behind our model, so with the magic wand tool click the white areas of your background (or whatever colour you background is) until you have your background selected! This may only take one click or could be multiple if you have a more complicated background. For this image it is a simple one click selection!

Step 3: Inverse the Selection & Refine Edge
With your background selected, go to Select > Inverse (or Ctrl/Cmd + Shift + I) to inverse your selection, this is so in the next step we can create a vector layer mask for our secondary image. Mastering the mask is really the key to achieving the best result from this double exposure tutorial.

With your selection now inverted, go to Select > Refine Edge. In the Edge Detection put in 1.5 and tick Smart Radius. Also, in the Output Settings select “New Layer with Layer Mask”. You should now see the image below:

The image needs some improvement before we can go any further, so in your Refine Edge Window start brushing around the edge of your image (especially if they have long and wavy hair like our subject) to make sure you don’t have any artefacts that will look bad. This is what you should try to achieve here:

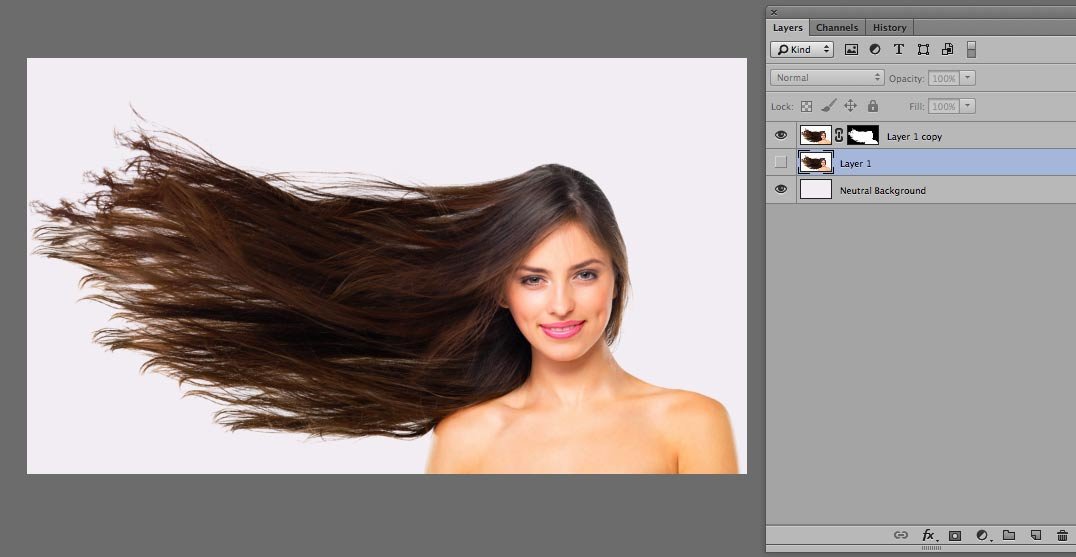
Once you have brushed round the edge of your image, press OK. You should now have your focus subject on a Layer with a Layer Mask Enabled.
Step 4: Fill Background
To achieve a nice effect we are going to fill the Background Layer with #F2EDF3, this is a nice off white pink colour and will go nicely with the subject image. You should now have something like the following:
Step 5:
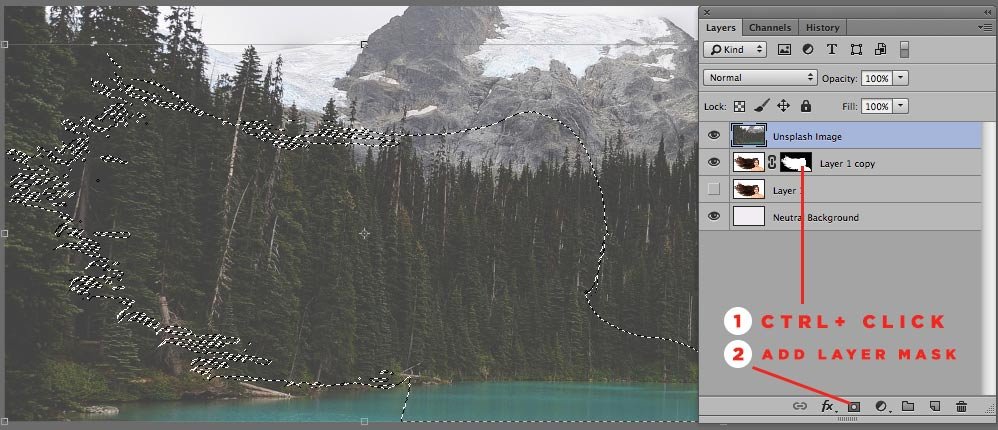
Select your secondary image, for this we have used an image from Unsplash: https://unsplash.com/photos/Qjd6-RuaVo0, drag it Above your Subject Image. From here, Ctrl/Cmd + Click on the Clipping Mask you made earlier, then with your new background still selected, press the Add Layer Mask button as seen in the image below:
You should now have the following image:

Step 6:
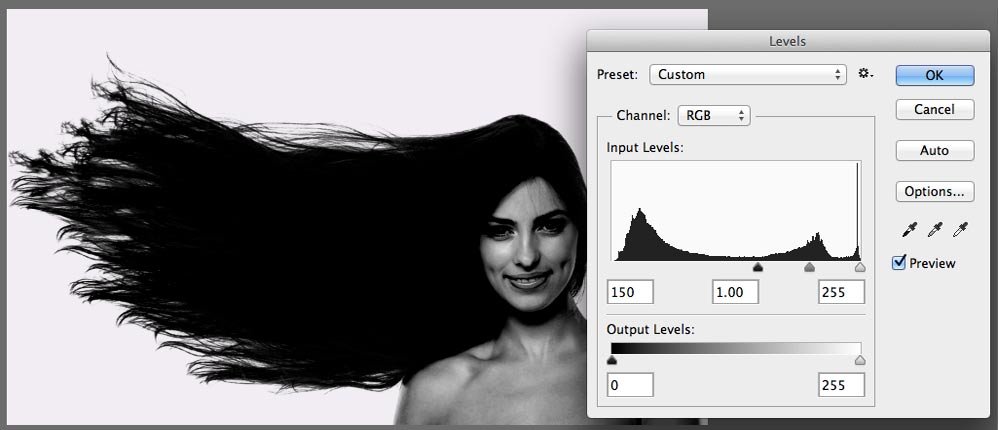
Hide the top layer for a moment by pressing the eye icon to the left of the layer, then press your model / subject layer. To give the layer more contrast we need to first Desaturate it by going to Image > Adjustments > Desaturate or Ctrl/Cmd + Shift + U.

From here Press Ctrl/Cmd + L to open the levels Panel and drag the black marker towards the right, or put 150 into the dialog box. The purpose of this is to add some more contrast to our image before we blend the two together!
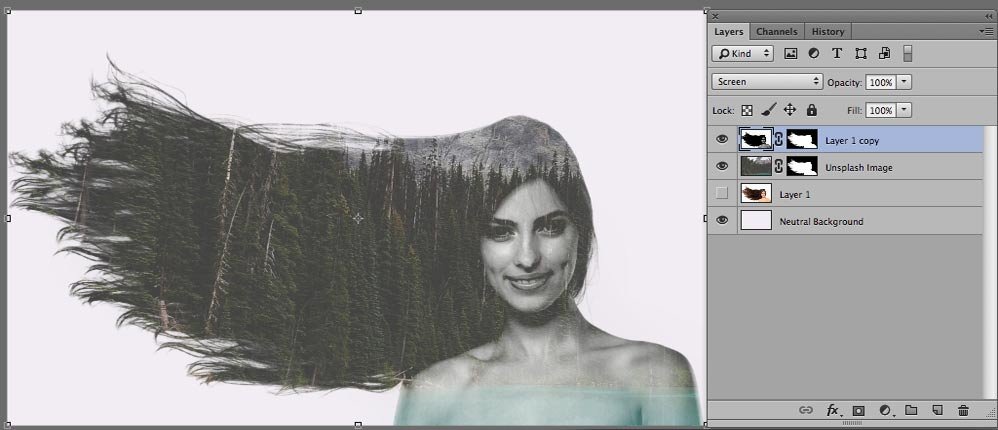
Step 7:
Now we have applied some contrast to our subject image, move it to the top of your layers (TIP: Ctrl/Cmd + Shift + ]) then set the Blending Mode to Screen. As you can tell from the image below we almost have our effect ready!
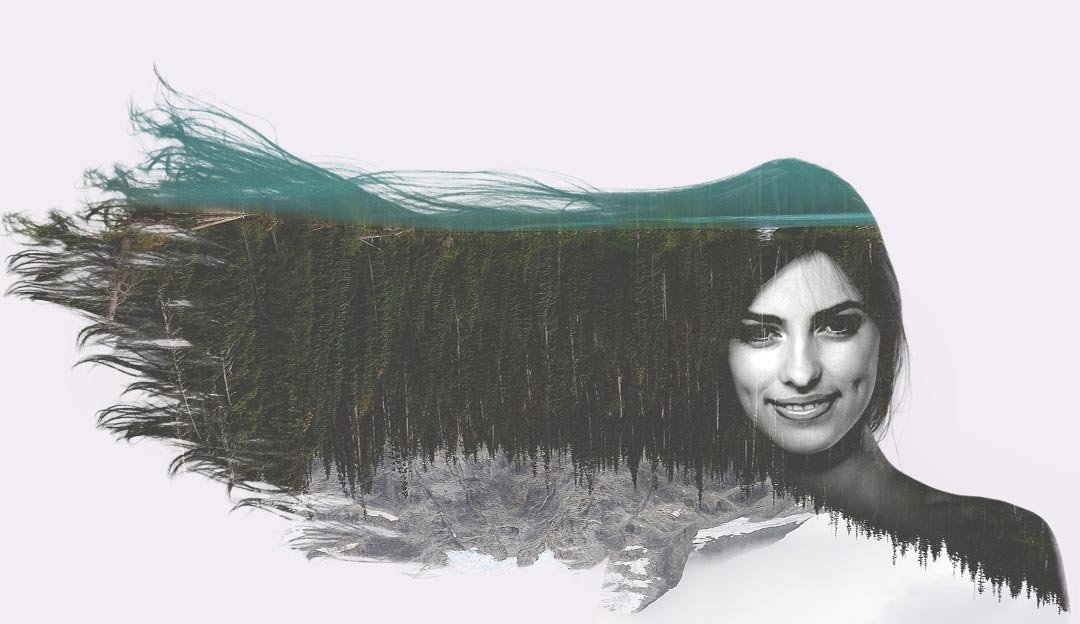
Step 8: Flip the Background Image & Increase Contrast
Ok, so as you can see we are almost there, but not quite. What you need to do next (if using the images we are using), is play around with your background image a little, we are going to flip it vertically. To move this within the mask and not mess up your composition you need to Unlink the Image from the Mask by pressing the Link Icon which sits inbetween. To flip the image vertically go to Edit > Transform > Flip Vertical and you should have the image below:

Step 9: Finishing touches
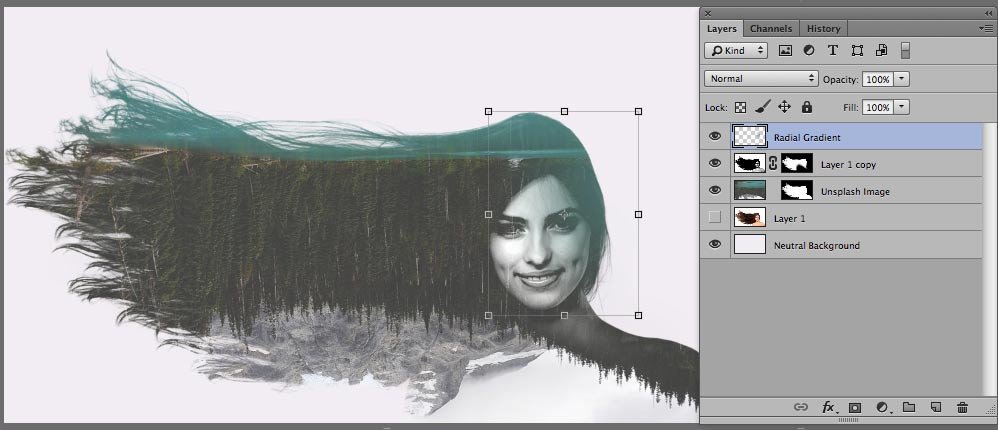
So we’re almost at the finish line, but there are a few finishing touches we need to add before we can say “FUCK YEAH!”. Firstly, we need to erase a certain amount of our subject by clicking the Vector Mask on that layer and using a soft Black Brush, and erase the bottom of her body and shoulder, leaving her face and neck flowing into the background image. Finally we need to increase the contrast on this image by clicking off the vector mask and onto the image then Pressing Ctrl/Cmd + L to increase the contrast slightly more.
We went one step further and colour picked the turquoise colour in the image #4a7975, and with the Vector Mask selected (by pressing Ctrl/Cmd + Click remember?) we used the Radial Gradient Tool to bring in some subtle colour over the subjects face!
FINISHED RESULT:

Voila! Here we have it, the finished result. We hope you had fun in this double exposure effect tutorial! We added some noise to the final result (Filter > Noise > Add Noise) and slightly sharpened it also (Filter > Sharpen > Sharpen). I hope you enjoyed this tutorial, It was fun to do, and hopefully you learnt something new, whether its how to use a vector mask, or how to use the refine edge tool to cut out complex hair! Please check back regularly for more tutorials or alternatively head back to the homepage to subscribe to the Layerform Email list! 🙂
FAQ
Can I do this effect on a drawing tablet?
You absolutely can, infact many of our subscribers have sent us amazing artwork that they have created from looking at this tutorial then using what they’ve learnt on a graphics tablet or standalone drawing tablet
Leave a Reply
You must be logged in to post a comment.