


Welcome
In this tutorial we will cover how to model grass in Cinema 4D using two different techniques. Method 1
Method 2:
Let's get started! Method 1 Using Matrix Extrude First off, create a new Plane object. Set the orientation to +Y. Next we need to figure out the size of the area we want to cover with grass. For this tutorial, I will use the default size, 400 by 400 meters with 40 by 40 segments. If you need to cover larger areas, please keep in mind you should keep the same segment / size ratio (1 segment for each 10m).  Next we need to make the object editable. Make sure you have the object selected and press "c" (right click > make editable). Now select all the polygons and head over to "structure > matrix extrude". A new window should now pop up in the bottom right corner. The values I will show you the values i have used and also show you what each value does, so you can change it to suit your own needs. The matrix extrude values are something to play around with yourself. Maybe you want to make the grass a little taller or maybe the wind is blowing from a different direction in your scene. :) Steps: 6 The number of times it is going to repeat the matrix extrude. Around 6 will do. Move Z-X-Y: 0-0-50 Change this value depending on which direction you want the grass leaves to bend. I will use the default, 0-0-50m. Scale Z-X-Y: 75-75-75 This will reduce (or increase if you choose a value above 100%) the size of the polygon with each step. For example, if your base polygon is 10m and the scale value is 50%, the size is going to be 5m in step 2, 2.5 in step 3 etc. Rotate Z-X-Y: 10-0-0 The rotation angle you want the leaves to bend. This should flow with the move value. continue on the next page... Variation: Initial The difference between initial and per step? Initial is only going to apply the variation once and is then going to move on with the default values, while per step will apply the variation on each step. Both will work for grass, but i prefer Initial because it's somewhat more predictable. Move, Scale and Rotate Min-Max: 50-100 Will take the previously defined values and add a random variation from the given range. The "variator" will pick a random value from a given range, 50-100% in this case. So if value one is 10, it is going to become anything between 5 to 10 in step two. Final Values  Click apply and a whole bunch of grass should now pop out of the ground. :) 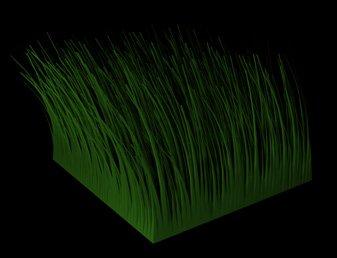 Remove the bottom polygons so it doesn't look like as if the grass is growing on a platform, rather than popping out at random places. Make sure "Use point tool" is selected. Select the bottom row of points and press delete.  Final Render (with hypernurbs) 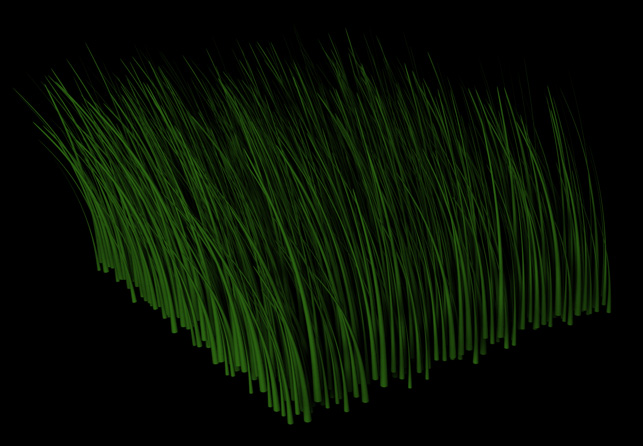 Continue on the next page, the low poly way to create grass. :) Method 2 Using Alpha Channels This method involves a little bit of Photoshop to create the alpha mask. If you do not have Photoshop you can download the image here.  File Download: Alpha Image File Download: Alpha ImageUsing Photoshop to create the alpha mask. Create a new document, 800 x 250 px. Set the background color to black. The blacks are going to be the transparent areas. If you have experience in Photoshop, it works exactly the same as a layer mask ;) Next, set both the fore and background colors to solid white. Select the default photoshop grass brushes and start brushing until you get something like this. 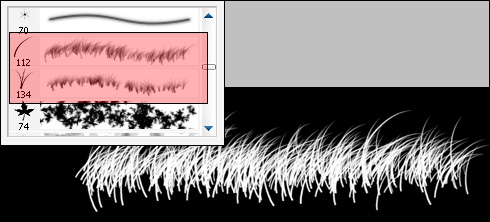 Save the image and get back to Cinema 4D  Finally fired up C4D? Alright, lets move on :) Create a new plane object. Flip the object 90 degrees in the Y direction. Set the height to 250m and the width to 1000m. Set both the height and width segments to 1. That's right. We only need one polygon!  Create a new material. Untick specular and turn on alpha in the basic tab. Click the alpha tab and choose the Alpha mask image we just created in Photoshop  Click the color tab and pick a grassy color. I used RGB 75,150,0 Apply the material to the object by dragging the material icon onto the object. Render your scene, you should now have something like this. 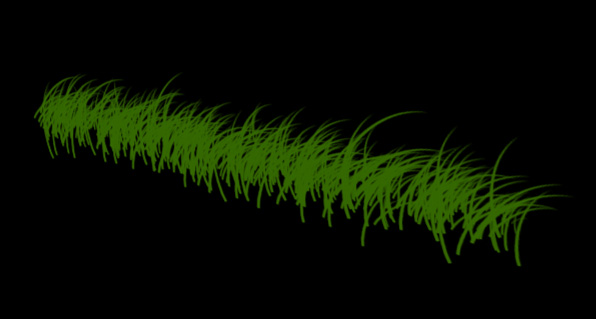 Final Renders 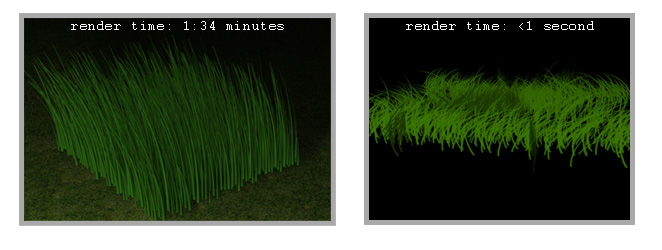 Conclusion Use the Matrix extrude method for still renders as it simply looks way better than the Alpha method. Use the alpha method for animations or games. You really don't want it to render 2 minutes for each frame at 30 frames per second. And that is without HDRI ;) That ends my tutorial, thanks for reading and I hope you've picked up something useful :) 
Dig this tutorial?
Thank the author by sending him a few P2L credits!


|


