Ok now we're gonna create a statistics icon.

This tutorial was created by Isa Hassen

_________________________________________________________
Let's get started.
1. Make a 3 new layers
2. Call layer1 "greenRec"
3. Call layer2 "redRec"
4. Call layer3 "blueRec"
Ok now put those three layers into a folder called "recs"
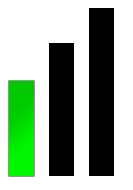
1. Now draw 3 rectangles; Put the biggest rectangle in blueRec and a smaller one in redRec and an even smaller one in greenRec. MAKE SURE U PUT THOSE RECTANGLES IN THE CORRECT LAYERS.
It should look like this:

1. Now add a 1 pixel grey stroke to all three rectangles.
Now goto the Blending Options for greenRec (by right clicking on layer and selecting "blending options").
1. Click gradient overlay
2. Make the angle of the gradient -52
3. Make gradient > dark green (09C800) to light green (27EB00)
Make sure darker color is on top and lighter color below. It should now look like this.

Do the same gradient to all three rectangles. Make sure darker color is on top and lighter color below.
Use these colors.
light red FF8888
dark FF0000

light blue 00C6FF
dark 02A1E4
Now it should look like this.

Okay now to the highlighting step.
1. Make a new layer above greenRec called greenRecHighlight
2. While that greenRecHighlight is selected, Ctrl + click on the greenRec layer

3. Goto Select > Modify > Contract. Then contract by 2 pixels

4. Now goto Edit > Fill. Fill with white.

5. Now on the greenRecHighlight layer click on the layer mask icon (lower part of layers pallet)
6. Now whip out your gradient tool and make sure it is black to white linear. Draw from the top of the document to the bottom or until it looks like this:

7. Do that highlighting process to all three rectangles until it looks like this:

Time to add a 3d effect.
Now click on the layer folder recs (the one with all the rectangles in it)
1. Click Edit > Transfom > Perspective
Now drag the layer folder until it looks like this.

Now just add some shadows until it loks like this!

Were done!


