Are you tired of your employees/coworkers playing solitaire all day long? Maybe you are just tired of playing the games yourself, or you need the disk space. This tutorial will show you how to uninstall the default games that come with windows.
For this tutorial I am using Windows XP Professional, but the steps should be very similar for other version of the Windows Operating System.
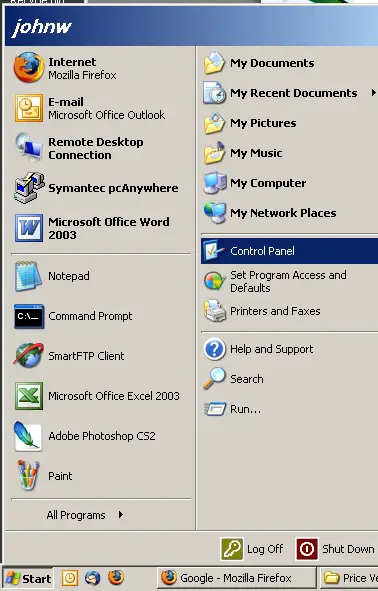
First we need to open the control panel. Go to Start > Control Panel
In the Control Panel double click the icon for “Add/Remove Programs”. (note: if you are in category view, you will need to click the link that says “switch to classic view” on the left menu.)

The Add/Remove Programs window will open. Click on the icon for “Add/Remove Windows Components”. This is located on the left sidebar menu.

Double Click on “Accessories and Utilities”.

Noticed that the “Games” option is checked.

Uncheck the box next to games.

Press ok and you will return to the Windows Components Wizard window. Press The Next button to remove the games. The progress bar will be displayed. When it is complete you will see this screen.

Click the finish button. You may be prompted to restart your computer. If you decide to restart now, the games will be gone when your computer comes back up. If you decide to restart later, the games will remain until you restart.

No more slacking off at work! Well, for all you slackers, you can check the box next to games to reinstall them.