As business owners, we face a plethora of challenges every day, but creating high-quality graphics shouldn’t be one of them. With Adobe Photoshop being the industry-standard software for digital imaging, it becomes essential to harness its powerful features to favor our business interests. Whether it’s creating stunning visuals for marketing campaigns or simply enhancing product photos for e-commerce, Photoshop’s versatile toolset allows us to take full control of the visual aspect of our branding.
We understand that diving into Photoshop can often seem intimidating due to its complex interface and multitude of functions. However, the right tutorials can demystify these complexities and equip us with practical skills to tackle real-world projects. As we explore these tutorials, we gradually build a foundation in maneuvering through the basics and later, seamlessly transition into more advanced editing techniques. By dedicating time to learning and practicing, we become capable of producing professional-grade designs that align with our business’s aesthetic and goals.
Key Takeaways
- Engaging with Photoshop tutorials enhances our ability to produce professional visuals for our businesses.
- Starting with foundational skills and progressing to advanced techniques can optimize our design workflow.
- Practical application of Photoshop skills leads to improved marketing materials and overall brand image.
Getting Started with Photoshop
Adobe Photoshop is a powerful tool for business owners looking to enhance their visual content. Whether you’re a beginner or have some experience, understanding the essentials of Photoshop is crucial for efficient workflow. Let’s explore the interface, learn the basic workflow, and see how workspace customization can set you up for success.
Exploring the Photoshop Interface
When you first open Adobe Photoshop, the interface may feel overwhelming. However, we’ll help you become familiar with its components. The Tools Panel on the left contains tools for editing images and creating artwork. The Options Bar at the top changes functions according to the tool you’ve selected. The Panels on the right, such as Layers, Adjustments, and History, are used to modify and track changes to your images.
- Tools Panel: Select, paint, retouch, measure.
- Options Bar: Customize tool behavior.
- Layers Panel: Organize and manage your creations.
Understanding Basic Photoshop Workflow
Our workflow in Photoshop revolves around layers and non-destructive editing. Begin by importing your image or creating a new project. Use layers to apply effects, text, or adjustments without altering the original image. This way, we can maintain the quality of our work and easily backtrack if necessary. Remember, saving your work in Photoshop’s native format (.PSD) retains your layers for future editing.
- Open or create a new project
- Work with layers to keep edits non-destructive
- Save in .PSD format for full editability
Setting Up for Success: Workspace Customization
Customizing your workspace in Photoshop allows for a more personalized and efficient experience. We can arrange the panels we frequently use and save our workspace layout for consistent use. To customize, simply drag panels to your desired location, stack them, or group them under different tabs. Once you’ve settled on an arrangement you like, save it by going to Window > Workspace > New Workspace.
- Drag to reposition panels
- Group related panels under tabs
- Save your setup via Window menu
By becoming familiar with Photoshop’s interface, mastering the essentials of our workflow, and personalizing our workspace, we lay a solid foundation for all our future Photoshop endeavors.
Mastering Fundamental Techniques
As we explore the core features of Photoshop, it’s essential for us to master fundamental techniques that will enhance our workflow and improve the quality of our projects.
Working with Layers and Selections
Understanding layers is crucial as they are the building blocks of any Photoshop project. They allow us to manipulate and adjust different parts of our image without affecting the rest. We’ll start by creating new layers and organising them effectively, ensuring we can work non-destructively. When it comes to selections, utilizing the right tools—like the Lasso, Quick Selection, and Magic Wand—is vital for editing specific areas of our image. We can refine our selections by adding feathering for smoother edges or by using the Quick Mask mode for precise adjustments.
Harnessing the Power of Color and Adjustments
Color is a powerful communicator in visual design. We must be adept at using the Color and Swatches panels to select and apply colors with precision. Adjustment layers provide flexibility in color correction and grading; they’re key for tasks like tweaking brightness, contrast, and saturation without permanently altering the original image. We can use Curves and Levels to make more intricate color and exposure adjustments, and these non-destructive layers can be revisited and modified at any point in our editing process.
Unlocking the Potential of Transformations
Finally, the ability to transform elements within our image—scaling, rotating, skewing, or warping—is fundamental for composition. The Transform tool is our go-to for these actions, granting us the ability to change the shape and size of our layers with precision. Whether we’re fine-tuning the details or overhauling the layout, mastering transformations enables us to craft our desired visual effect with confidence.
Advanced Editing and Retouching
Mastering advanced editing and retouching techniques is essential for us as business owners to ensure that our product images and marketing materials stand out with professionalism and aesthetic appeal. These skills can elevate the quality of our visual content and engage customers more effectively.
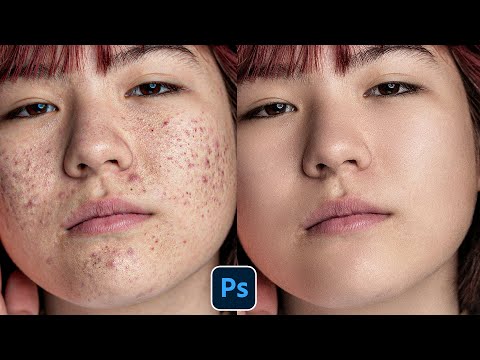
Sophisticated Retouching Skills
We often emphasize the importance of retouching skin to present subjects in their best light, especially in business portraits and product advertisements. To retouch skin effectively, we must:
- Use the Healing Brush and Clone Stamp tools to remove blemishes seamlessly.
- Employ frequency separation techniques to maintain natural skin texture while correcting tone and color discrepancies.
Creating Realistic Photo Manipulations
For our brands to truly capture attention, we’re capable of creating realistic photo manipulations that tell a compelling story. To do this, we:
- Combine multiple images into a single composition with attention to perspective and lighting.
- Apply color grading to unify elements from disparate sources, producing a cohesive final image that maintains realism.
Leveraging Brushes for Artistic Effects
Using the Brush tool in Photoshop, we have a versatile instrument for various artistic effects:
- Customize brush settings to create unique textures and details in our images.
- Employ brushes to add or refine shadows and highlights, enhancing the three-dimensionality of objects in our compositions.
By equipping ourselves with these advanced Photoshop skills, we ensure that our business’s visual content is of the highest quality, appealing to our target audience and setting us apart from the competition.
Practical Photoshop Projects

We understand that as business owners looking to leverage digital marketing, proficiency in design software, particularly Photoshop, is crucial. Here we’ll focus on key Photoshop projects that will significantly enhance your brand’s visual appeal.
Brand Design for Business Owners
The cornerstone of a business’s online identity is its brand design. We will guide you through creating a logo and developing a consistent color palette. A strong brand identity is vital, and mastering these skills in Photoshop places control in your hands.
- Essentials: Logo, Typography, Color Scheme
- Photoshop Tools: Layer Styles, Pen Tool, Color Swatches
Social Media Graphics Creation
Social media requires captivating graphics to cut through the noise. We’ll explore techniques for generating attention-grabbing posts and stories that resonate with your audience.
- Formats: Profile images, banners, posts
- Elements: Image quality, text overlay, branding
Designing Marketing Materials
From flyers to e-newsletters, marketing materials must be visually appealing and on-brand. Our tutorials emphasize the fundamental aspects such as layout, imagery, and call-to-action placement.
| Material Type | Key Focus |
|---|---|
| Flyers | Engaging Images, Clear Message |
| E-newsletters | Readability, Engaging Content |
| Business Cards | Contact Information, Branding |
By mastering these practical Photoshop projects, we equip ourselves with the ability to create compelling and professional visuals that effectively convey our brand message across all platforms.
Expanding Your Skillset
In today’s competitive business landscape, mastering advanced Photoshop capabilities can give us a distinct edge. Let’s explore specialized tutorials that help us harness the full power of Photoshop and its companions like Illustrator and After Effects.
Vector Art with Illustrator Integration
Creating vector art in Photoshop is a game-changer for graphical assets that need scalability. Adobe Illustrator, renowned for its precise vector capabilities, integrates seamlessly with Photoshop, allowing us to craft intricate designs. Specific tutorials can guide us through creating logos that maintain their crisp quality at any size, vital for branding in high-resolution mediums.
Animating with Photoshop and After Effects
Photoshop isn’t just for static images; we can breathe life into our designs through animation. After Effects is an Adobe tool specifically made for motion graphics, and its integration with Photoshop is robust. Tutorials focusing on this integration can show us how to animate our Photoshop designs, adding a dynamic layer to our presentations and social media content.
Exploring 3D Features in Photoshop CC
The introduction of 3D features has transformed Photoshop CC into a multifaceted tool that can produce high-quality three-dimensional imagery. Learning to manipulate text and graphics in 3D space opens up possibilities for product mock-ups and realistic visualizations. Well-structured tutorials can ease us into mastering these features, upgrading our visual storytelling potential.
Creative Effects and Techniques
In this section, we explore powerful techniques to enhance your business’s brand visuals through Photoshop. Our focus is on practical applications that will directly benefit your professional image.
Applying Text and Photo Effects
When you’re looking to grab attention with your marketing materials, text effects can play a crucial role. We can use drop shadows, glows, and 3D manipulations to make text pop off the page. As for photo effects, adjusting color balances and applying filters can transform a standard photo into a captivating image. Techniques like these are deftly explained in resources like Creative Photoshop, which delves into creating realistic painterly effects.
Innovative Illustrations and Digital Painting
Our digital canvas is limitless; with digital painting, we can bring illustrations to life in a way that connects with viewers. Leveraging brushes, texture overlays, and mastery of light and shadow, we create art that carries the essence of our brand. Works such as Art and Design in Photoshop show how achievable these effects can be with the right guidance.
Experimenting with Blending and Composite Techniques
The power of blending modes and composite techniques lies in their ability to merge various elements into a cohesive whole. By experimenting with different blending options, we can achieve a harmonious blend of images and textures, resulting in compelling visuals. This is particularly useful for creating promotional materials that tell a story or convey complex ideas at a glance.
Accelerating Your Workflow
In this section, we’ll explore key methods to significantly enhance our efficiency in Photoshop. By mastering keyboard shortcuts, utilizing actions and scripts, and leveraging smart objects, we can streamline our workflow and save valuable time.
Photoshop Keyboard Shortcuts You Must Know
Using keyboard shortcuts in Photoshop can drastically reduce the time it takes to perform common tasks. Here are some essential shortcuts we should all commit to memory:
- Ctrl/Cmd + Z: Undo last action
- Ctrl/Cmd + S: Save the current document
- Ctrl/Cmd + Shift + S: Save As
- Ctrl/Cmd + J: Duplicate the selected layer or selection
- Ctrl/Cmd + T: Free Transform
- Ctrl/Cmd + L: Levels dialog box
- Ctrl/Cmd + E: Merge selected layers
Remember, the more shortcuts we use, the more seamless our workflow becomes.
Efficiently Using Photoshop Actions and Scripts
Photoshop actions can automate repetitive tasks to make our workflow more efficient. For example, we can record an action that resizes a batch of images, then apply it to all future image sets with a few clicks. Additionally, scripts can take automation to the next level by performing tasks that are too complex for actions.
For advanced automation and to expedite our workflow even further, explore resources like The Photoshop CS2 Speed Clinic.
Streamlining Editing with Smart Objects
Smart objects provide flexibility by allowing us to work non-destructively. We can scale, rotate, and apply filters to these layers without losing original image quality. To further streamline our editing, we can apply adjustments to multiple layers by converting them into a single smart object.
Using smart objects, we not only preserve the quality of our assets but also maintain a cleaner, more manageable workspace which contributes to our overall workflow efficiency.

