
Illustrator Quick Banners
Step 1: Create a new Illustrator document 460 px wide by 230 px high.
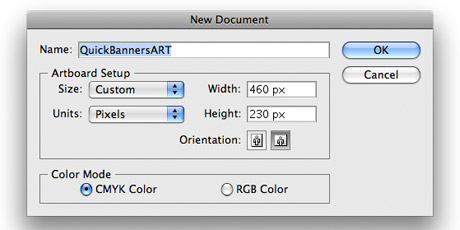
Step 1
Step 2: Create a new rectangle by selecting the Rectangle Tool (M) and clicking anywhere on the artboard. Set the width to 350 px and the height to 50 px in the Rectangle Tool dialog box.
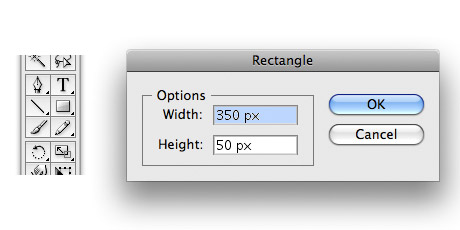
Step 2
Step 3: Set the fill color of your new rectangle to white and add a 2 pt black stroke with rounded corners. I’ll refer to this first large rectangle as the “body”.
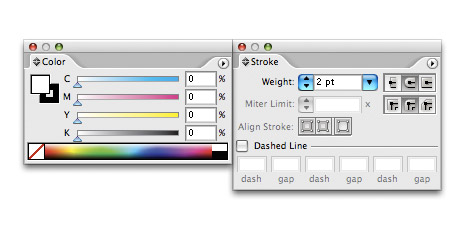
Step 3
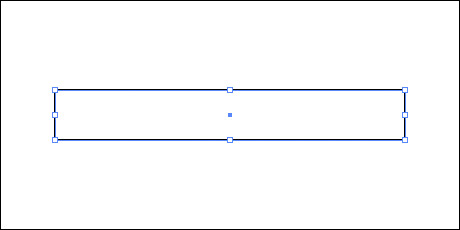
New Rectangle
Step 4: Cut off the Scale Strokes & Effects setting in the Transform Palette.
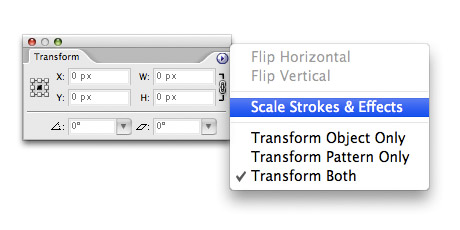
Step 4
Step 5: Select your new rectangle and copy it. Edit > Copy (Command + C). Paste two new rectangles in front of the first one. Edit > Paste in Front (Command + F) for the first (middle) copy. Edit > Paste in Front (Command + F) for the second (top) copy.
Step 6: Pull up the Transform Palette and set the transfer reference point to middle-left. Then remove the constrain width and height proportions link.
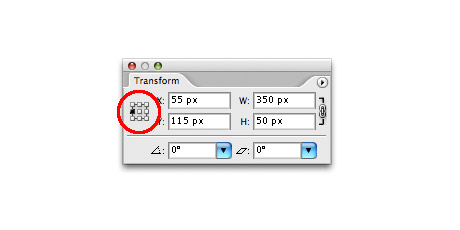
Step 6 - Set Transform Reference Point
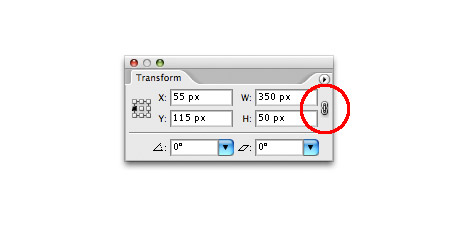
Step 6 - Constrain Width and Height Proportions Link
Step 7: Select the top rectangle and set its width to 80 px with the Transform Palette. I’ll refer to this rectangle as “left tail”.
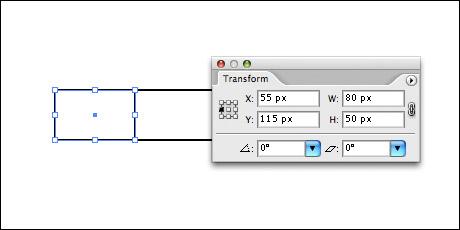
Step 7
Step 8: Select the middle rectangle, set the transform reference point to middle-right and set the width 80 px. I’ll refer to this rectangle as “right tail”.
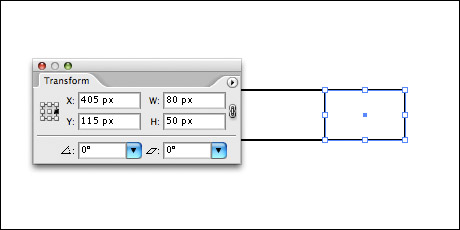
Step 8
Step 9: Select the left tail and move it 40 px to the left. Object > Transform > Move (Shift + Command + M).
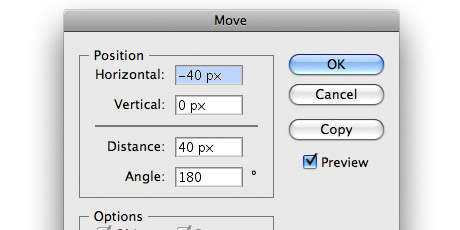
Step 9
Step 10: Select the right tail and move it 40 px to the right. Object > Transform > Move (Shift + Command + M).
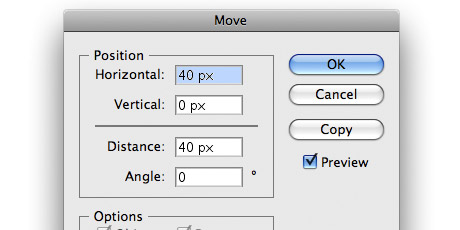
Step 10
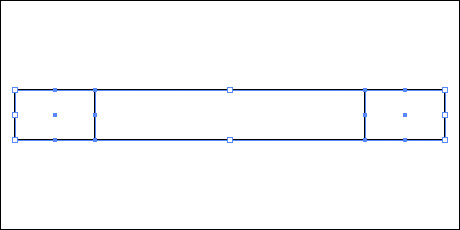
Both Tails Moved
Step 11: Select both tails by clicking the left tail, then holding down the shift key and clicking the right tail.
Step 12: Add extra points to both selected tails to create the end cuts of the banner. Object > Path > Add Anchor Points.
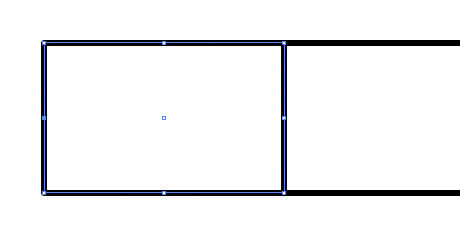
Step 12
Step 13: With the Direct Selection Tool (A), the white arrow in the toolbox, select the left-middle anchor point on the left tail.
Step 14: Move the selected anchor point 25 px to the right. Object > Transform > Move (Shift + Command + M).
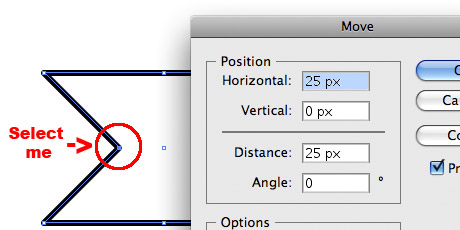
Step 14
Step 15: Now select the right-middle anchor point on the right tail and move it 25 px to the left.
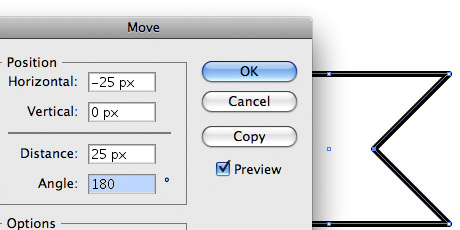
Step 15
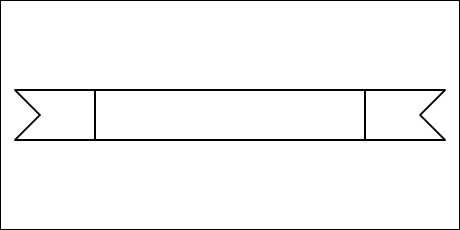
Fixed Ends
Step 16: Select the left tail and move it up 10 px.
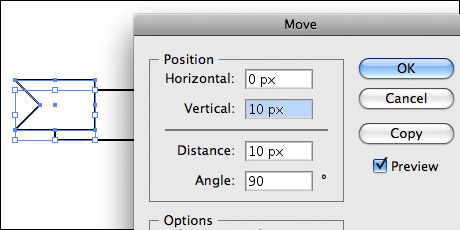
Step 16
Step 17: Select the right tail and move it down 10 px.
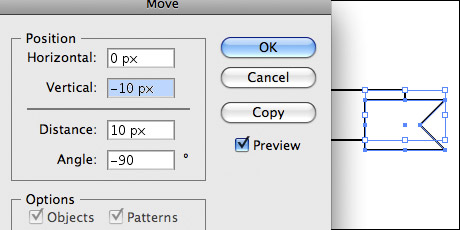
Step 17
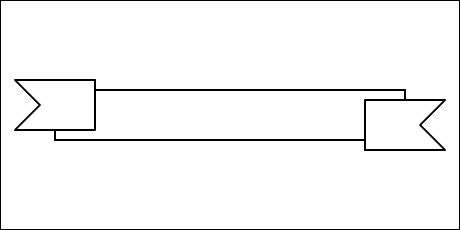
Offset Tails
Step 18: Select both tails and send them behind the body of the banner. Object > Arrange > Send to Back.
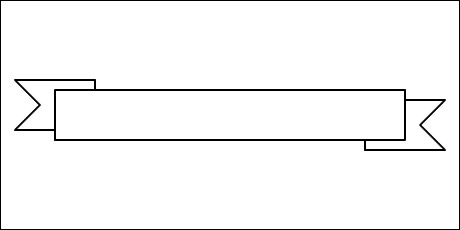
Step 18
Step 19: Zoom in really close on the left tail and with the Pen Tool (P) and draw the fold (triangle) that connects the body to the left tail. To make sure you hit each anchor point exactly, switch the view mode to Outline. View > Outline (Command + Y)
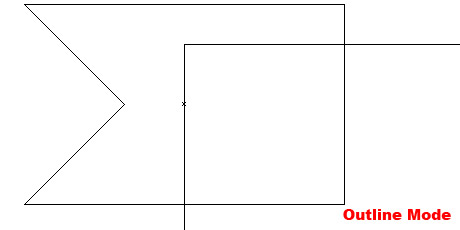
Step 19 - Outline Mode
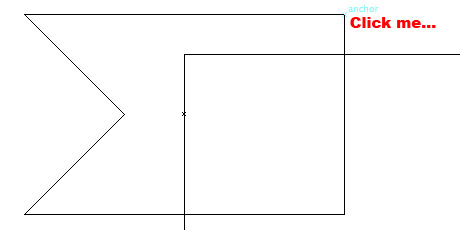
Step 19 - Click #1
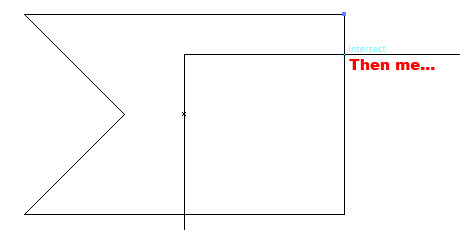
Step 19 - Click #2
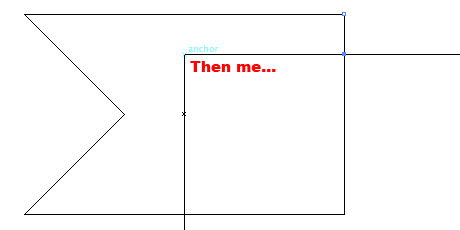
Step 19 - Click #3
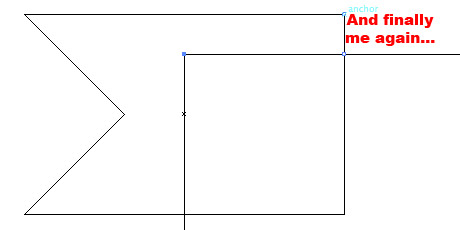
Step 19 - Click #4
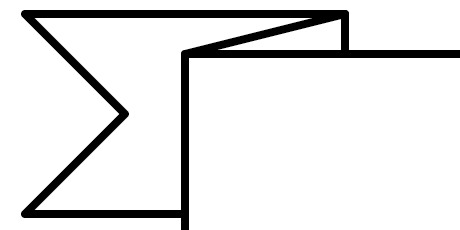
Step 19 - Preview Mode
Step 20: Now do the exact same thing on the right tail.
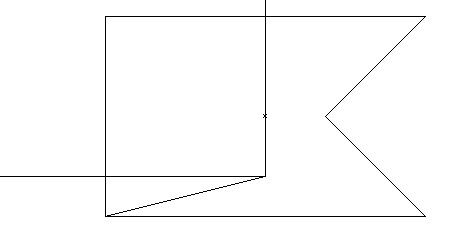
Step 20 - Outline Mode
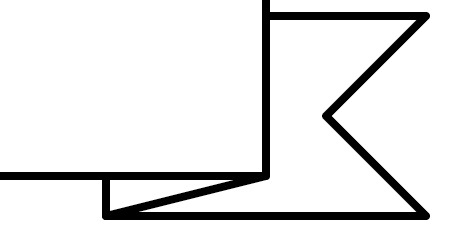
Step 20 - Preview Mode
Step 21: Switch back to Preview mode. View > Preview (Command + Y). Zoom back out so you can see the entire banner.
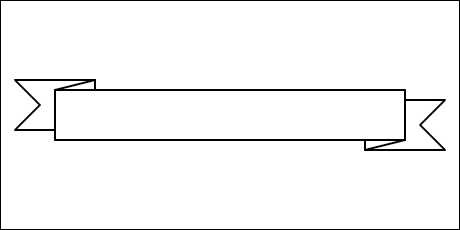
Step 21
Step 22: Select every piece of the banner and load up the Envelope Distort Tool. Object > Envelope Distort > Make with Warp. For this tutorial I used the default setting with the Flag style.
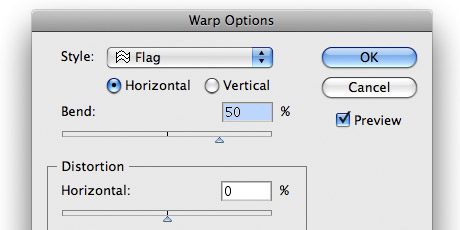
Step 22
Done… Download sample file(s).
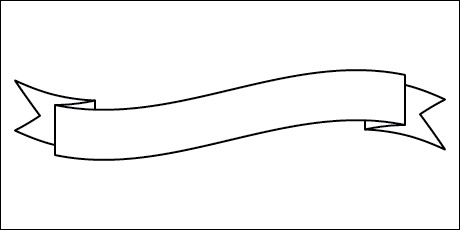
Final Result

Illustrator Quick Banners
Extra: Be sure to try some of the other envelope distort warp styles to achieve different looks. Also, make sure to add any text you may want in the banner before you apply the envelope distort.
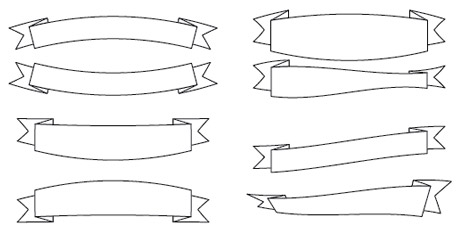
Alternative Looks
Nice tut! Thx!
As embarrassing as this may be I just have to say I have been using Adobe Illustrator since 1988 and still don’t use or even know about all of the features in the program. Thanks for posting this tutorial.
Thanks alot. This has been really helpful.
Excellent.
the way you explained the work with lines,arcs and anchor points has surpassed a million tutorialists..
wow! thanks…. very helpful especially the way you use the move tool..
THANK YOU for posting this tut! I am very new to graphic design but have a specific task involving creating a curved banner on my hands. You’ve made it a possibility for me to actually handle this project!
–Joy
Thanks for this. I usually lose my way half way through most tutorials due to poor descriptions/instructions, but you did a great job of explaining things in a clear and easy to follow manner!
super nice for banners victors
Nice!
I tried your steps in CorelDRAW instead, it’s even easier there. But CorelDRAW is faster than Illustrator for almost everything, and by now most people know that.
Smart way to use ‘Wrap’
just wanted to add a nice tip, save these banners as symbols (and then as a symbols library) for easy access in any document. You can then expand the symbol in another document to change colors and otherwise customize. 🙂 Just another shortcut when designing.
Good tip! That would probably help everyone (especially me) stay a little more organized.
Thank you very much! Very helpful!
Hello there. Thanks for the fabulous directions. I am working on an exhibit and need to create the title for it. The part that you didn’t go into is the part I need. How to make large 3-4 inch letters so that the guests can read the title of the exhibit.
If you have a minute, I would appreciated knowing how to make this title.
Thank you.
Margie, I’m not sure I understand you exactly but here is my answer to what I think you need.
Step 1: After you finish the tutorial and have your completed banner, simply measure your physical exhibit board/table/etc. to determine what size you need the banner to be. For illustrative purposes, let’s say it needs to be 16″ wide.
Step 2: Inside of Illustrator select the entire banner you created along with all text (Command + A).
Step 3: Bring up the Transform Palette and enter “16 in” in the width measurement value box. Make sure the constrain width and height proportions link is selected so your banner and text will scale proportionally.
Step 4: Finally, adjust your document size and print your banner.
I may be way off base with my answer, so let me know if this helped or not. GOOD LUCK!
I’m having trouble with creating the folds of the banner. When I complete the triangles, they don’t quite match up properly. The tips of the triangles extend further than the top of the bottom rectangle. Any ideas what I’m doing wrong?
I’m guessing that you forgot to round the corners on the strokes for your triangles. Make sure that your Stroke Palette settings for each triangle look exactly like mine in Step 3. If you select the two middle stroke corner buttons (Round Cap, Round Join) everything should line up. The default stroke settings for Illustrator are Butt Cap and Miter Join which makes for pointy corners on extreme angles. Let me know if this doesn’t work.
– Josh
Thanks – this is so cool!
hello super
Excelent!!! your explanation was great!!
Design for dummies… :>)
Easiest and most detailed instructions! Thank you!
Excellent tutorial!
How would I go about having the text line up with the banner? I tried to match the text by having the same properties using the envelope flag warp, but have had little success.
Any help would be appreciated.
Nevermind! Figured it out:
To anyone else who ran into this issue, just select the text with everything else and then use the envelope warp.
Glad you figured it out… but for future use, always try to design all elements that need to be distorted/warped fully and complete, and then apply the transformation to all object as a whole. It’s usually hard to get things to line up exactly if they are distorted individually. Thanks for visiting! – Josh