
Video Painting with Photoshop and Cinema4D
Though there are plenty of compositing and effects programs out there for the CG artist, the learning curve for most of them is steep. By contrast, a great many artists spend their time in Photoshop, which is used for everything from buttons on layouts to photomanipulation and they feel much more comfortable and familiar in that environment.
This article will leverage your prior knowledge of Photoshop to apply to a domain you likely haven’t explored yet: video painting. The term is slightly misleading, since you’re not going to be doing matte painting or compositing anything, but you will be doing something very close, which is using Photoshop as part of your production pipeline to achieve a particular effect.
The project used to demonstrate this technique is rather simple: a gray sphere will move from the left half of the frame to the right and vanish when crossing the middle. We’ll need to make sure it’s hidden once it crosses the middle line and add some effect that accompanies its disappearance.
The advantages of using Photoshop to do this are clear: no need to learn an effects application, less time spent rendering frames, and an ability to change the effect on a granular level. The disadvantages are also clear: it’s time-consuming, and the effect may not look consistent when assembled back into an animated sequence. The disadvantages dictate that this technique be used only for short sequences where domain-specific knowledge of effects applications is lacking.
This footage was generated from Cinema4D and output as a series of BMP files (something you’ll want to do when doing frame-by-frame video painting). Here’s what the C4D setup looks like:
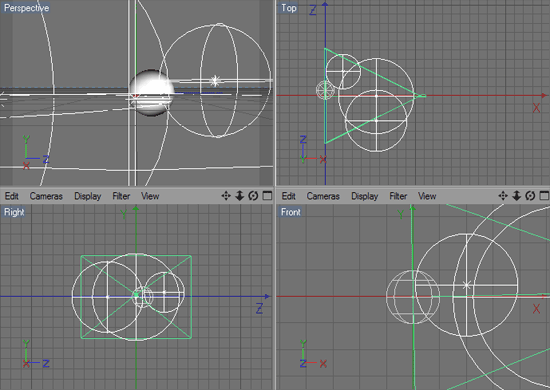 The footage is sized 320×240 at 24 fps, is entirely CG, and likely won’t need to use alpha channels. Therefore, this should be fairly straightforward and easy. Other times you might find yourself needing to use this technique may have you working with much larger, entirely live footage in need of an alpha channel, in which case the process will be complex and somewhat challenging.
 This is the part that requires the most Photoshop knowledge. You’ll have to figure out all the parts of the shot and how you’re going to work with them. Our project here is simple, but it still requires some forward planning.
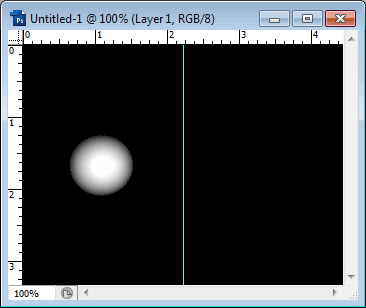
First, since the sphere vanishes exactly in the middle, we must establish where the middle is. You can do this by setting a guide (press Ctrl+R and drag the left ruler in the middle of the image until it snaps in the middle), as shown here.
This is the part that requires the most Photoshop knowledge. You’ll have to figure out all the parts of the shot and how you’re going to work with them. Our project here is simple, but it still requires some forward planning.
First, since the sphere vanishes exactly in the middle, we must establish where the middle is. You can do this by setting a guide (press Ctrl+R and drag the left ruler in the middle of the image until it snaps in the middle), as shown here.
 I used the Line Tool to make the line, applied an Outer Glow layer style (set to Linear Light blend mode), and set the layer blend mode as Hard Light. Feel free to experiment with the settings to accomplish different effects.
 Complete the effect for all the pertinent frames. You can do this by dragging each frame to the appropriate layer and resizing the line. Remember to save them in a lossless format such as BMP or TGA and make sure they follow the naming convention of the original footage.
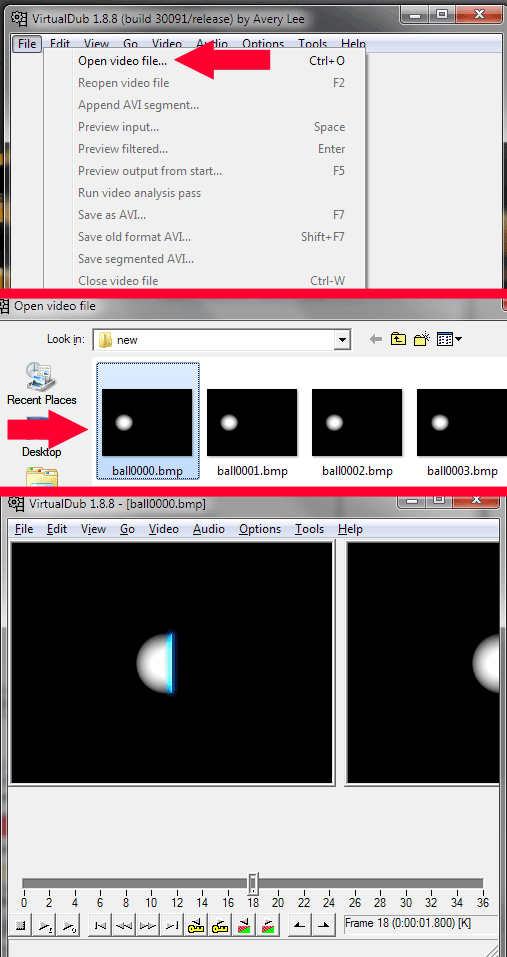 Open the frames in VirtualDub or a tool with similar functionality and save them as a video. Depending on the sequence you’re working on, you might have to adjust frame rates, interlacing, or other effects. Given the simplicity of this shot, all we have to worry about is the frame rate, which is set to 18 fps.
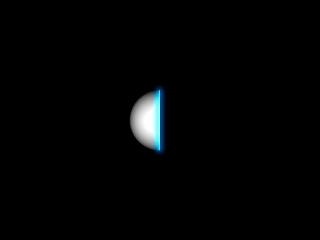
Here’s what the shot looks like after applying the effects:
Open the frames in VirtualDub or a tool with similar functionality and save them as a video. Depending on the sequence you’re working on, you might have to adjust frame rates, interlacing, or other effects. Given the simplicity of this shot, all we have to worry about is the frame rate, which is set to 18 fps.
Here’s what the shot looks like after applying the effects:
Here’s a ZIP file with the PSD of the sequence setup and the original frames, so you can recreate the effect by yourself. The techniques used in this article are just the tip of the iceberg. Try rotating the line or coloring the sphere; the possibilities are endless. Enjoy!

Step 1: What Are You Dealing With?
You should know the resolution and frame rate of your footage, whether or not you’ll be working with CG or live action, and whether or not you’ll need to use alpha channels. All of these things are crucial in determining how long it takes to work on a sequence and what tools you’ll need to use. Here’s the original gray sphere footage:Step 2: Setting Up the Sequence
Guides and Points of Interest
Static Elements
Static elements are things that don’t move in a shot. This can be a background picture or a foreground element. In our case, it’s 50% of the shot covered in black. Making this happen is very simple: make a new layer, select the right side of the shot, and color it black.Dynamic Elements
Apart from the sphere, we’ll also have a thin line in the middle that glows blue. This line is supposed to represent the reaction of the sphere vanishing (like lava making contact with a rock). Since the sphere does not have a uniform height across its length, this line will have to increase in height, and is therefore dynamic. The blue glow will be accomplished with layer styles. A good test of a dynamic element is testing it at the extremes of its visible movement. For our line, we’ll have to test it at its largest (when it intersects the sphere’s middle) and at its smallest (when it intersects the very tips of the sphere).Step 3: Make It Happen
First, we’ve got to find an appropriate starting point, which will be the sphere exactly halfway across the screen. Here’s a picture of the effect at that point:Step 4: Finish Your Work
Author: admin
Howdie stranger!
If you want to participate in our photoshop and photography contests, just:
LOGIN HERE or REGISTER FOR FREE
- says:
-
says:
nice tutorial, thanks a lot..
( 2 years and 4488 days ago )
Pxleyes
Photography and photoshop contests
We are a community of people with
a passion for photography, graphics and art in general.
Every day new photoshop
and photography contests are posted to compete in. We also have one weekly drawing contest
and one weekly 3D contest!
Participation is 100% free!
Just
register and get
started!
Good luck!
Follow us:


© 2015 Pxleyes.com. All rights reserved.
[…] Read the original article […]
( 2 years and 4488 days ago )