Sleek Car Stereo Interface

This tutorial will teach you how to use Illustrator and Photoshop to create a sleek car stereo interface that can be adapted to many different uses.
This tutorial assumes that you know how to use the basic tools within Illustrator including creating shapes, changing fill and stroke colors, expanding strokes, and adding and subtracting shapes from each other.
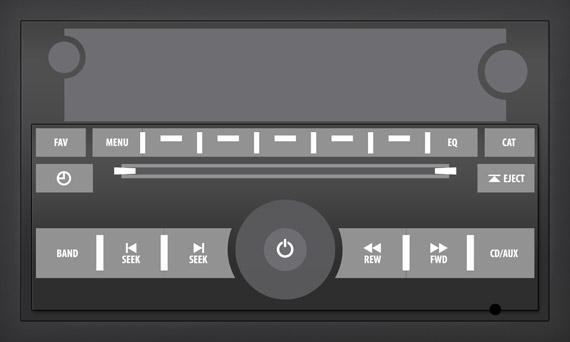
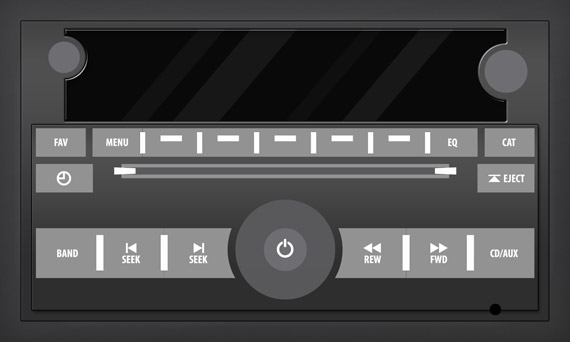
What You Will Be Making
First, we'll create the main shapes for our interface in Illustrator, then use Layer Styles within Photoshop to create depth and texture.
Step 1
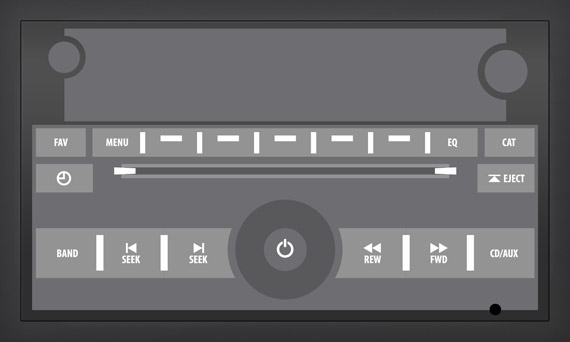
Create a new Illustrator document that is 9.25" wide and 5.25" tall and draw the basic shapes of the elements for you interface.
Use different shades of gray so you can easily see the separate pieces.
It helps to have a reference photo to build from. I used a picture of the stereo in a Chevy Silverado.

Step 2
Add some details like separators between the buttons and the two small trapezoid shapes that will become lights.
Duplicate some of the circles and increase their size, then subtract them from their surrounding shapes to create rounded edges on some of the buttons and the piece at the top that will become the LED display.

Step 3
Create text and symbols for the each button. Expand the text and symbols and group them together.
Don't forgot to create a small ring shape in the bottom right corner that will become the auxiliary input jack.
Step 4
You will want to make each button a separate shape. Divide any large blocks into single shapes and boolean subtract the separators from them. We will need them to be cut out in the proper shape for when we add layer styles to them to make them look more 3D.
Your button shapes should look similar to the ones below.

Step 5
The wireframe shot below should help you see the outlines of all of the shapes.
Step 6
Select all the shapes in your document and change their transparency to 99%. For some reason, when you export from Illustrator to a PSD, it will sometimes merge shapes with transparency values of 100%, which we don't want to happen.
Click File > Export and choose to save it as a .PSD file.
In the Photoshop export settings dialog, select settings similar to the ones below.
The reason for exporting at 150dpi is so we can work on the file at a higher resolution in case we want to save a larger copy in the end.
Step 7
We'll now move out of Illustrator and into Photoshop.
Open the file you exported from Illustrator in Photoshop.
You can either change the transparency of every layer to 100% now, or you can adjust them one at a time as you go along. It's a little tedious, but it must be done.
Increase the canvas size to 1500 x 900 pixels by pressing CTRL + ALT + C.
Create a new layer and move it beneath all of the other layers, this will be the background.
Fill the background layer with the color #3F3F40 and apply the following settings to the layer blending options.
Step 8
Select the layer for the main faceplate and apply the following blending options.


Step 9
Apply the same blending options to the smaller faceplate. You can copy and paste layer styles by right clicking the layer in the Layers palette and selecting Copy Layer Style and Paste Layer Style.
Also add a drop shadow within the layer blending options using the settings below.
Step 10
Next we'll create the clear plastic that covers the display.
Select the large shape at the top and apply the following blending options settings.

Step 11
Next we'll make the large buttons.
Select the layer for the Band button and apply the following blending options settings.


It's important to make sure the layer order of the buttons is correct. The far right button should be above all of the rest in the layers palette and the far left button should be at the bottom.
This ensures that the highlights on the edge of each button show up properly.
Step 12
Apply the same settings to the smaller buttons except use the following blending options settings for the inner glow, again, making sure the layer order of the buttons is top to bottom from right to left.
Step 13
Copy and paste the same blending options settings from the small faceplate to the outer plate of the CD slot.
Apply the follow blending options settings to the darker inner portion of the CD player slot.

Step 14
To create the glowing effect around the CD player lights, we'll need to have two copies of each light.
Duplicate the lights by right clicking their layers in the Layers palette and selecting Duplicate Layer.
Apply the following blending options settings to the bottom layers.
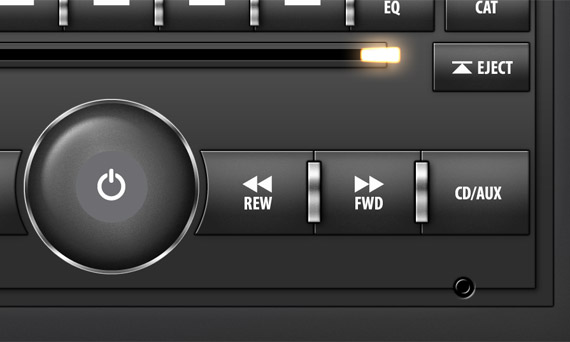
Step 15
Apply the following blending options settings to the top layer for each light.
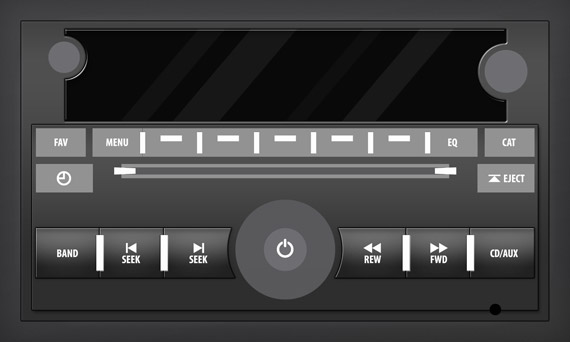
Your image should now look similar to the one below.

Step 16
Next we'll style the large button separators. Make sure the separator layers are above the button layers and apply the following blending options settings.
Copy and paste the same settings to the small button separators and adjust the following blending options to match the settings below.
Step 17
We want to make sure the color of all the knobs is correct. First, select the biggest knob and give it a Color Overlay using the color #3B3B3B within the layer blending options. Right click the layer and select Convert to Smart Object.
Repeat the process with the other two knobs so they are all the same color.
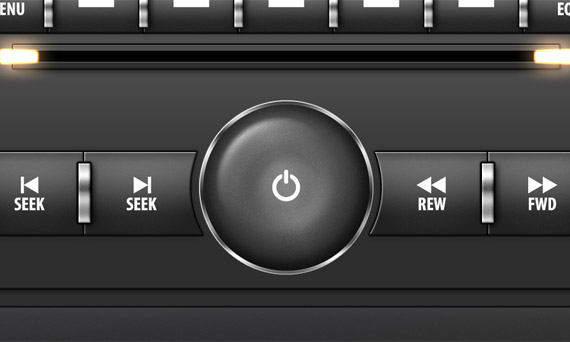
Now select the biggest knob and apply the following settings to the blending options to give it a plastic-like feel with a chrome finish.

Step 18
Apply the following blending options settings to the smallest knob.

Step 19
Copy and paste the settings from the small knob to the medium knob. With the layer effects list expanded in the Layers palette, right click on the effects of the medium knob and select Scale Effects.
Scale the effects to 150% percent and hit OK. You will also have to reduce the size of the Outer Glow to 4px.
All three knobs should now look similar.
Step 20
Select the input jack hole and apply the following blending options settings.
Step 21
Select the input jack ring and apply the following blending options settings.
Step 22
Select the smaller circle that is within the biggest knob and apply the following blending options settings. This will make it look like there is an indentation on the big knob where the power symbol is.
Step 23
The last thing left to do is add some more dramatic shadows to give our interface more depth.
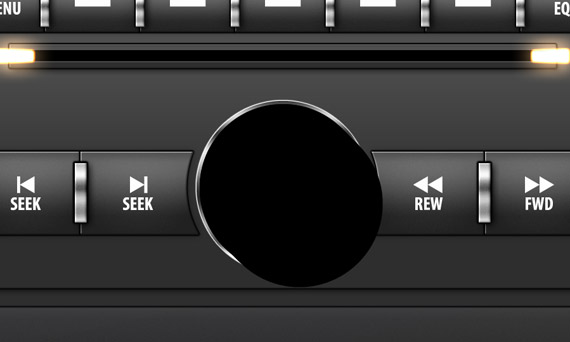
Select the big knob shape, duplicate the layer, then clear the layer effects. Give it a color overlay of black in the blending options settings then right click the layer and select Convert to Smart Object. You will now have a plain black circle as a smart object.
Hold down the ALT key and press the down and right arrow simultaneously. This will create a copy of the black circle layer that is 1 pixel down and 1 pixel to the right of the original.
Do this about 10-15 more times. Select all the layers that you just created, right click them in the Layers palette, and select Convert to Smart Object. Press CTRL + SHIFT + ] to move the shape to the very top layer to make it easier to see while we work on it.
You should now have a single black shape like the one below.
Step 24
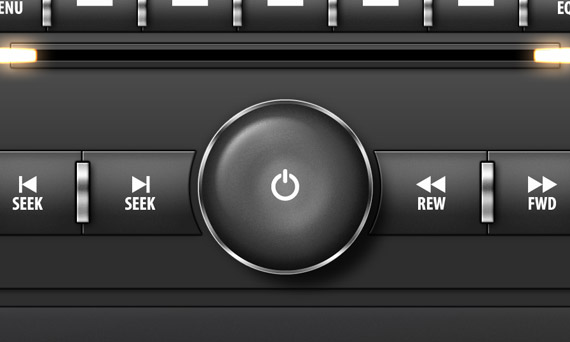
Click Filter > Blur > Gaussian Blur with a radius of about 10 pixels. Change the layer blending mode to Linear Burn and Opacity to 75%.
Move the shadow layer under the knob layer.
You may need to shuffle the order of some of the layers around to get the shadow to display under the knob, but on top of the other buttons.
Step 25
Repeat steps 23 and 24 for the other knobs. The longer the shadows you create, the more the knobs will appear to stick out.
Step 26
You will also want to create shadows for the large and small buttons using the technique above.
Remember, you can select all of the buttons, duplicate them, and clear their layer effects all at the same time.
After you have duplicated and cleared the effects of all the buttons, it is easiest to merge the layers into one shadow layer to work from.
Repeat the previous steps to create shadows for the buttons.
The buttons shouldn't stick out as much as the knobs, so you should only create 5-7 copies of the shadow layer rather than the 10-15 you did in step 23.
Step 27
Select the white text and symbols and apply the following blending options settings. It is barely noticeable, but adds some texture to the overall design.
Step 28
Using the font Gas Plasma PG, type some text at about 75pt in size and place it on the display.
Apply the following blending options settings to give it a slight orange glow to match the CD player lights.
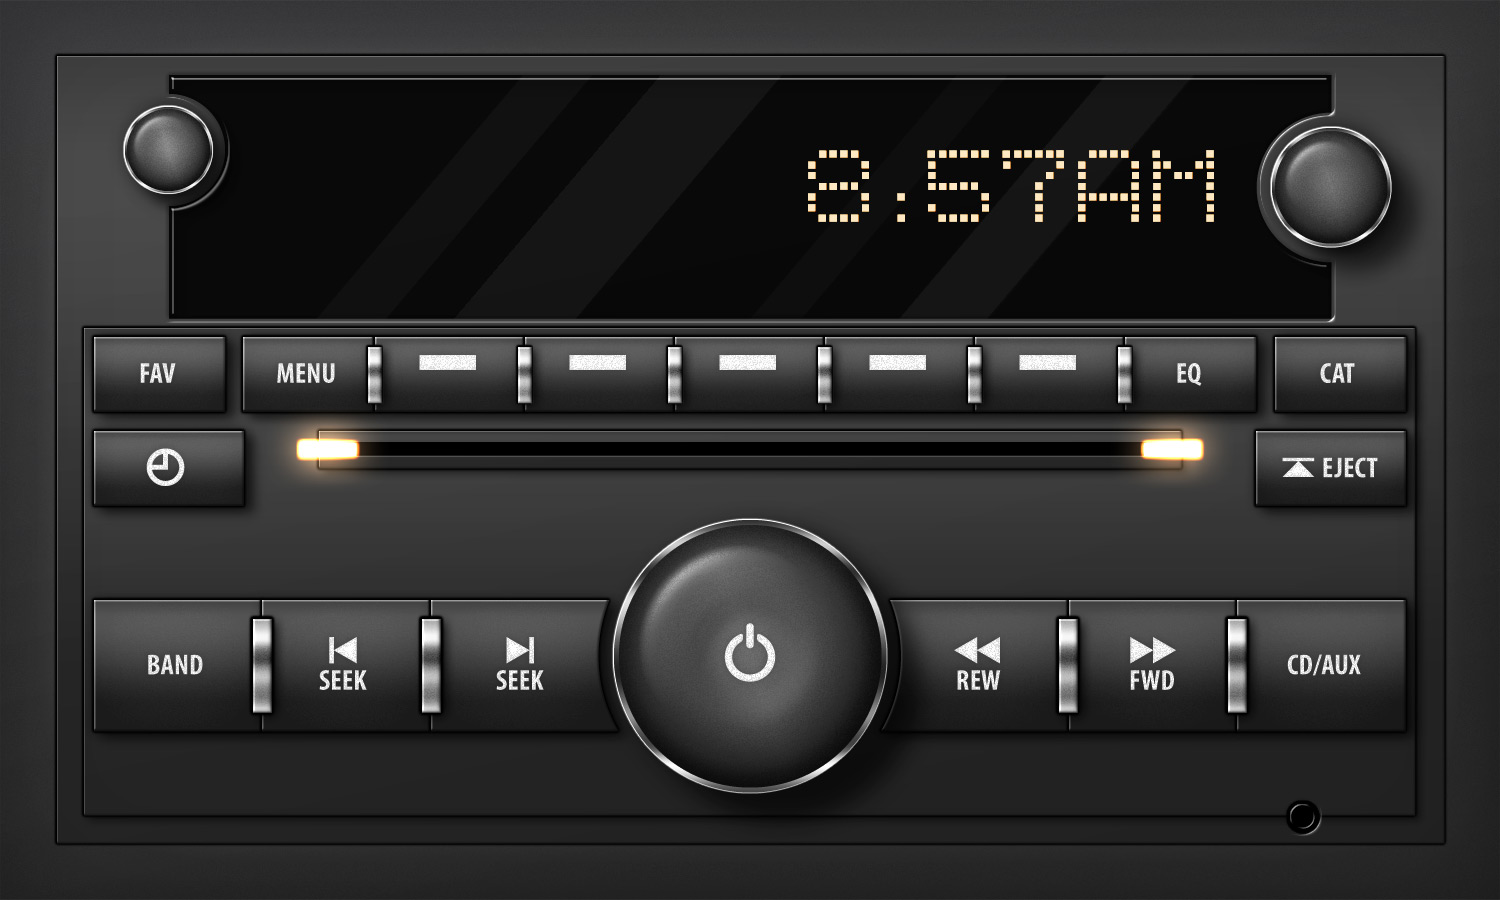
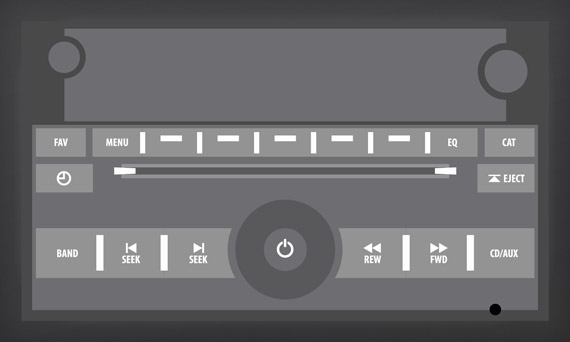
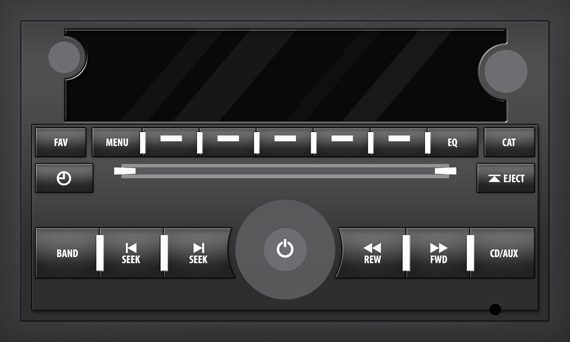
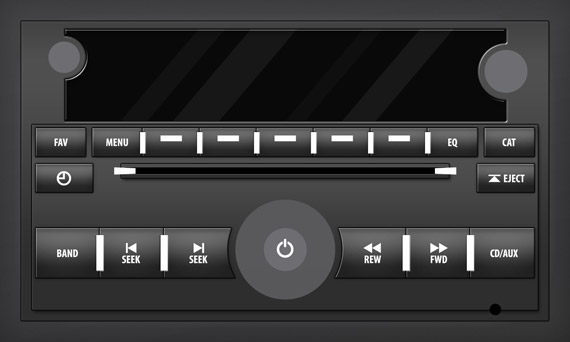
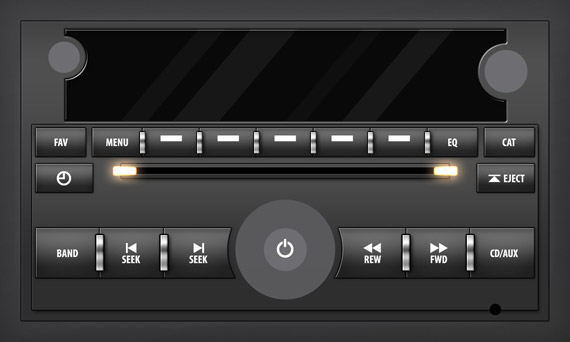
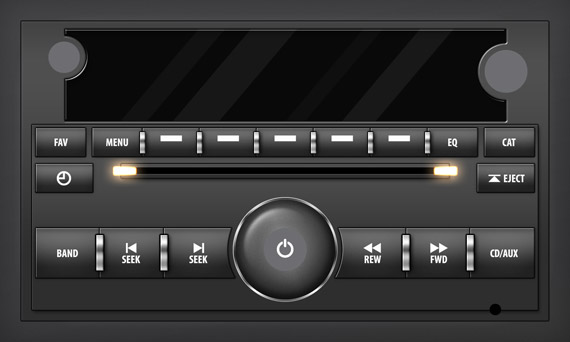
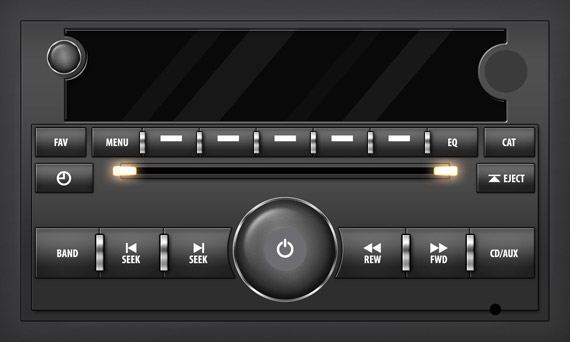
Final Image
You're done! It can be a long process if you aren't familiar with using layer styles but you now have a design that is fully editable with elements that can by easily copied and pasted into other designs.
Post your questions and results in the comments below and don't forget to share this tutorial!
Related Items
Grab a PanoPass now and get instant access to all these items and much more.
