The steps to add an image in the background of the text are:-
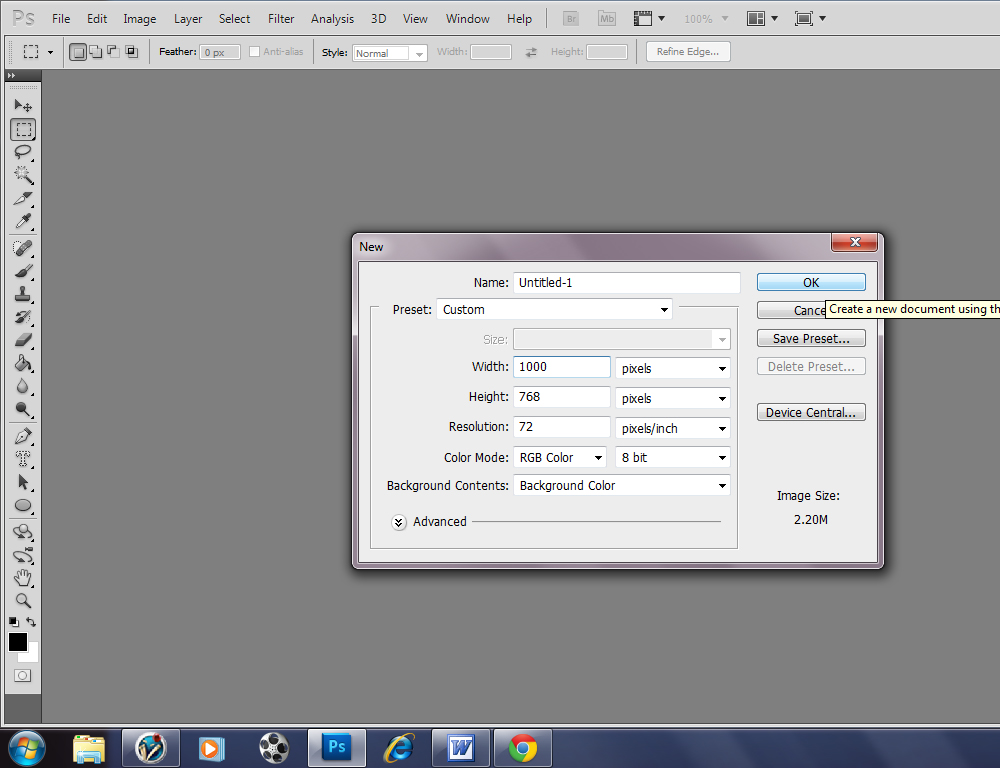
1. Start PS CS5 and choose the following dimension for the new file:-
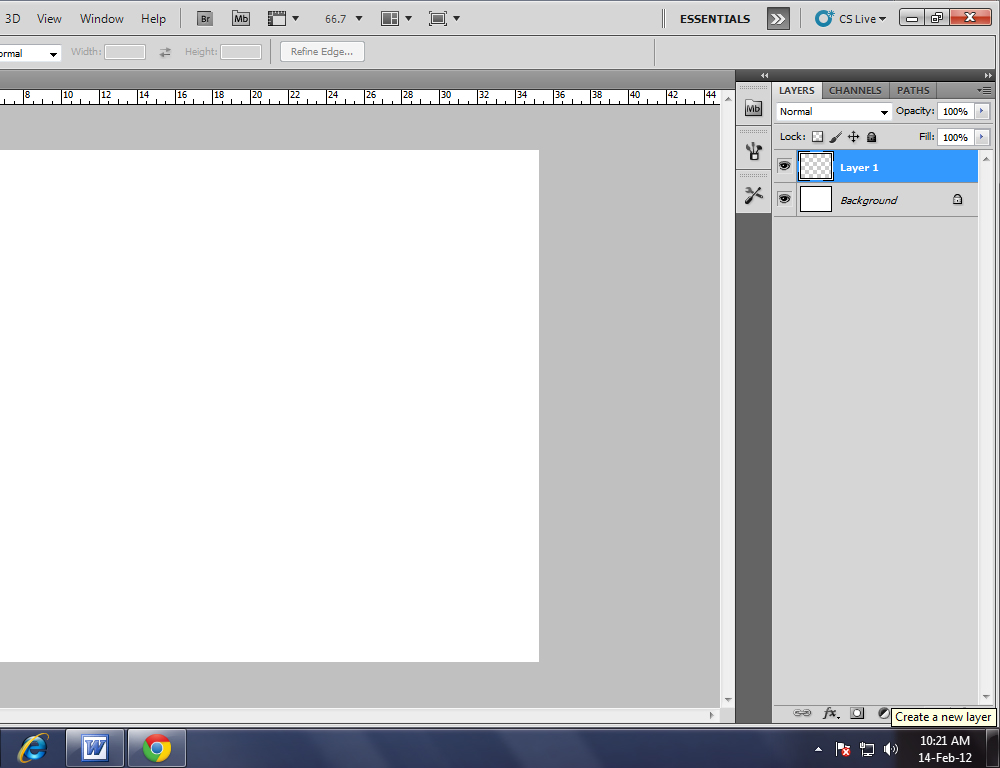
2. Now creat a new layer named as Layer 1.
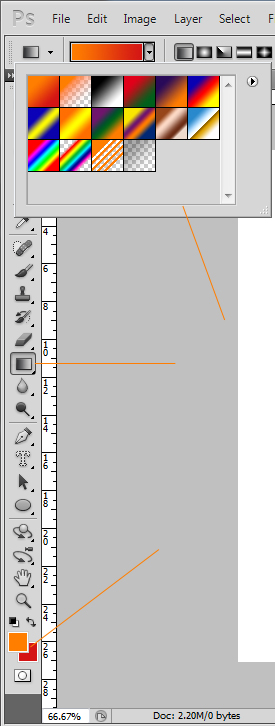
3. Now select orange colour in the foreground and red in the background. After that select rectangular marquee tool and draw a rectangle on the canvas. Now use gradient option and fill wih the suitable settings.
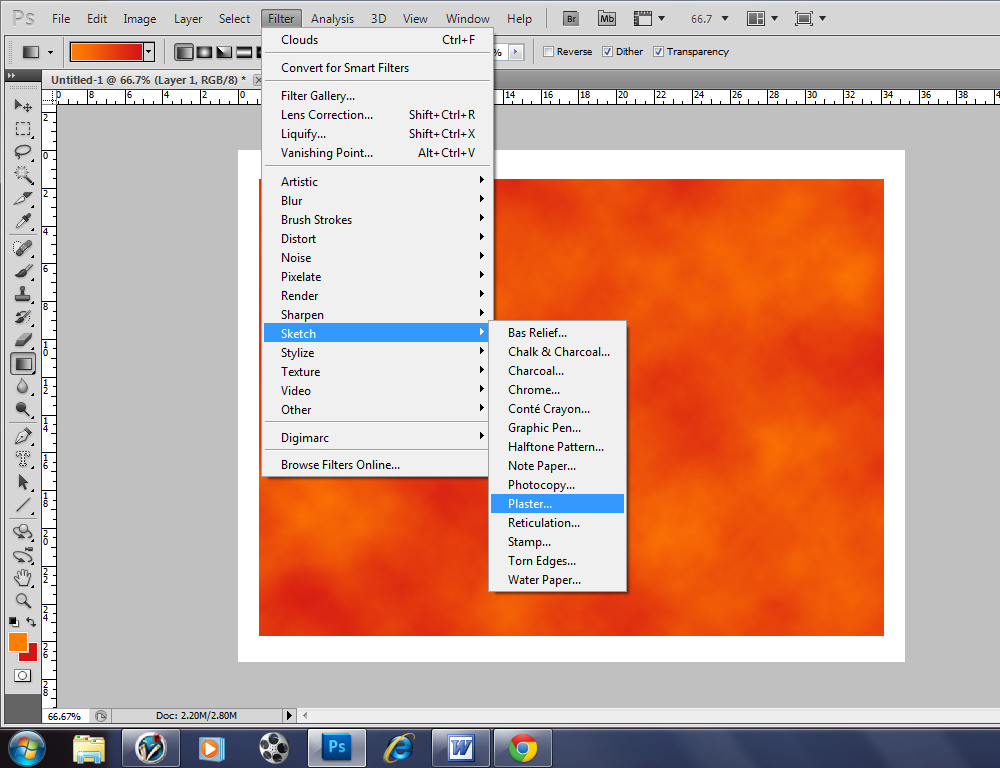
4. Now choose Filter > Render > Clouds option. Repeat it four times to get the desired result.
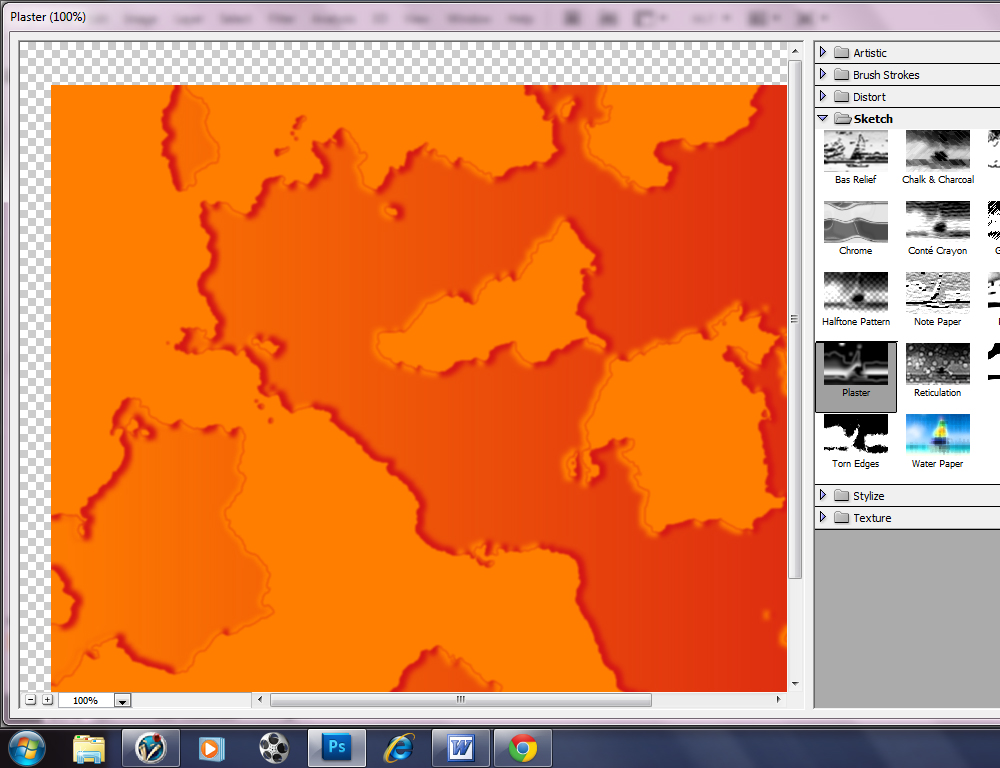
5. After that choose Filter > Sketch > Plaster option and apply it.
6. Now take the Horizontal Type Mask Tool and type a word on it.
7. Press Ctrl+Enter to bring it to the selection mode. Now Press Ctrl+Shift+I to invert selection. After that hit delete key. You will get the same output given below.
8. Now select the graphic and choose Edit > Transform > Perspective and do the needful.
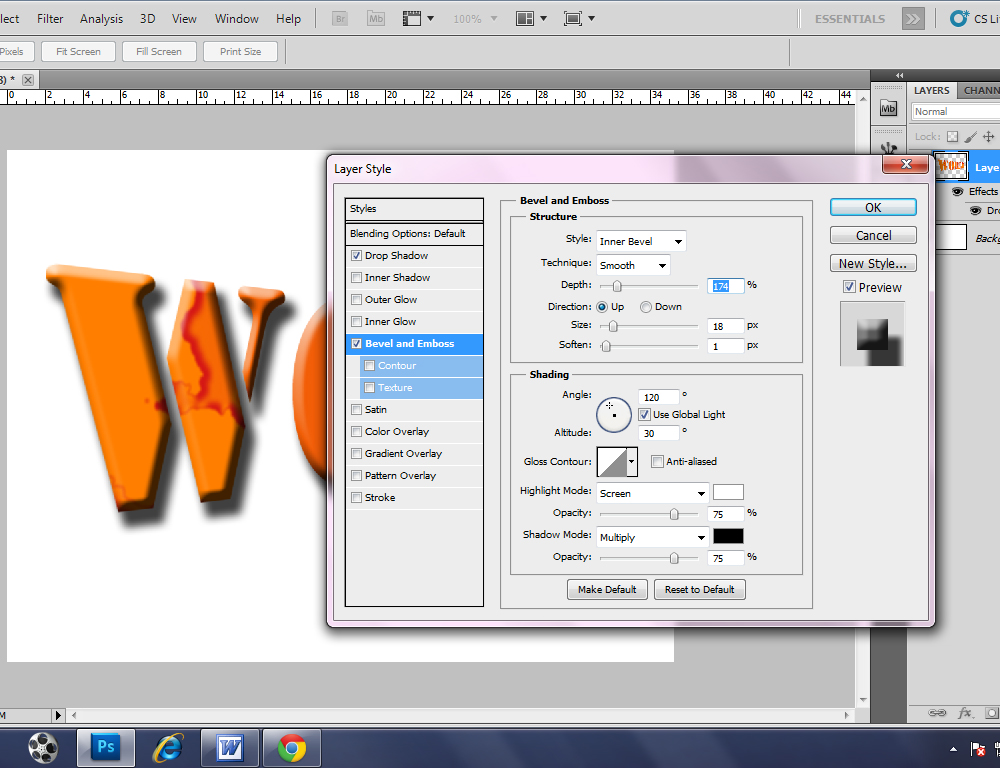
9. Apply shadow layer style and Bevel and Emboss effetcs.
10. Now select Renctangular Marquee tool and make a selection around the image. Now click on Image > crop option. Your image is ready to use.

Dig this tutorial?
Thank the author by sending him a few P2L credits!

manishsultan
Hello friends, I am Manish Saraswat from India. I have been using Pixel2life for a long time. But it is my first attempt to contribute anything. Kindly let me know my mistakes if any. 


|