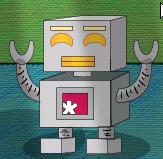
Simple Cartoon (Robot)
This time i decided to work on a childish art XD ^__^..
In this tutorial i’m just gonna teach you on how to create a cartoon robot..
i’ll teach you the other things in it next time..

THE FIRST STEP … Cubes :
Cubes are the head, Body, and feet of the robot
first of all .. start a new worksheet

Use the Rectangle Tool by the Tools window and make a square
and for it to look like a cube it’s either you use the “3D Effects >> Extrude & Bevel”, but me i made a slant square using the Pen tool

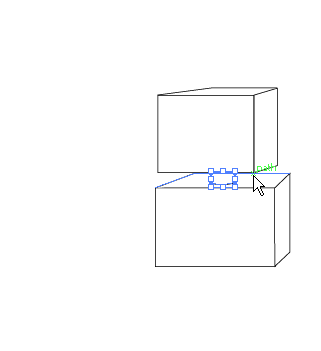
As for the neck, all you have to do is make a tube (a flat top and a curve bottom) like this:
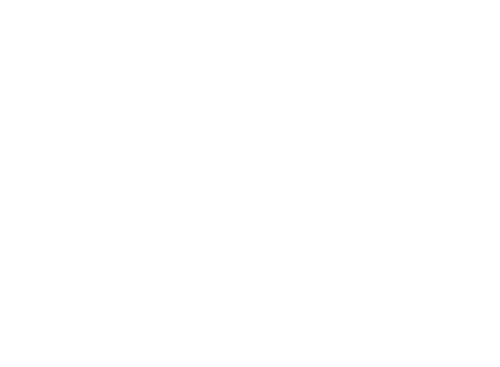
As for the eyes use the Ellipse Tool and place it like this:
As for the arm.. make a curve round shape line ..
just like this:

I mad the eyes crescent by using the Pathfinder Tool
just what in the images below:

The vertical oval must be in front of the circle

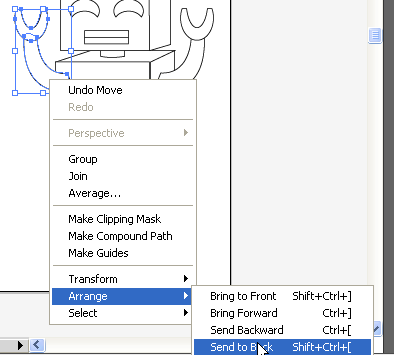
Making the other arm .. all you have to do is copy Ctrl + C then paste it Ctrl + V
Then right click the copied arm go to “Transform >> Reflect” then reflect it vertical

Place it to the left side and then Send to Back :

For a metal set of colors go to the “Fill Color” and then to the icon that has two folders click it then select “Metal”

You could either just select the item and click on the color palette to color it or use the “Live Pint Bucket”

And there you have it
the next thing we do is add a few details
I put a cartoon type of our Logo at the body of the robot

use the pen tool or brush tool at the robot’s arms and legs to make lines


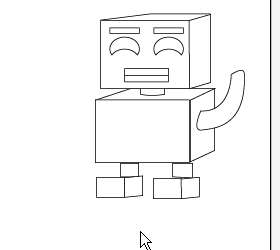
And now there you have it your robot…
For Logo Design New South Wales , visit http://www.webnovation.com.au