Making a full Flash Website is not an easy task. Let alone for someone who never done any web design, even for web developer who is experienced with HTML script still having difficulties adapting to Adobe Flash Software. Even by purchasing a flash template which still requires you to edit them using Adobe Flash. However in this tutorial we will show you that anyone, even one without multimedia or web design skill can make a Flash Website Easily and without the need to own Adobe Flash. You simply choose a template you like and customize it using a very easy to use software. Here we show you an example of the Fashion template we are going to cover in this tutorial.
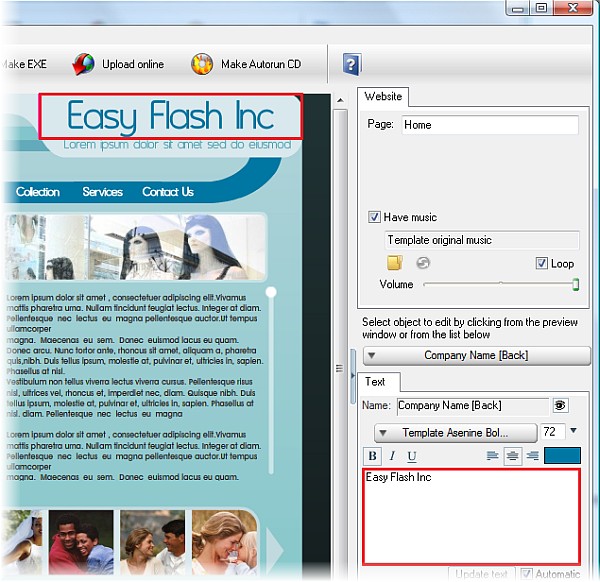
Step 1 Download and Install the FREE editor software from here Step 2 Run the software and click OK to start a new project. 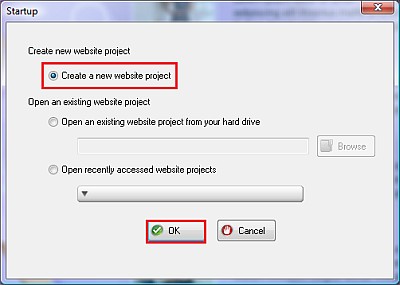 Step 3 You will see all available Flash Templates. You need to purchase thetemplate you wish to use by clicking thePurchase button. You can also preview them by clickingthe View button. However for evaluation you can try the firsttemplate called 'Abstract'. Even though we are going touse the Fashion Template for our discussion, all thecustomization process for all templates are similar. Sohere we select Fashion Template and click Create button.  Step 4 Here you will see the website is created automatically for you. What weneed to do now is to change texts andphotos to suit your purpose. Notice that there are 4page thumbnails showing on the left. That represent each of yourwebsite page. You can add or remove page however in thistime we will stick to default 4 pages.The page currently selected is the one with the red boxaround it. This page is the one we are currently see in thebig preview window at the center. 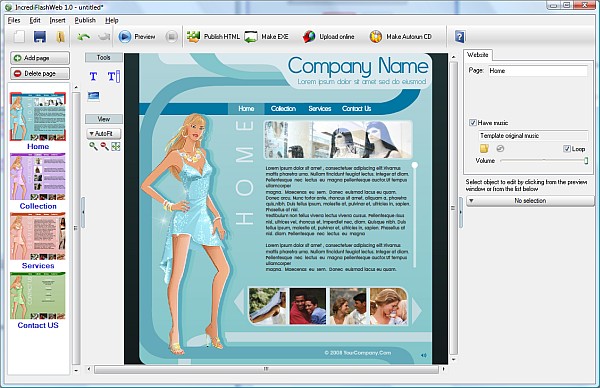 Step 5 Click on the Company Name text at the top to change it. Soon you will see a textbox at the bottom right cornershowing the same text. Change the text in that textbox to 'Easy Flash Inc' 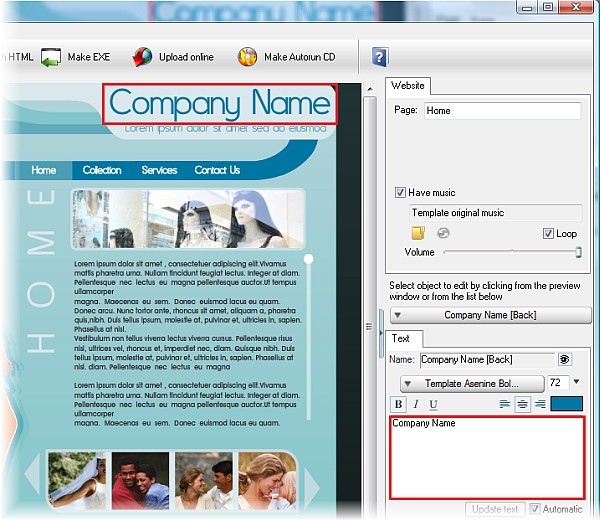 Soon you will see that the Company Name text on the website will change respectively.
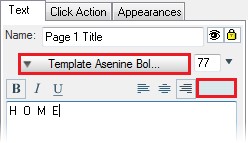
 Step 6 Do the same for any text on that page you would like to change. If you feel a little adventurous you can alsotry to change their color and font name using control above the textbox where you type in the text.
 Step 7 Now we will edit Collection Page. Click on the Collection Page thumbnail on the left panel. You will now seethat the Preview window is now showing you the Collection Page.
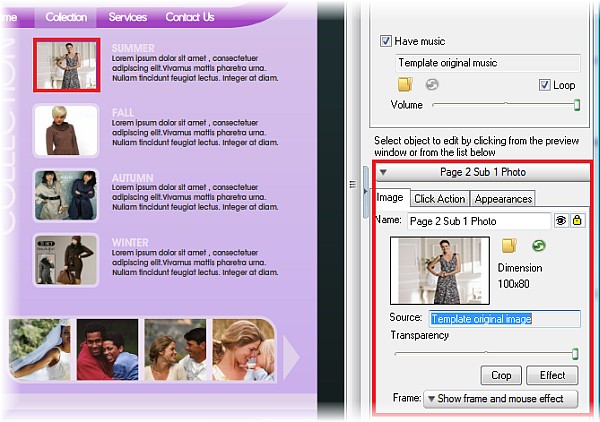
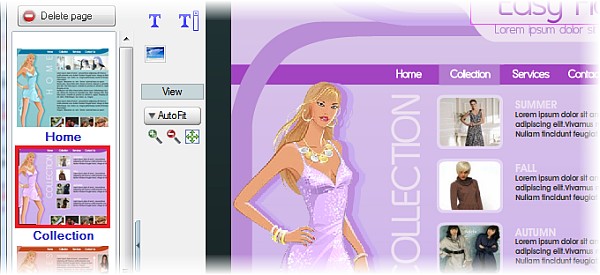 Step 8 Here we will change some photos. Click on the top most photo thumbnail. Notice that the control on the bottomright is now changed into Image control showing properties of image you have just clicked.
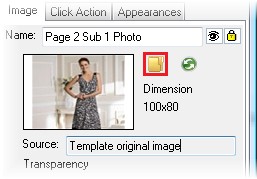
Step 9 Click the Folder Browse button to select your own photo as areplacement. It is recommended that you use thesame photo dimension as the one showing under the FolderBrowse button. However if you don't it is ok. The softwarewill crop and resize the photo to fit the area for you.
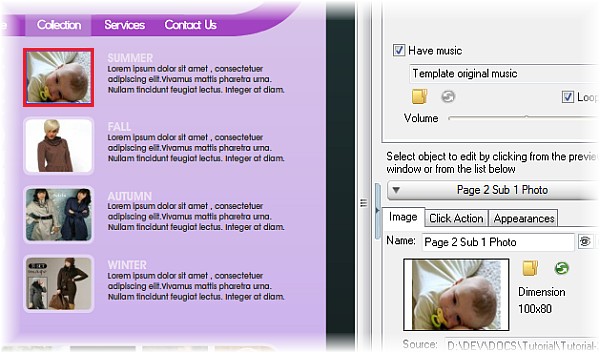
Step 10 Now you will see that the photo is changed automatically at the Preview window.
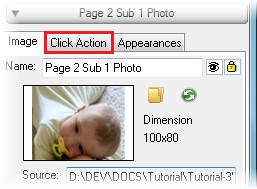
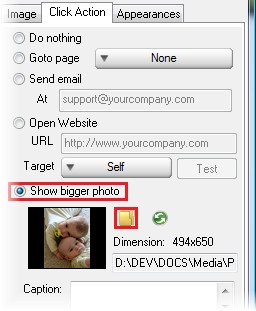
Step 11 At the moment when you play the website. Clicking this photo thumbnail will do nothing. Mostly you want toopen a bigger version of a this photo. To do this, go to Click Action tab.
Step 12 Select Show bigger photo and click Folder Browse icon to select a biggerversion of your photo. Again if thesize of the photo you selected is not the same as therecommended size, you will be offered to automatically resizethem.
Step 13 One last thing about changing photo. Sometimes collection of photos aregrouped inside a gallery scroller suchas the one showing below. You can simply clicking on thethumbnail of the one visible to replace them with your ownphoto. However there may be more photos than whatcurrently is showing. To scroll the gallery to show more photos,simply clicking on the Right arrow. Now you can see morephotos. You can click on them to replace
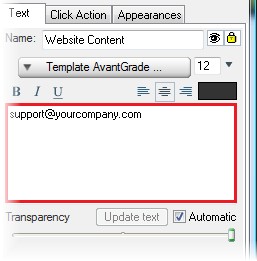
Step 14 Spend sometimes to change other photos in this page and on other pages. Step 15 One last modification we are going to do is to change the contact email address into our own. Go to ContactPage by clicking on it's thumbnail. Then click on the Email address on the Preview window.
Step 16 Notice that the text control now appears on the bottom right corner. Type in your email address in thistextbox. However we are not done yet. This will only change the appearance of the text but not the actual emailadress openned when someone clicks on this link.
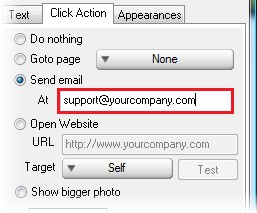
Step 17 Click 'Click Action' tab and change the email address showing there with your own. This is the actual emailaddress used when someone clicks on this link.
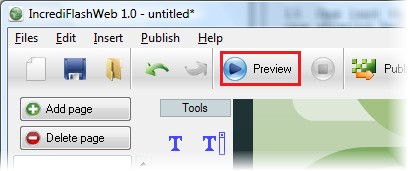
Step 18 Spend a bit more time to change other text such as Fax, Phone and Address. Step 19 Now you are done. Preview the website by clicking on Preview button. You may stop the playback by pressing theStop button next to Preview button. Now you see that the website is fully functional. This is all done by simplyclicking and typing without the need to use other complicated software. Isn't it cool!
Step 20 Now as a final step. You may wish to put this website online for real use. To do this, you will publish thiswebsite as an HTML and SWF (Flash) file. Click on Publish HTML button.
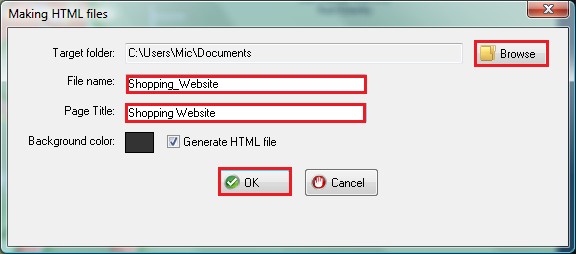
Step 21 Click the Browse button to select the target folder, type in the Page Title and Filename you wish to use andpress OK. After the publishing process is done, you will be offered to preview the website. Choose No.
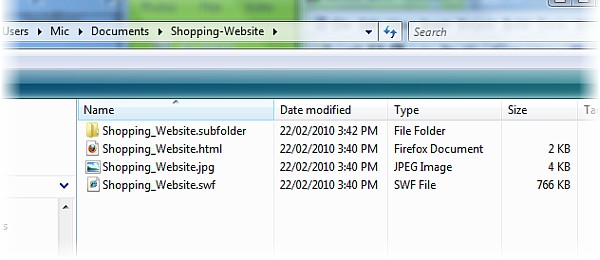
Step 22 Now go have a look at the target folder using Windows Explorer. Youwill see an HTML, JPG, SWF file and onesubfolder. Simply upload all files and subfolders intoyour website. Make sure that the subfolder is also uploadedas subfolder. Then your website is visible online byviewing the HTML file.
Step 23 Now if you go back to the software, you can save this project for later modification by pressing File => SaveProject menu.
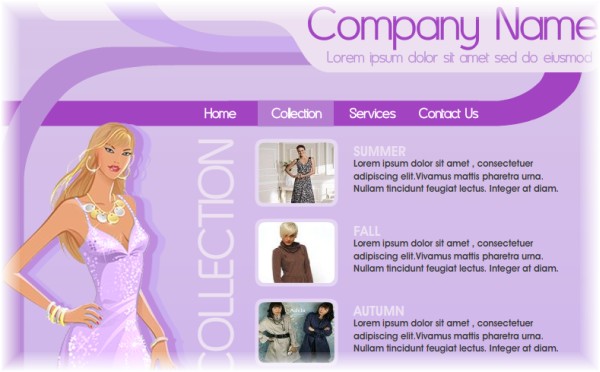
Here is the result:

|