This time we'd like to show you how to Convert & Upload PowerPoint file into flash animation with a customizablesplash screen and a company logo Easily.
Step 1 Install and Run PPT To Flash Studio from here Step 2 Create a new conversion project.
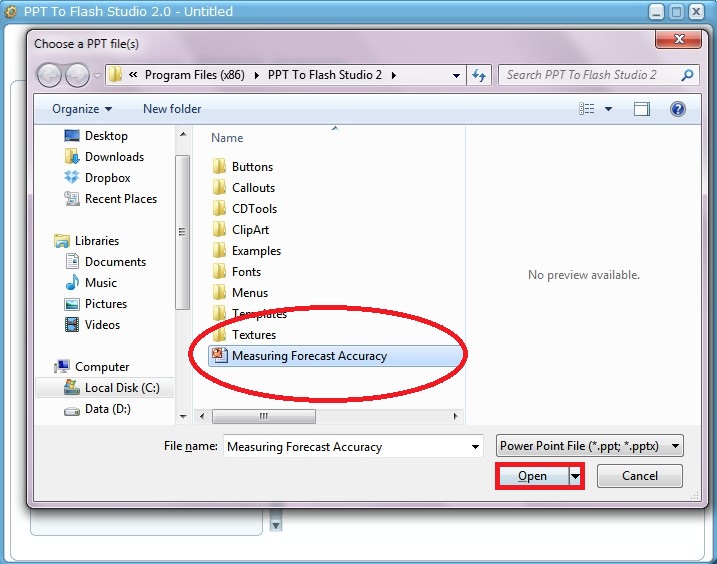
Browse and select your MS PPT file.
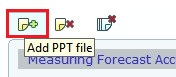
To add another one or more PPT file(s), click add button
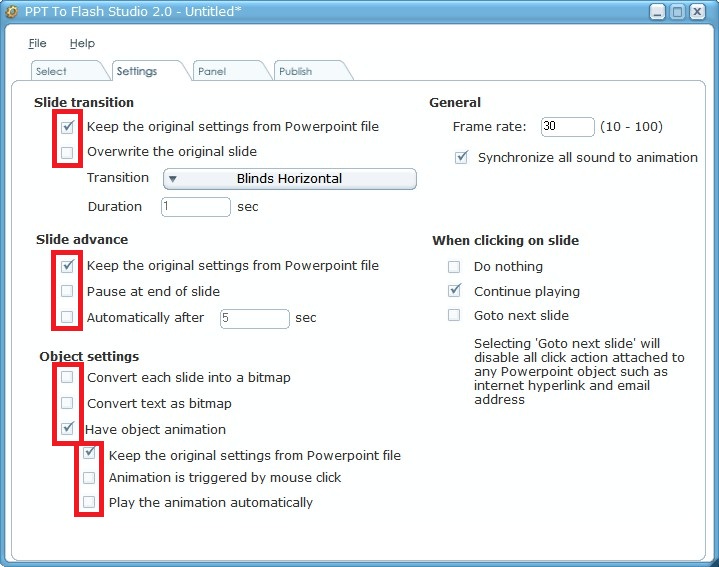
Step 3 Go to tab "Settings" to change the default setting. PPT To Flash Studio enables you to customize MS PPT bysetting Slide Transition, Slide Advance and Object Settings. For this tutorial, we will use "Keep the originalsettings from Powerpoint file".
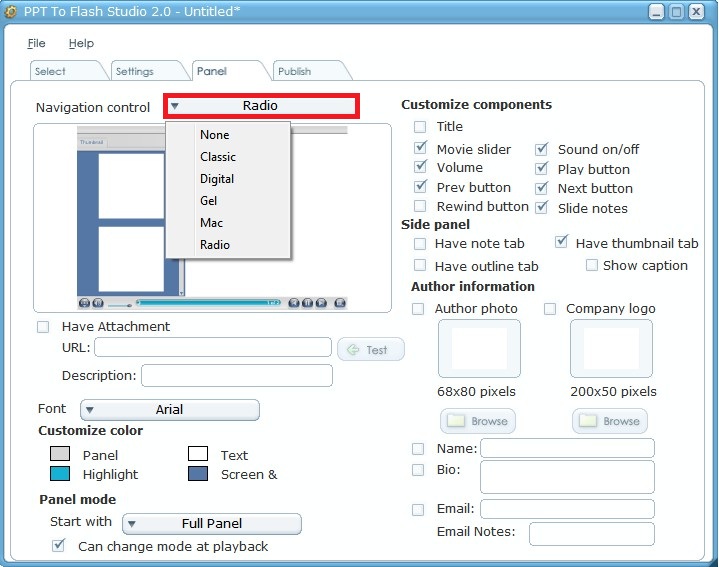
Step 4 Next, click on tab Panel, to add some information. We change the navigation control into "Radio".
We want to change the color and the panel mode.
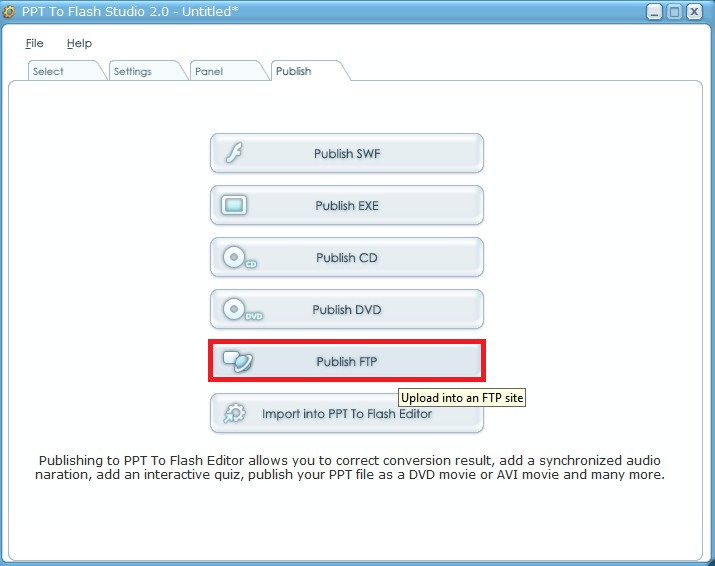
We have checked all component at Customize components and add author information such as email, name, bios, companylogo and author photo. Step 5 Click on tab "Publish". You can publish your ppt as SWF, EXE, CD, DVD, FTP and Import Into PPT To Flash Editor.For this tutorial, we will show you to publish this tutorial into website/FTP site.
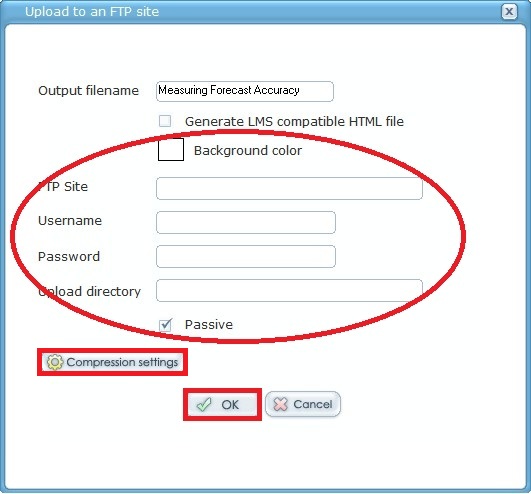
You should to fill in your ftp site, username, password and upload directory.
Here you can adjust the overall photo and sound compression.
The lower the compression quality, the smaller the published file. Step 6 Congratulation! You have just upload your ppt file into your own website directly. Here is the result:
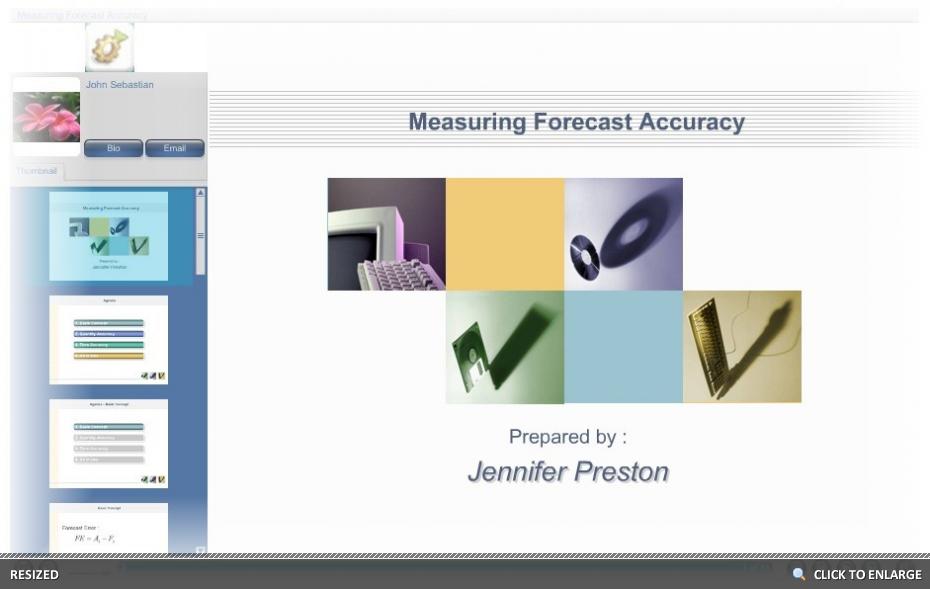
Click here to play the flash file 
|