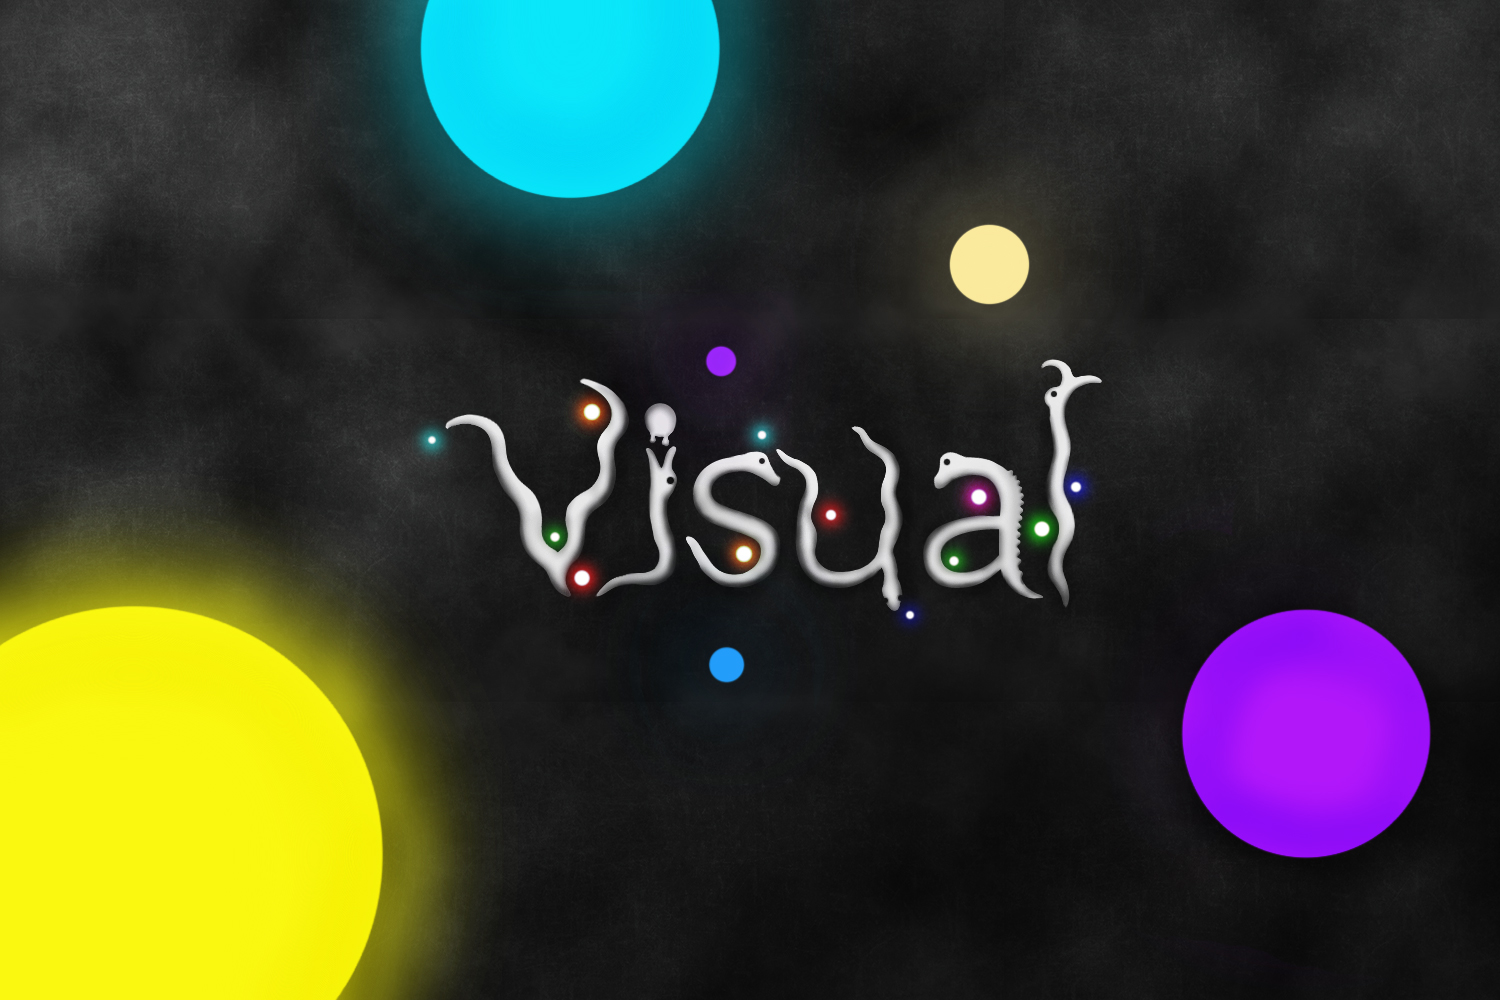
Creating a Custom Space Creatures Typography with PS6 Some time ago I wrote an article about the tutorials that every designer should definitely know how to do. All these works remembered me that the Photoshop tuts was the only way I learned as well as experimented how to work with Adobe. So in this tutorial I will show a quick way to create a nice and organic typography using only Photoshop and some brushes. The final image
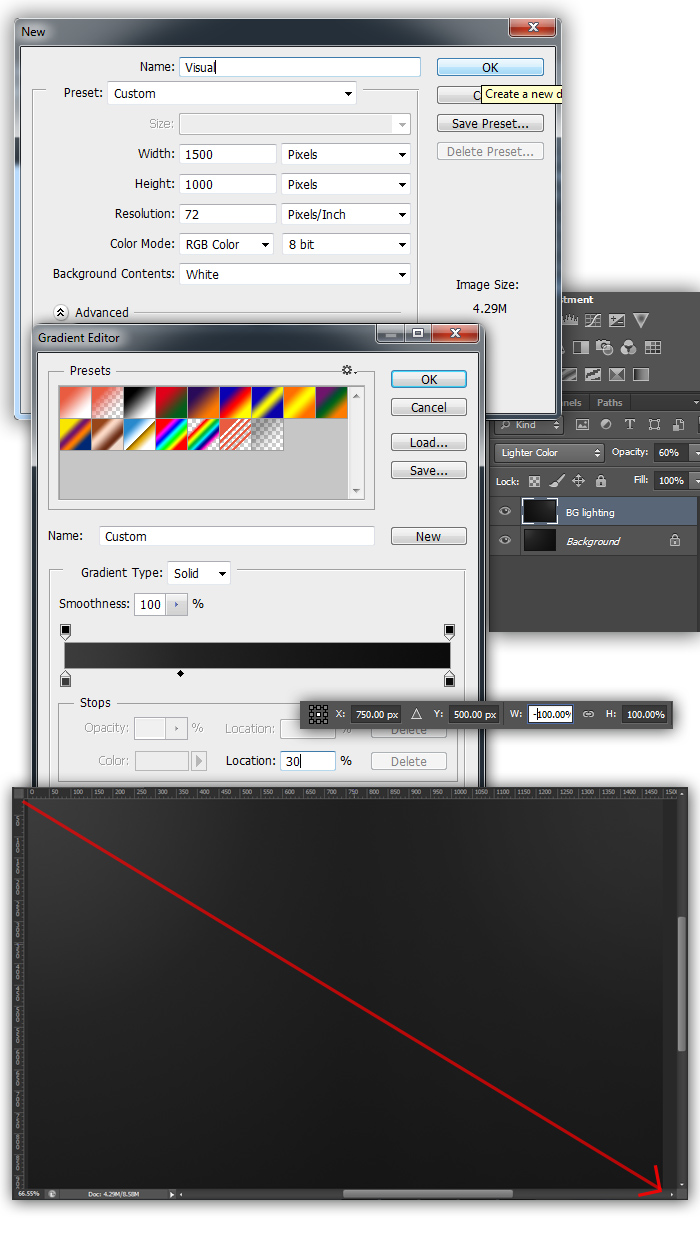
Step 1 Create the new 1500 wide and 1000 height document. In this case I called it Visual. Draw a subtle Linear Gradient from dark grey #3c3c3c to darker grey #0c0c0c. Note that we want our light to come from the top left and top right. Duplicate the background (ctrl +J) and rename the new layer to “BG lighting”. Press Image>Transform (ctrl + T) and change the wide value to negative (-100%) and rotate the image to the left side. Change the blending mode to Lighter Color and lower the opacity to 60% to make 3D effect.
Step 2
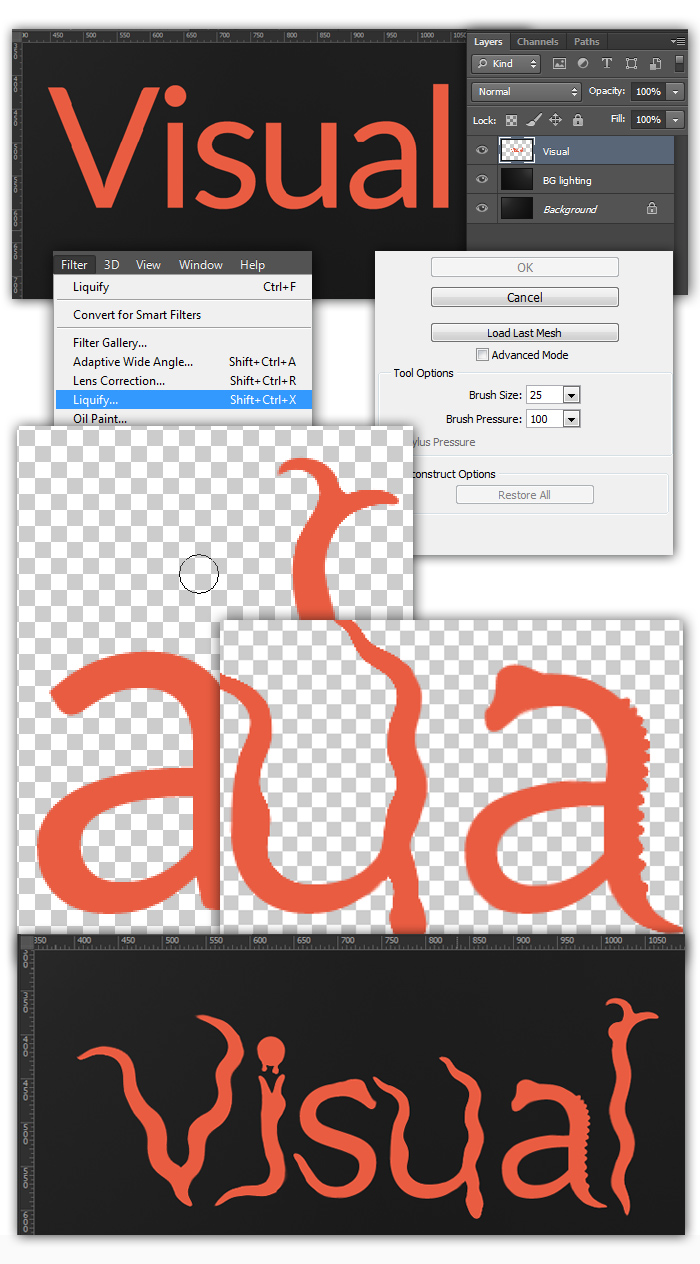
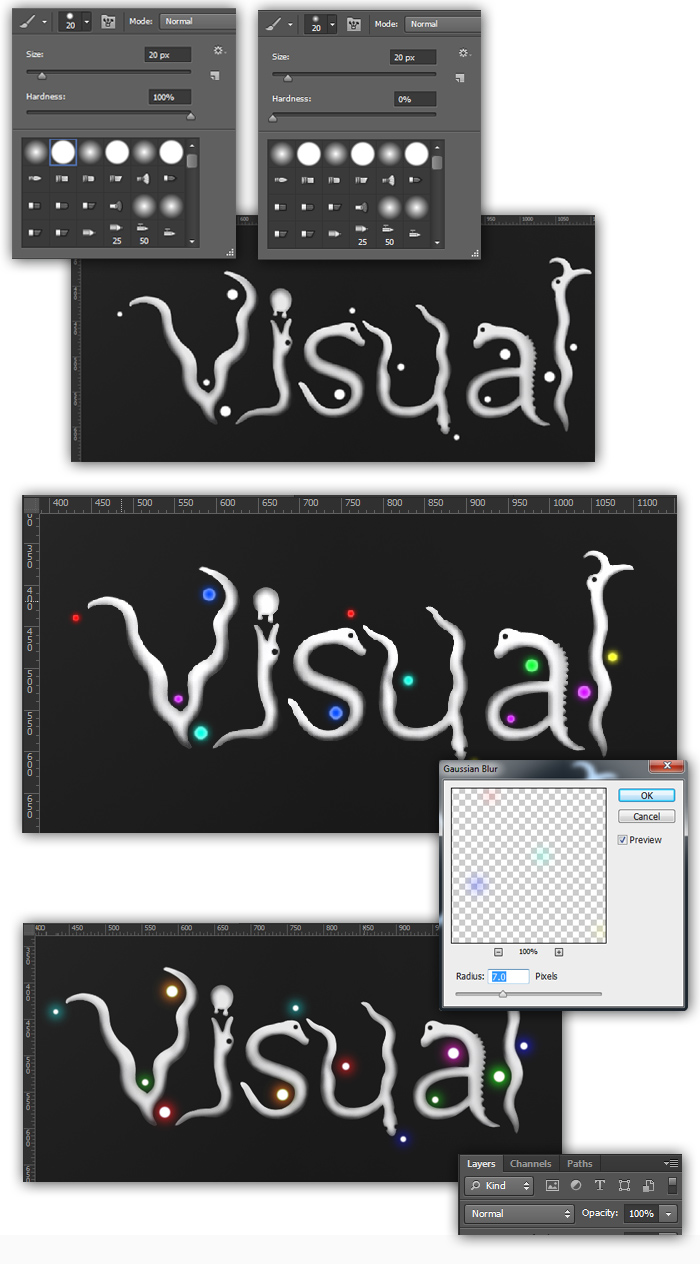
Now we will use a nice typography called Lato. U can download it from here Grab the Text Tool (T) and write “Visual” on the canvas. I used 260px size. At this point color is not important. Rasterize the layer: Layer>Rasterize>Type. With the Visual layer selected, on the top of menu press Filter>Liquify Tool and set the 100 for the pressure. Changing the brush size smoothly reshape text forms to make something creative. In this case I was trying to imitate fantastic “Space animals”.
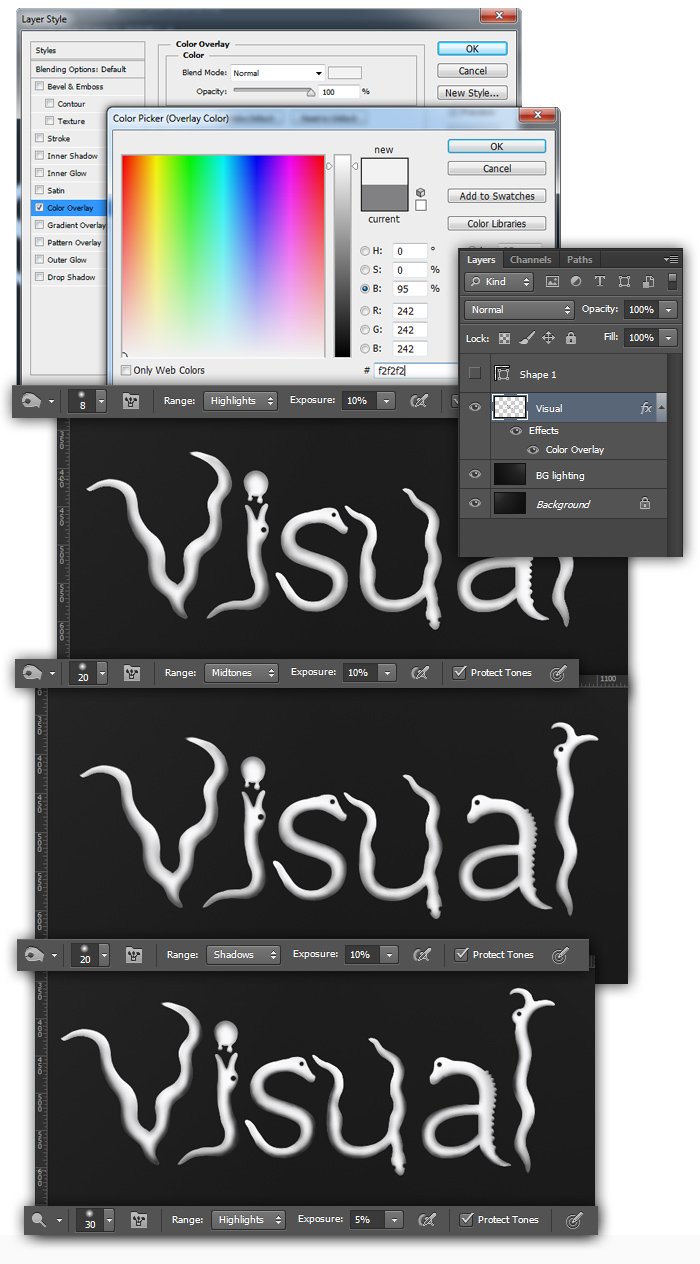
Step 3 Open Layer Style panel and choose light grey color #F2F2F2 for color overlay (Layer>Layer Style>Color Overlay). Rasterize Layer Style for the layer “Visual”: Layer>Rasterize>Layer Style. Take Burn Tool and with 10% of exposure opacity smoothly draw shadows. Once you done choose Dodge Tool and with 5% exposure draw highlights on the top of the letters. Here we trying to make shadows based on our background top left and right lighting. Make the “eyes” just erasing area with the rounded and hard Eraser tool.
Step 4 Create a new layer and call it “Dots”. Grab the hard Brush Tool (B) and start place dots all over the letters. Choose the size from 9 to 20px and use color white. Create another layer on the top and call it “Dots blur”. Take the soft brush and paint the same size circles on the top of the white ones. Pick up the colors with high saturation. Duplicate the “Dots Blur” layer (Ctrl + J) and with it selected add 7px Gaussian Blur filter Filter>Blur>Gaussian Blur.
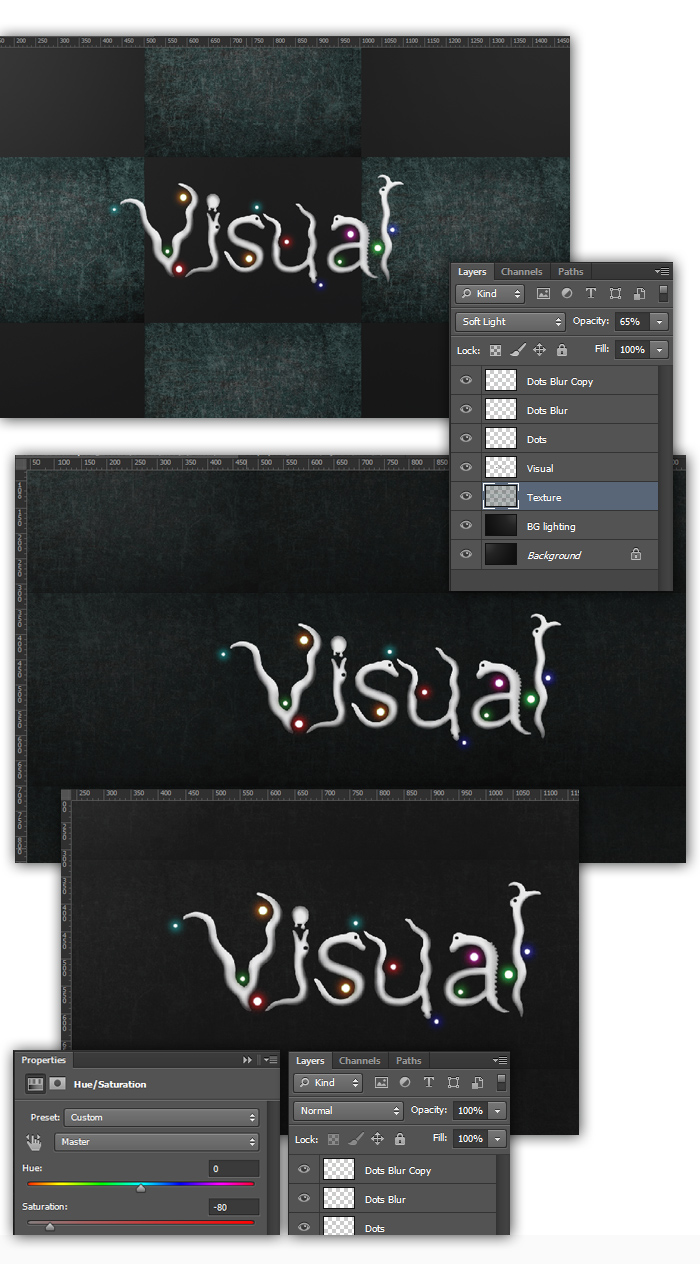
Step 5 Upload the texture image. The one I used was this: Scratch. Put the image layer on the top of the “Bg lighting” layer. Rename it to “Texture”. Now convert it to Smart Object - Layer>Smart Objects>Convert to Smart Object. Rotate the layer 90 degrees and resize it enough to place 9 same ones on the canvas. With the layer Texture selected press ctrl + J and duplicate it 9 times. Replace new layers to make nice matrix all over the design. Once you had done select all layers and marge them: Layer>Marge or Ctrl +E. Change layer Blend Mode to Overlay and lower the opacity to 50%. Rename the layer to “Texture” again. From Adjustments Menu add Saturation filter and set the Saturation value to - 80% (negative). Create a new layer above the “Texture” and rename it to “Could”. Choose the white and black colors in your Color Picker and with the layer selected press Filter>Render>Clouds. Change the layer Blend Mode to Overlay and lower the opacity to 60%
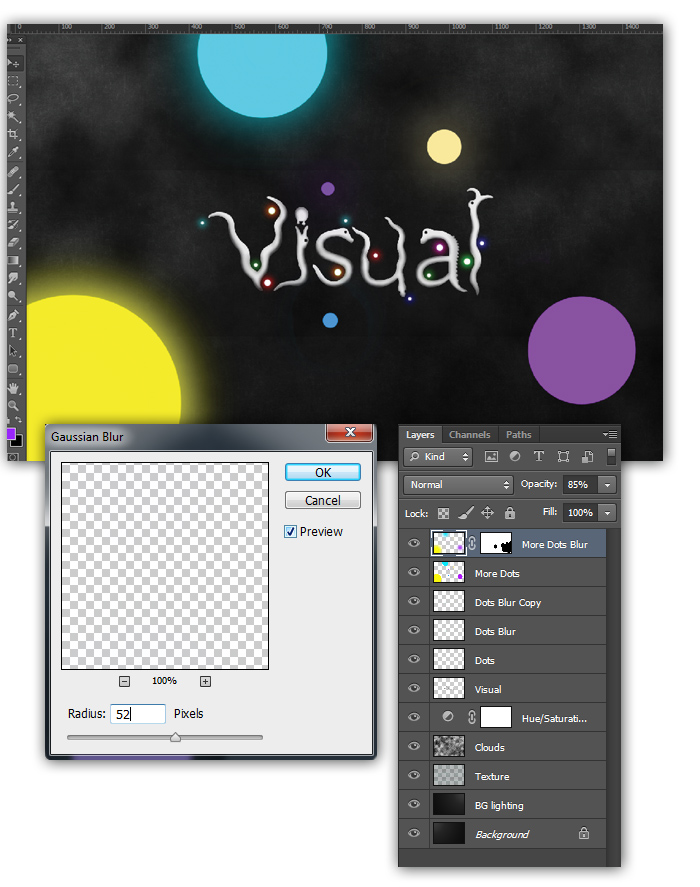
Step 6 Crete the new layer above all and call it “More Dots”. Grab the hard Brush Tool (B) and paint few huge and the medium size circles around the background. Again, use the bright colors. Select “More Dots” layer and press Ctrl + J to duplicate it. Rename the layer to “More Dots Blur”. Now add some blur to it Filter>Blur>Gaussian Blur. With the layer selected press Layer>Create Clipping Mask and with the soft black brush delete the brightness from some dots .Change the layer ”More Dots Blur” opacity to 85%. At this point we are trying to simulate 3D effect.
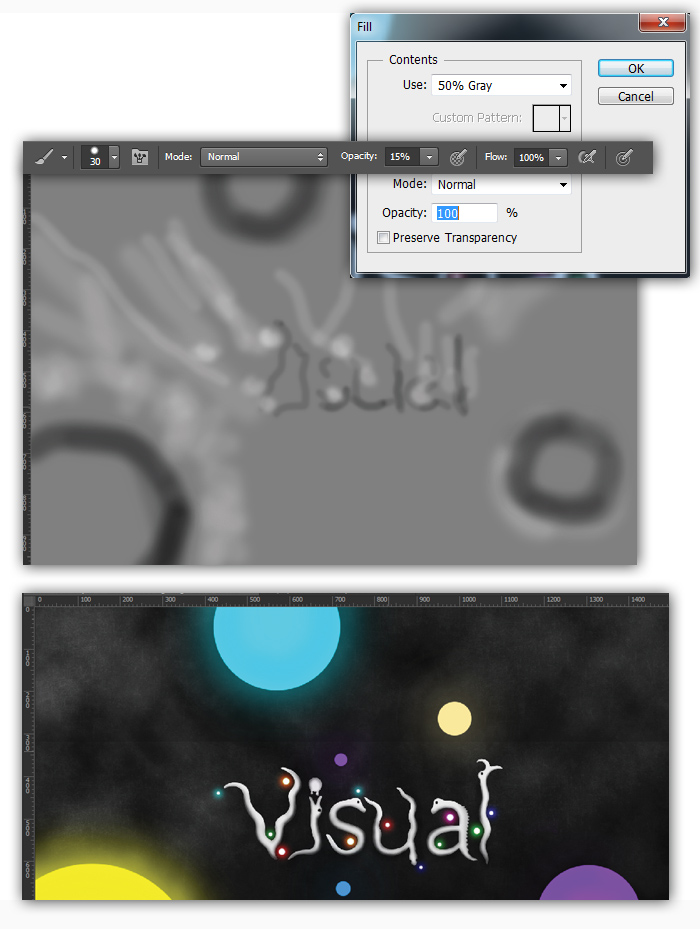
Step 7 Create the new layer above of all and call it “Globe Lighting”. Fill it with Grey (Edit>Fill>50% grey) and change the Blend Mode to Overly. Grab the Soft Brush Tool (B) and lower the opacity to 15%. The theory here is that the black brush is for shadows and the white brush draws the highlights. Changing the brush size smoothly draw the light rays and shadows all other the design. Don’t forget to put more effort on painting shadows near the letters to blend them better into design. Go back to the Texture layer and add clipping mask to it (Layer>Create Clipping mask). Choose 10px soft brush and lower it’s opacity to 10%. Smoothly delete the grey lines in between the rows.
Thank you for your time :)
Visit my blog: http://blog.visualpelican.com 
Dig this tutorial?
Thank the author by sending him a few P2L credits!


|