AngularJS Tutorial: Submitting form with ng-submit
Posted in Tutorials


This is part of the AngularJS tutorial series and follows right after the previous tutorial in which we demonstrated data-binding with an Angular template tag in our HTML view. We move further by demonstrating AngularJS’s ng-submit directive.
1. In our index.html, have ng-app in the body element. You can put the ng-app on any element. But AngularJS will only be applied to the scope within the element in which ng-app is located. So in our case, anything within the <body> element will be “Angularlized”.
We now remove that template tag and replace it with a submit button so that we can add items to our shopping list. And we add the ng-submit directive to the <form> element. ng-submit goes on the form element, not on the submit button.

ng-submit directive
You might note that we are now using AngualarJS 1.3.5 (This will not work with Internet Explorer 8.0).
We now have the following in our browser…
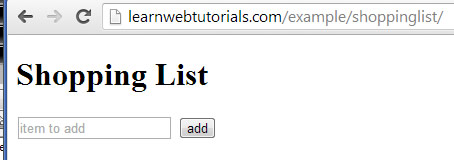
angular button click on browser
This directive …
ng-submit=”addItem()”
is invoked when form is submitted (which is when the submit button is pressed). When ng-submit directive is invoked, Angular calls the function addItem().
But it doesn’t do anything yet, because we have to code the addItem() function.
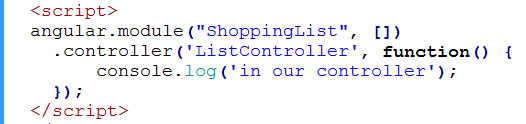
2. We will code the addItem() function in the “controller” of our AngularJS app. But first we have to create our AngularJS app in a script block at the bottom of the page like this …
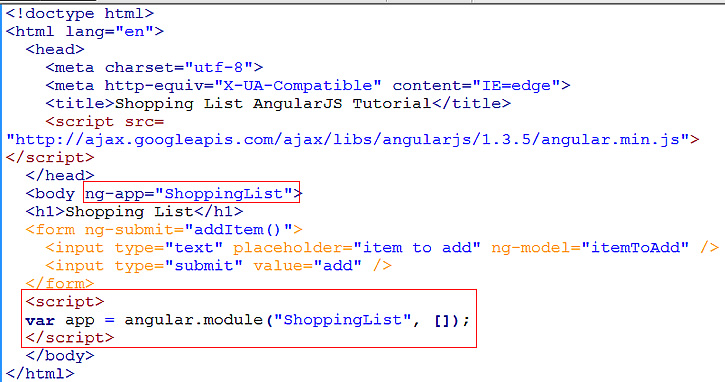
angularjs script block
Yes, you can put this Javascript code in a separate JS file if you like.
The angular.module method is how we create an AngularJS app. We give our app the name ShoppingList. The empty square brackets means that are app does not contain any dependencies. Nevertheless, you need to put in the empty square brackets.
So now we have to reference our app name in the ng-app controller like this …
ng-app=”ShoppingList”
as seen in the above screenshot.
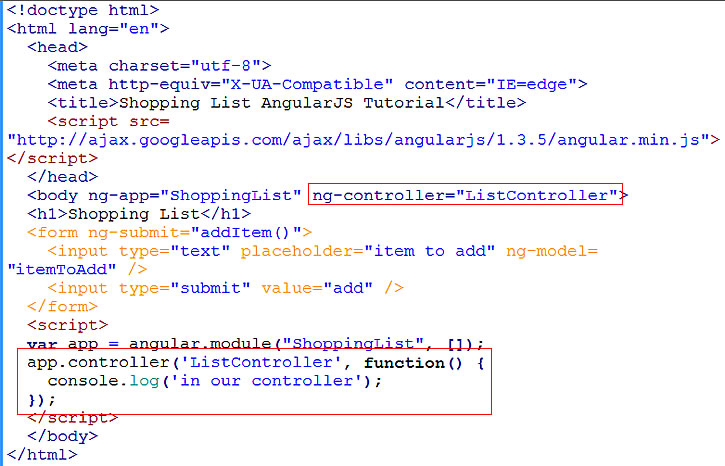
3. Now that we have the “app”, we calls its “controller” method to create our controller …
angularjs controller
The first argument to controller method is the name of our controller, which we shall name “ListController”. We also need to reference this name in an ng-controller directive on the body element like this …
ng-controller=”ListController”
The second argument is the function of the controller. Here we just put in the console.log message so that when we run in browser a message is displayed in the javascript console to indicate things are working…
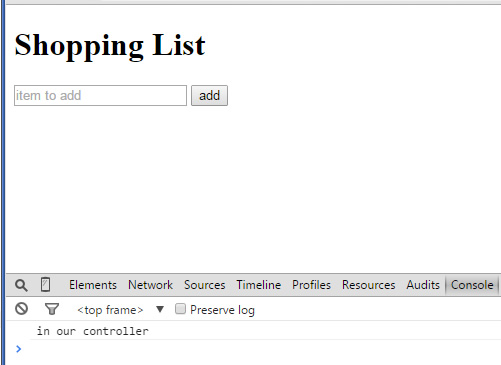
console message from the controller
4. We can chain the method calls of module and of controller by doing the equivalent code …
chaining angularjs methods
This eliminates the need for the app variable.
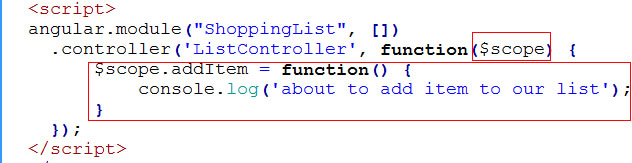
5. Now we can add our addItem() method in our controller …
addItem function
$scope is an AngularJS services. We “inject” the $scope in the function parameter of the controller method. And within the controller function, we attach “addItem” to the $scope like this …
$scope.addItem = function() { … }
The … is where we write the code for our addItem() function. Right now we have only a debug message. Running in browser, we see that our debug message appears when the form is submitted. In other words, when the “Add” button is clicked…
debug message appears when Add button is clicked
You will see $scope a lot in Angular, it is one of its core services. It has to be spelled that way. It acts as the glue between the controller and model in the HTML. In this controller, we add things to the $scope so that the HTML view can access them. Here we added “addItem” to $scope. addItem is a function. Just for testing purpose for now, the function just contains a console.log statement.
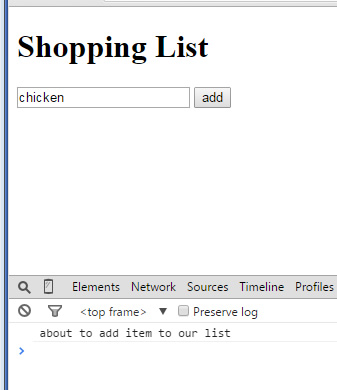
6. Our controller knows what item to add to the shopping list, because the controller picks up everything via the $scope service. Recall that in the previous tutorial, we had assigned “itemToAdd” as our model of the textbox via the ng-model directive. That means our controller has access to the value of the textbox via $scope.itemToAdd. So if we change our message to include this …
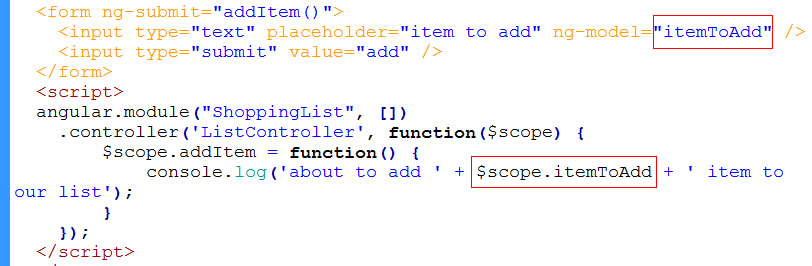
$scope knows about ng-model
We see in the browser that the message knows exactly what the user had typed in …
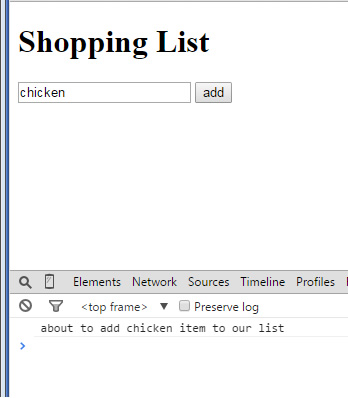
adding chicken
Things are not quite done the “Angular way” in this beginning tutorial. Continue to next few tutorials to see how to do thing properly.
Related Posts
Tags
Share This

