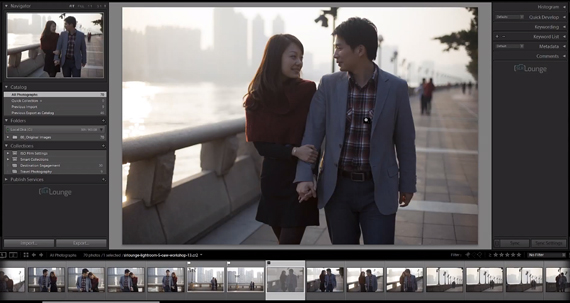
One of the benefits of using digital cameras is the convenience of being able to take a lot photos at the fraction of the cost of film. The downside of that comes when you upload all the images to your computer and have to sort through them. The task can be overwhelming when you are faced with choosing and sorting hundreds—perhaps even thousands—of images. However, Lightroom users can rejoice; the following video clip from the SLR Lounge course details a few different ways to help you quickly sort and organize your images:
The video is part of the organization and workflow workshop.
Three Methods for Rating Images in Lightroom
Regardless of your skill level, all of your photos won’t be keepers. Some will inevitably need to be culled, while others will earn high marks. Having a solid workflow in Lightroom will ease the pain. Following one of the processes listed below will help ease the pain and un-complicate the process:
- Once your images are imported into a Lightroom library, start the rating process by going through the images and flagging them either as a picked image or a rejected image. As you scroll through the images, you can quickly flag them by pressing “P” on your keyboard to pick or “X” to reject them. Once they are rejected, the images will appear greyed out. If you accidentally reject an image, press “U” to unflag it.
- Adding a star rating system to your picked images helps you sort the best from the okay quickly. Go through your picked images, selecting each image individually, and give each one a star rating by pressing a number 1 through 5 on your keyboard. For example, to give an image a 3 star rating, simply click on the image the press the number “3” on your keyboard. One star is the lowest rating, whereas 5 stars is the highest rating.
- One last way of rating your images is by color coding them. You can label an image a certain color the same way you gave it a star rating, only instead of pressing keys 1 through 5, use keys 6 through 9 on your keyboard. Once an image is selected, press “6” for red, “7” for yellow, “8” for green, and “9” for blue. To remove a color label, simply press the same number on the keyboard again.
There are multiple ways to cull images in Lightroom.
Which Rating System Is Best?
Long answer short: the best one way to rate and cull your images is the one you find most relevant to your needs. Logically thinking, the quickest way to sort photos is most likely just scrolling through them quickly and either picking them or rejecting them. That being said, there are benefits to star ratings. One being that it is more hierarchical which makes it easy to pick the best images right off the bat.
As far as color flagging goes, it is useful in situations where there are many photos, some which are good to go and some which need some kind of editing. As explained in the video, colors are a good way to mark photos when multiple people will be working with them. In the narrator’s studio, marking a photo with red means it needs to be revised. So when the photographer has finished sorting and labeling, his images are sent on to the editing team who can quickly go through and see which photos need to be revised.
To that end, evaluate your needs and chose a workflow that works best for you. Most casual shooters will find the “pick or reject” method the easiest and most suitable, but each photographer’s needs will vary.
Like This Article?
Don't Miss The Next One!
Join over 100,000 photographers of all experience levels who receive our free photography tips and articles to stay current:


I think of the 3 options above as one system. The 1-5 stars are a rating for the quality (technical and composition) of the photo, the color ratings are for making your selection and supporting your workflow. and the pick flag is for the final approved ones.
My wf looks like this;
After importing I start with rating the photo’s X & 1-5.
– X for the real crappy ones
– 1&2 for the ‘if nothing else available
– 3 for the OK, just usable,
– 4 for the best of a series
– 5 for the really good ones (portfolio material)
After applying keywords and location metadata I start applying colors for the photo’s to be edited and the second choices.
After editing a photo I decide to use it or not (by setting pick flag)
I use the pick flag so it is without a doubt clear that are the ones that are selected, edited and approved. All my export filters start with ‘pick flag is flagged’
Once a month I do a cleanup and delete the * and remove the ** from the catalog.