Outdoor flash can be used in a number of ways.
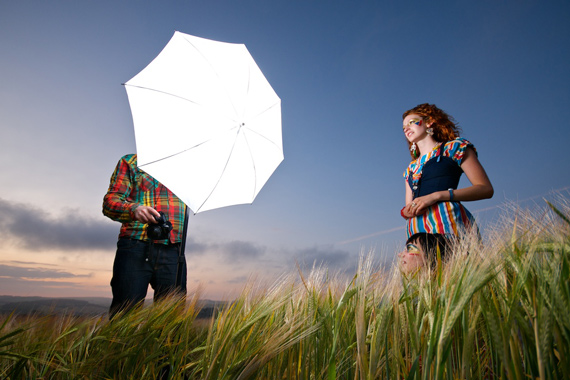
“Watch Out for Our New Project” captured by James Kendall
Using Flash as the Main Light Source
On a dull day, it can be used to simulate sunlight and add contrast to a photograph. In this situation, the flash is the main light source, and its direction should be above and perhaps to one side of the subject, just like sunlight. This entails the use of an off-camera flash. It’s important to remember that even on a dull day, the natural light is directional, and when used correctly, the flash should augment that natural light.

“Abby” captured by Ryan Ritchie
Calculating Exposure
Exposure calculation should start in the normal manner — via a light meter reading (i.e. determine what aperture you would you set if not using flash). The Guide Number of the flash should then be divided by the aperture suggested by the light reading, which will derive the distance at which the flash-gun would be positioned for lighting by flash alone.
Remember:
Guide Number ÷ Distance = Aperture
Distance x Aperture = Guide Number
Guide Number ÷ Aperture = Distance
At this distance, the combination of flash and natural light would produce a considerable degree of overexposure, so the actual distance at which the flash is positioned needs to be doubled. Doubling the distance effectively reduces the level of illumination to one quarter the initial amount. This setup should more or less produce the correct exposure, but when using simple flash units, a degree of experience building and experimentation is always required.
For example, if the meter reading is f/16 at 1/60, and the flash Guide Number is 80, then the distance of the flash should be is five feet (80 ÷ 16), which is then doubled to 10 feet.
Since the directional qualities of the flash light are required for this application of boosting natural light, it’s far better to move the flash-gun rather than try to reduce its output by using a diffuser.
Using Fill Flash
The second (and far handier) use of outdoor flash (or natural daylight) is as a fill-in light. When shooting in direct sunlight, photographs can suffer from hard shadows. Fill-in flash can illuminate these shadows and reduce contrast, especially where shadows would otherwise render as totally black. The use of on-camera flash is ideal because the “normal” position of fill-in lighting should be as near as possible to the subject/camera axis.

“Ainsley” captured by Scott Hill using a fill flash
The secret to success lies in ensuring that the fill-in light’s strength is less than that of the main light source (otherwise it becomes the main light source). When shooting in sunlight, it’s highly likely that the flash will provide a lower level of illumination than the sun, unless it’s really close to the subject, but a few quick calculations can help before going for the shot.
The simplest way of calculating the correct exposure should start with a light meter reading of the highlights. The aperture is then divided into the flash gun’s Guide Number to derive a shooting distance, and one f-stop added to prevent overexposure being caused by the combination of natural and flashlight.
For example, if the meter reading for the highlights is f/8 at 1/60, and the flash Guide Number is 80, then the distance of the flash should be 10 feet (80 ÷ 8), and the aperture set to f/11.
Of course, in the example given, 10 feet may not be the ideal shooting distance. If you need to be closer, then the output of the flash should be reduced using a diffuser, and in this instance, a diffuser is a really good thing because we really don’t want the fill-in light to be highly directional (creating its own set of shadows). If you need to be further away, then the illumination from the flash will naturally reduce, so the exposure adjustment (of one f-stop) can be revised according to judgement. Remember, for every doubling of the distance, the light intensity reduces by one quarter (known as the Inverse Square Law).
Painting with Light
Painting with flash is a technique of using multiple flash-gun fires with a long single exposure. The camera is secured in a fixed position (usually a tripod), and the flash is fired off-camera, and moved from place to place during the exposure (it doesn’t need to be connected to the camera). For example, this could be used to photograph a large, dimly lit (or even totally dark) space, with the flash being pointed at different areas and fired as many times as possible within the exposure time.

“Under the Stars” captured by James Jordan using a flash painting technique (handheld flash fired 6 times during 90-second exposure)
It’s a super hit-and-miss performance, but with a little luck on your side, it can produce stunning results and allow flash photography where a single flash would provide inadequate illumination.
Using Multiple Flashes
The final application of a simple flash-gun is to use more than one of them. If you thought there was a bit of guesswork required in using one flash correctly, then the use of multiple flashes starts to get rather tricky. There is also the practical problem of making them fire synchronously. This can be accomplished through the use of cables and two/three-way adapters or “slave units.” A slave is a compact device that connects to a flash and fires it when it detects a flash of light from another flash-gun. You will also need tripods or light stands to hold, position, and direct some of the extra flashes.
The aim of using a multiple flash unit setup is usually to provide a main light, fill-in, and possibly a backlight. It can be done, but the downside to multiple flash lighting is that it’s easy to get wrong and something best left to the diehard flash enthusiast.

“Another Year More Beautiful” captured by Brian Wolfe using multiple flashes
Becoming adept with flash photography takes experience gained from experimentation. The simple rules explained here will take away some of the guesswork and get you into the ballpark of accurately exposed and sympathetically lit shots.
About the Author:
Film camera collection. John A Burton is a film photographer.
Like This Article?
Don't Miss The Next One!
Join over 100,000 photographers of all experience levels who receive our free photography tips and articles to stay current:


enjoy reading about new techniques and new equipment
Excellent photographs, good tips but thinning with age
Always the best for outdoor photographers with lots of tips to improve your photography!
I am an amateur – I love landscapes and this magazine is enjoyable. I learn from articles written so I understand, tips I can use and the photos – wow. I would like to improve my photography to a higher level. This is a step in that direction.
Full of useful ideas and locations. Plus tips to improve your images. a GOOD FIELD GUIDE.
I love photography of nature… It is so inspirational!
Great pictures. interesting articles. I would recommend this to other people
The photographs are so beautiful and magnificent. I don’t know how they get the shots that they do but I love flipping through and looking at them.
I love photography! This magazine has it all! Gorgeous images, tricks and tools to take the best outside shot!
I hope I can do that picture! Very impress!
Very informative article, thank you very much
Always you have shared amazing photography tips. Thanks again.
Thank you for the tips. Very helpfull