Have you noticed those neon texts scattered along the street? Let’s learn how to make them from scratch using Photoshop and Illustrator. We will use basic tools such as Pen and Brush, combine them with layer style to get realistic neon text. Let’s begin!
This Photoshop tutorial is written exclusively for PSD Vault by Indonesian graphics designer Mohammad Jeprie.
The PSD file of this tutorial is available via the PSD Vault VIP members area.
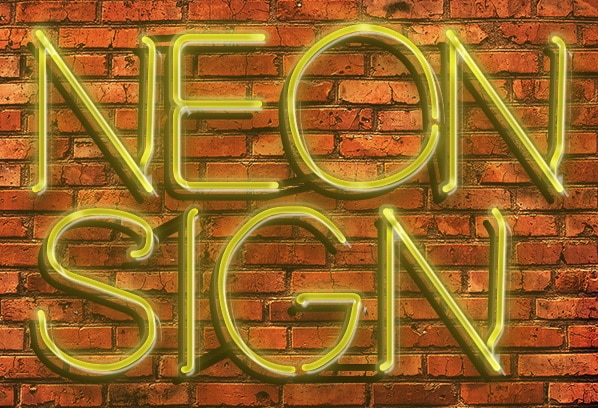
Preview
Here’s the neon text we are going to make in this tutorial.

PSD Vault VIP Membership
You can download the PSD File for this tutorial via the VIP Members Area for only $6.95/Month (or less)! You will not only get this PSD File, but also 300+ other PSD Files + Extra Goodies + Exclusive Photoshop tutorials there. Signup now and get exclusive!

Assets Used in This Tutorial
Here’s some resources used in this tutorial:
Step 1: Drawing Characters in Illustrator
We will start by drawing the letters in Illustrator. We choose Illustrator because it is very reliable in drawing shape. Open up Adobe Illustrator and then make a new file (Ctrl + N).

Step 2
Activate Type Tool. Make a text using standard font type such as Helvetica.

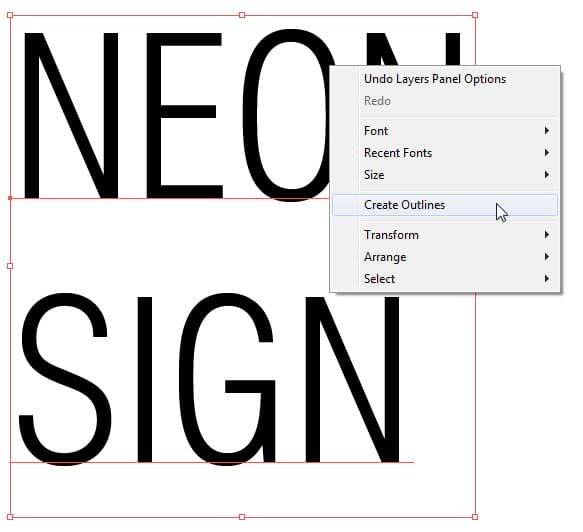
Step 3
We want to convert the text into shape. Right click the text and select Create Outlines. Right click again and select Ungroup.

Step 4
Select lower text and move it upward, make it closer to the other text.

Step 5
I also want the text to be wider by selecting it and then pull its transformation handle.

Step 6
Create new layer by clicking New Layer lower part of the Layers panel.

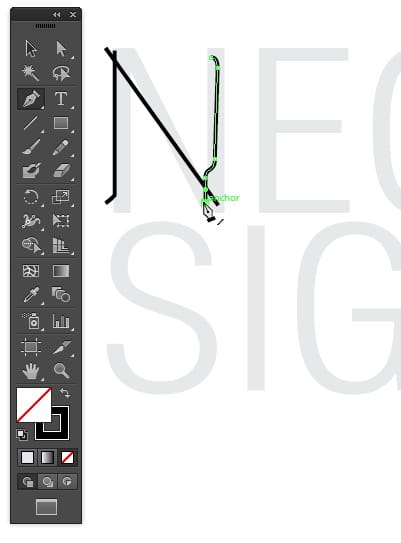
Step 7
Activate Pen Tool and then draw a line tracing the text.

Step 8
Keep on adding another line for the text.


Step 9
Select the text line we have made earlier. Increase its Stroke Weight.

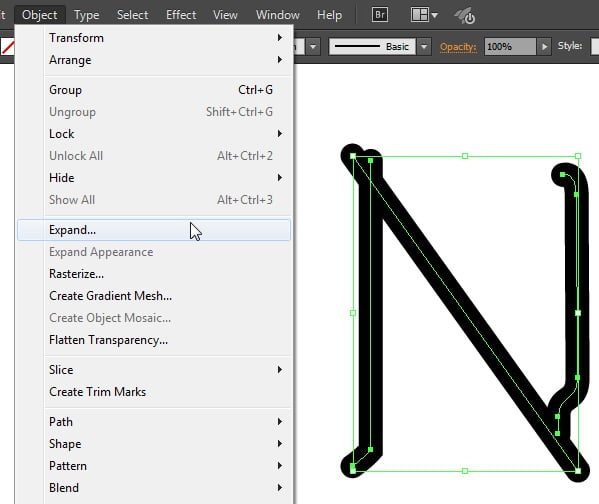
Step 10
Select all the line and then click Object > Expand to convert them into a shape. Click OK in the next dialog box.


Step 11
We want to combine all those shapes into one single shape. First, let’s change its stroke color to black and fill color to none.

Step 12
Select all the shapes and then click Unite icon in the Pathfinder panel. If you can’t find Pathfinder panel, open it from the Windows menu.


Step 13
Repeat this step to add another text. Here’s what I come up with. I suggest you to gather enough references on real neon text shape to come up with realistic shape.

Step 14: Export Text to Photoshop
Select all the shapes and then copy them into Clipboard by hitting Ctrl + C. Open up Photoshop and then make new file (Ctrl + N).


Step 15
Grab a nice wall photo for background of our neon text.

Step 16
In Photoshop, hit Ctrl + V to paste the letter shapes we have made earlier in Illustrator. Paste them as Layer Shapes.

Step 17
Double click its layer shape thumbnail in the Layers panel and change its color to yellow. If you want to use different text, you should do that here.

Step 18: Adding Effect
Double click and add Outer Glow to the text using following settings.


Step 19
Hit Ctrl + J to duplicate the text. Drag fx icon to the recycle bin icon to delete attached Later Styles.

Step 20
Double click the new duplicated text shape, apply Outer Glow and Drop Shadow.


Here’s the result. We haven’t seen the neon effect yet.

Step 21
Make new group layer and then change its name to improvement. Duplicate the text and place it in this group layer. Double click its layer to open up Layer Style dialog box. Set its Size in Outer Glow to larger size. Add bigger Drop Shadow too.


Step 22
Ctrl-click the text layer to make new selection based on its shape. Click Select > Modify > Contract and input 1 to reduce selection size by 1 pixel.

Step 23
Hit Right Arrow and Down Arrow a few times to move selection down.

Step 24
Make new layer and then fill selection with white. Click Edit > Fill.


Step 25
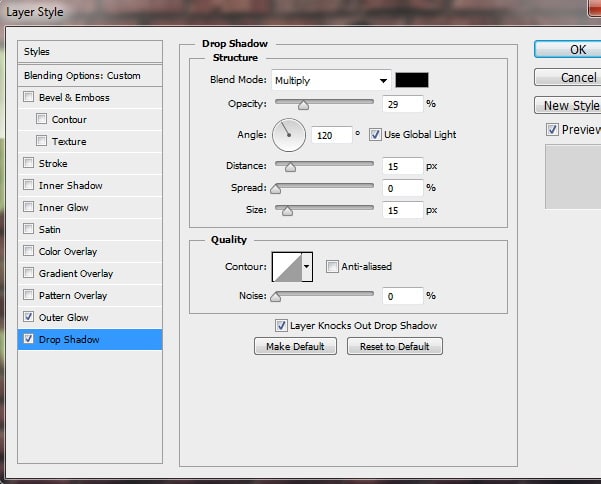
Duplicate text layer again and then place it inside the group layer. Double click and add another Outer Glow and Drop Shadow with following settings.


Step 26
Ctrl-click the text to make another selection based on its shape. Expand it 4 pixels by clicking Select > Modify > Expand and set unit to 4.
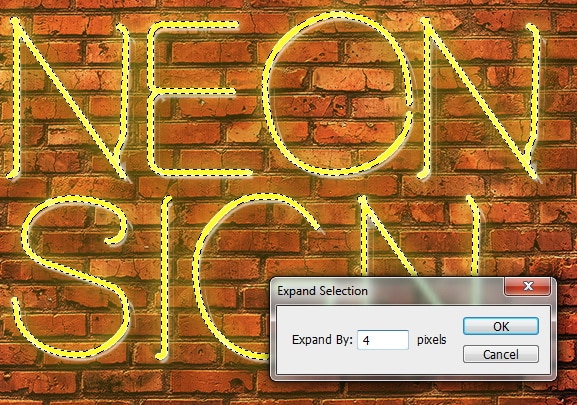

Step 27
Make new layer above the text and then fill selection with any color.

Step 28
Apply Inner Shadow and Inner Glow and then Outer Glow. Then, set layer’s Fill to 0%.


Step 29
Our text effect is now closer to reality, but still not enough. We will need to fix it again. We want to add dark area inside the text to add depth into its shape. Ctrl-click the text layer and then contract its size by 1 pixels.

Step 30
Make new layer on top and then fill selection with darker yellow color.

Step 31
Add layer mask into the layer and then paint with black to hide some of the dark pixel inside the text.

Step 32
Add new layer and then paint shadow inside the text to lift certain part of the text. Take a look at image below to see its sample.

Step 33
Add a rounded rectangle vector shape connecting each letter. Rotate it to make it appears natural.
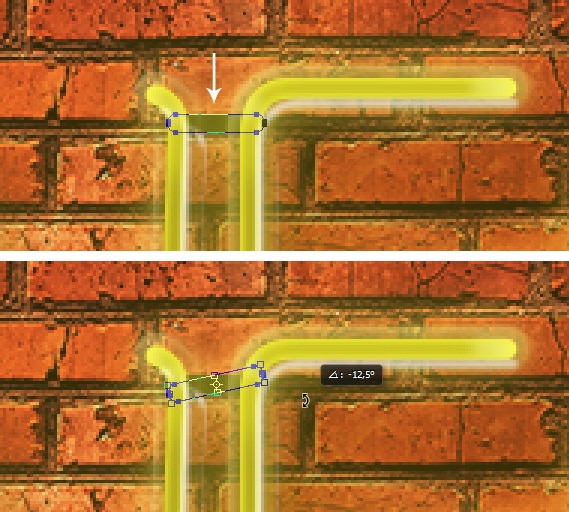
Step 34
Set its color to black and place it underneath all text layers.

Step 35
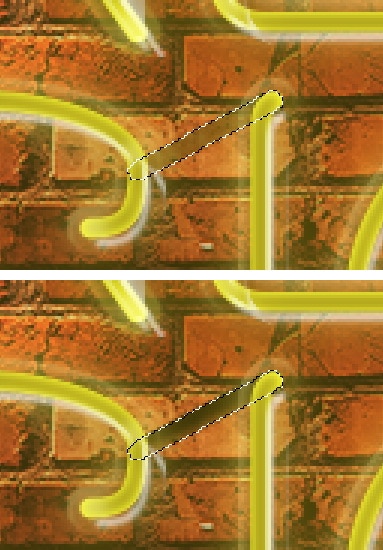
Keep on adding rounded rectangles connecting each character.

Step 36
Hit Ctrl + Enter to convert all the shape into a selection. Make new layer and then paint black on top of the shape.
Step 37
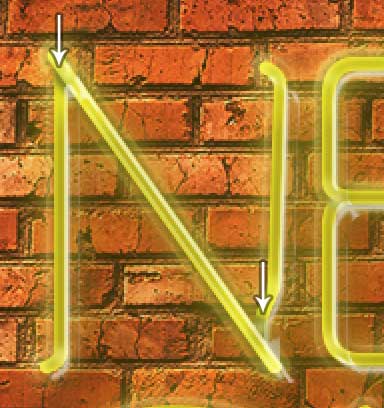
You will also need to add some lighting manually inside these character connector. Remember that they are behind a lamp, so some part of them need to be lit.

Step 38
Let’s add another shadow behind the text. Ctrl-click text and its connector to make new selection. Move selection down.

Step 39
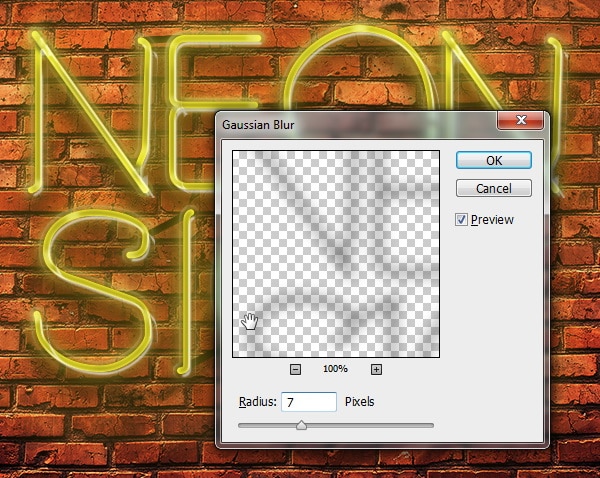
Make new layer behind the text. Fill selection with black. Soften it by applying Gaussian Blur filter (Filter > Blur > Gaussian Blur).

Step 40: Adding Cables
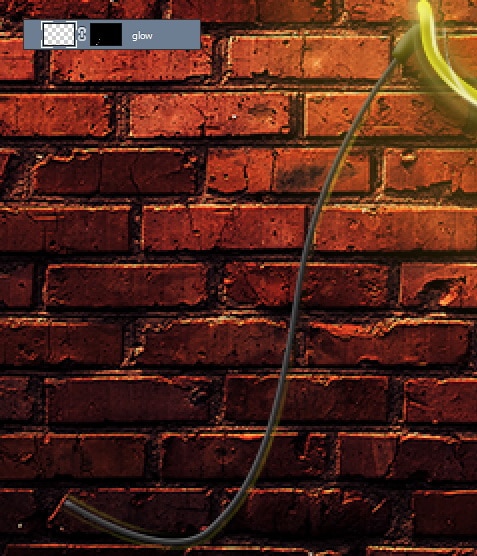
Activate Pen Tool and then draw tip of a cable as seen in the picture below. Set its color to black and put it behind the text.

Step 41
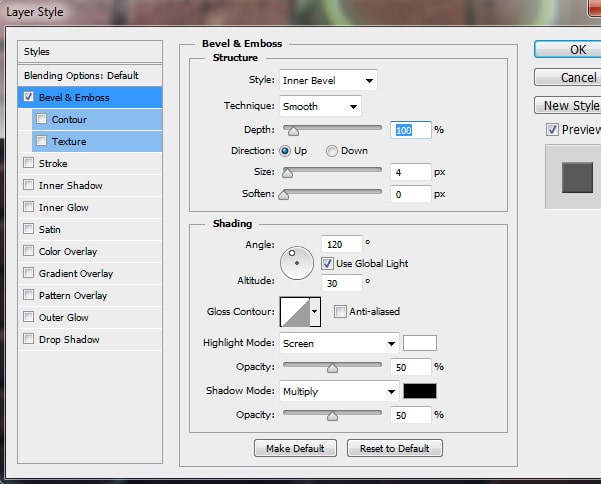
Double click its layer and then add Bevel & Emboss with these settings.

Step 42
Return to Illustrator, we are going to draw a cable. Start by drawing a simple curve using Pen Tool.

Step 43
Hit Object > Expand.


Step 44
Copy the path we have made in Illustrator and then paste it in Photoshop.

Step 45
You may need to rotate the shape layer until it match the scene.

Step 46
Double click and then change its cable color to dark grey.

Step 47
Add Bevel & Emboss to turn it into a 3D shape.
Step 48
Ctrl-click the cable to make new selection based on its shape. Click Select > Modify > Expand.

Step 49
Click Edit > Stroke. Apply 2 px stroke and then click OK.


Step 50
Delete some of the stroke with soft eraser. This will add highlight on the cable.
Step 51
Add another stroke to the cable. This time use lighter color and then soften it by applying Gaussian Blur filter.

Step 52
Here’s the result. You may want to manually add lighting on part of the cable that near the lamp.

Step 53
Draw another cable in the first character.

Step 54
Add cable connecting both top and bottom characters.

Step 55: Adding Holder
Finally, we have to add holder that keep the neon text on the wall. We will just simply draw two rectangles shape with similar color as the character and place it on top of the character.
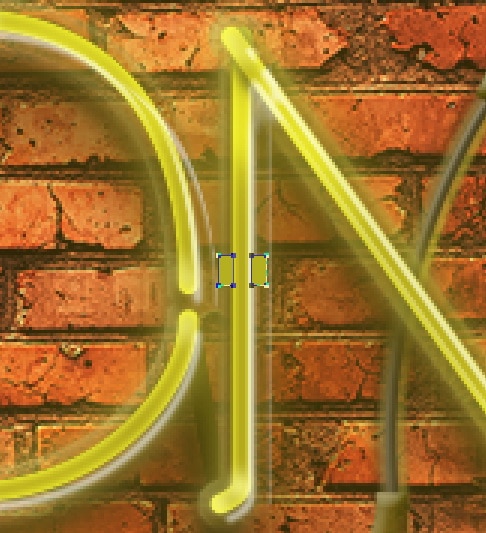
Step 56
Next, we can simply duplicate the shape and then move it to another position.


Step 57
Add layer style Bevel & Emboss, Inner Glow, and Outer Glow into the holder.


Step 58
Finally, to make it realistic we need to manually paint the holder shadow inside the text shape. This is very subtle but helps making the image more realistic.

Final Result
And finally, this is the result of our nero text effort. I hope you enjoy this lengthy tutorial and get a sense on how to draw realistic lighting using mainly Layer Style.


