In this tutorial, you'll learn how to create a shared file with remote control on another computer.
This tutorial is only for learning purpose. DO NOT use it for inflicting any damage to computers. I shall not be held responsible for anything you do with it. Use at your own risk!
In this tutorial, we're going to create a sharing folder on a distant computer. For example, to share the folder C:ClientsForms situated on the computer SERVER from the computer CLIENT with an opened session as John (user on the computer CLIENT). John is not authorized to open a session on the computer SERVER, he will have to use the account Administrator (and his password).
1. On the computer CLIENT, open Start Programm --> RUN

2. Write the UNC path for a root disk, letting the Administrative Shares of the computer SERVER get enabled. This step will let you login on the local computer with more privileges than John. Write: NAME.OF.THE.COMPUTER.YOU.WISH.TO.CONNECTA.KNOWN.SHARED.FOLDER$ (without the dots but with the $) [example: SERVERC$].

3. You need to connect with a administrative account.

4. Close the new window that will open with the Shared Folder. Your user name is now authenticated as Administrator on the remote computer.
5. Right click on the My Computer icon and select "Manage".

or you can call the command : compmgmt.msc on the "Run" feature.
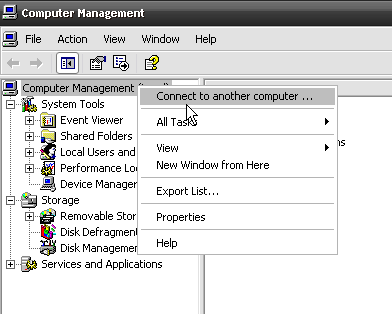
6. In the console Computer Management, right-click on Computer Management (local). Click on the command "Connect to another computer..."

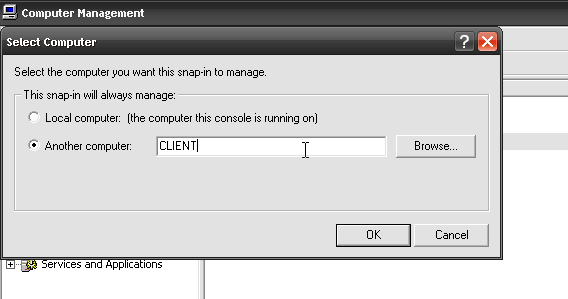
7. Type in either the name or the IP Address of the remote computer on witch you wish to create the shared folder.

8. Expand the new Computer Management (NAMEOFTHECOMPUTER).

9. Select New File Share...

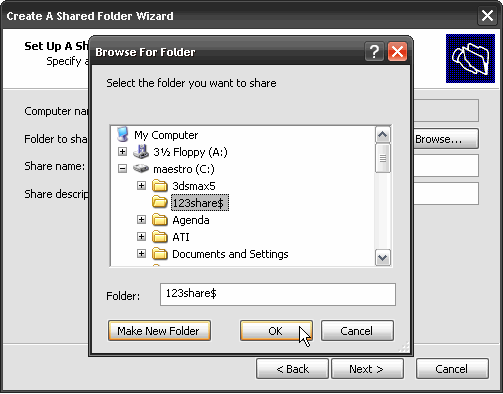
10. In the Wizard, Browse the Hard Drive and select the folder you wish to share on the network.


11. Select the authorizations you wish to grant for this folder (usually, it's the second option).

You're done!
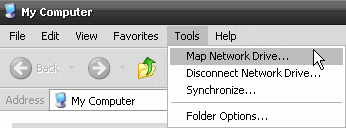
Now you can connect to the folder remotly created on SERVER from the same computer.


There ya go! It's in your Computer!
For more information, visit Afarm & Selao


