Publishing System Settings Logout Login Register
How to use the Mail Merge feature of Microsoft Word 2007
TutorialCommentsThe AuthorReport Tutorial
Tutorial Avatar
Rating
Add to Favorites
Posted on October 10th, 2008
33890 views
Microsoft Word
What is Mail Merge?

  Mail Merge is an automated feature of MS Word that enables you to merge a data source( a file that stores fields and records of information, like first name, last name, etc...) into a copy of a document to customize or personalize the document.

The Word 2007 Mail Merge toolbar looks as follows:


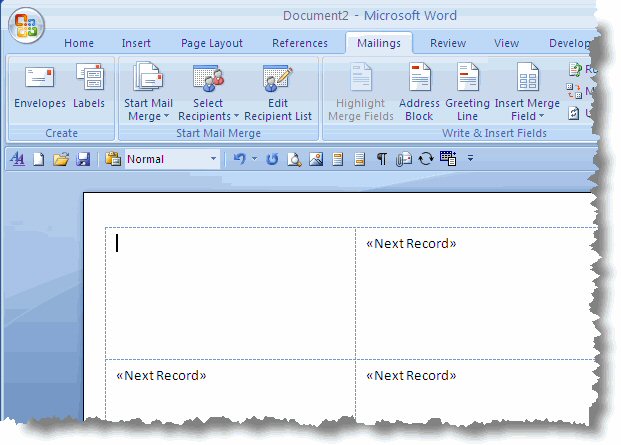
Mail Merge in Word is accomplished by the following steps:

Step 1: Set the data document type.
           The data document holds the text that repeats for all merged documents.
In the Mailings tab, click Start Mail Merge and select the document type.

Word offers the following types of documents :
  • Letters:
  • Use this option for composing and designing mass mailings for which only the recepient information varies.
                              This document type is also used when sending out a form letter or invoice.
  • E-mail Messages:
  • Using e-mail merge, multiple addresses in the To, Cc or Bcc fields can be avoided.
                               Each recepient can receive a personalized e-mail.
  • Envelopes:
  • Use this option for producing envelopes.
  • Labels:
  • Use this option to print sheets of labels. Many addresses can be printed on the same page, in different label formats.
  • Directory:
  • Use this option when printing a catalog or any other document that requires printing multiple records per page.

Step 2: Associate a data source with the document:
              In the Mailings tab, choose Select Recepients.

The various options are:
  • Use Existing List:
  • The Select Data Source dialog box appears when you choose this option. Navigate to and select a data source file.Typically, the data source is created in Excel or Access.
  • Type New List:
  • If you choose this, click Create, and then use the dialog box that appears to enter names and addresses. If you don't plan to use the entire database, you can use the Mail Merge Recepients dialog box, to select just the recepients you want. To open the dialog box, click Edit Recepient list in the Start Mail Merge group of the Mailings tab.
                                   

    The recepient list can be refined by Sort, Filter, Find Duplicates, Find Recepient and Validate addresses options.
                                   

  • Select from Outlook Contacts.

Step 3: Design your data document by combining ordinary document features with Word merge fields.
             Placeholders can be used when designing the data document for information pertaining to the intended recepient. When you are done, edit your document and substitute Merge Fields for the placeholders. To insert a merge field, position the insertion point where you want the field to appear. In the Mailings tab, choose Insert Merge Field in the Write & Insert Fields group. Click on the field you want to insert.Special sets of merge fields like Address Block and Greeting Line can be inserted to save time!


Step 4: Preview the finished document by testing to see how it looks with different data records.
             Click the Preview Results button in the Preview Results group of the Mailings tab. Navigation buttons help you to traverse through the records.

Step 5: Finish the process. Merge the data document with the data source, creating a printed result, a saved document or an e-mailed document.

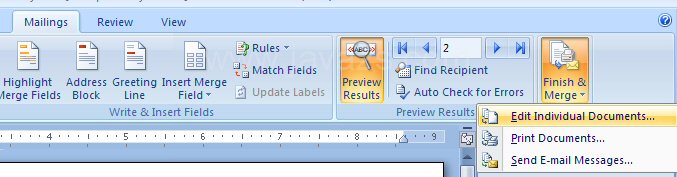
Your other option is to use the Mail Merge Wizard! In the Start Mail Merge group of the Mailings tab, click the Start Mail Merge button and choose Step by Step Mail Merge Wizard.
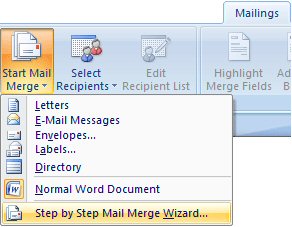

That's it!
 

Dig this tutorial?
Thank the author by sending him a few P2L credits!

Send


This author is too busy writing tutorials instead of writing a personal profile!
View Full Profile Add as Friend Send PM
Pixel2Life Home Advanced Search Search Tutorial Index Publish Tutorials Community Forums Web Hosting P2L On Facebook P2L On Twitter P2L Feeds Tutorial Index Publish Tutorials Community Forums Web Hosting P2L On Facebook P2L On Twitter P2L Feeds Pixel2life Homepage Submit a Tutorial Publish a Tutorial Join our Forums P2L Marketplace Advertise on P2L P2L Website Hosting Help and FAQ Topsites Link Exchange P2L RSS Feeds P2L Sitemap Contact Us Privacy Statement Legal P2L Facebook Fanpage Follow us on Twitter P2L Studios Portal P2L Website Hosting Back to Top