Although Arturia’s Jupiter 8V admittedly isn’t a free synth, it is arguably one of the best analogue emulations on the market. If you are thinking about investing in a soft synth you could do a lot worse than picking up a copy of the 8V.
Not only does the synth faithfully emulate the original Jupiter 8’s signature sound but its interface is also a great representation of the hardware. Arturia have not stopped there though, they have added some clever extensions of the original synth’s abilities allowing you to create sounds that just weren’t possible on the original instrument.
Obviously there are free synths out there that will do a similar job, but few do it as well as the Jupiter 8V and for what it does it’s really not too expensive. You can try a demo here and if you already own it you can try experimenting with the following techniques yourself. The Jupiter preset is available in the Play Pack. All the example audio is supplied so you can follow the tutorial without the synth.
Step 1
Let’s start by constructing a basic polyphonic pad sound. We’ll start with a simple, no frills sound, so that the changes we make later will really stand out.
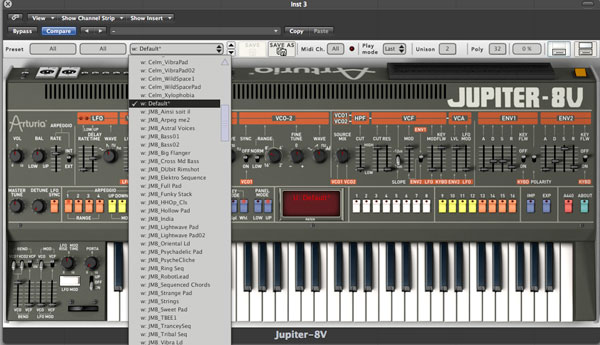
The best way to start constructing a sound in any synth is to use a default or initialized patch. This sort of patch often resets key parameters and also cancels any routing or modulation that may be taking place. This gives you a clear starting point to work from and generally makes programming your sounds easier.
Step 2
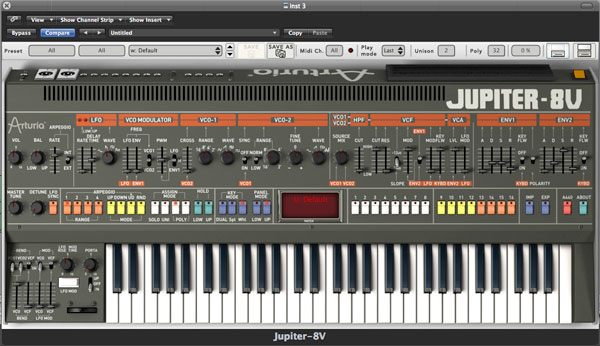
The default sound is already polyphonic in nature, so with some light editing, using the controls on the main panel, the patch can be easily transformed. With some simple tweaks to the filter and both envelopes the patch is softened up and is starting to resemble a pad or synth string.

I have used a simple three note chord to demonstrate the sound throughout this tutorial. Hopefully this will help to clearly demonstrate the changes to the sound.
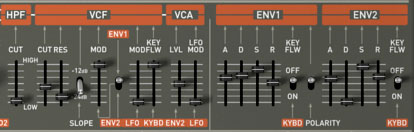
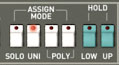
The filter envelope and amplitude envelope are both using slow attack and release settings, creating a swell effect and a nice smooth fade when the keys are released. A touch of resonance has been added and the voice mode has been changed from Poly to Unison to add some extra width and dimension.
Step 3
Before moving onto the more advanced sound manipulation tools within the Jupiter, one last adjustment is made in the main editing area to add some interest. The main LFO is used to create a delayed vibrato effect that occurs some time after the keys are held down.
This effect is achieved by modulating the pitch of both both VCOs (voltage controlled oscillators) with the instrument’s main LFO. I have used quite a fast sine wave based LFO in this instance to create a classic vibrato but as I didn’t want it to effect the sound from the outset, the delay function has been used to fade in the effect of the LFO as the sound develops.
I have used quite a long delay on this sound but of course you would probably want to use a much lower value for sounds such as bass or even lead. The delay in milliseconds is displayed as a tool tip as you move the fader, so accurate adjustments are easy.
Step 4
Up until this point in the creation of our sound only basic parameters and controls have been used. All of these controls are available on the original Jupiter 8, so in theory this sound could be reproduced exactly on the hardware version. Of course, the patches that can be created in this way sound great but if we want to truly tap into the full potential of the Jupiter 8V, we have to dig a little deeper and access the new advanced parameters.
By clicking on the expand button in the top right hand corner of the instrument’s interface you will reveal the extended controls. The main edit panel will fold down and the new section will be visible. The interface is obviously of a different style from here on out and it is heavily borrowed from Arturia’s new monster hardware synth ‘Origin’. The whole workflow and style of the processing here is actually pretty similar to Origin’s interface.

On inspection you will see this section is cut into three areas, using tabs across the top of the panel to access each one. The sections are ‘Presets, Modulations and Effects’. For this sound we will be focusing on part of the Modulations area and also dipping into the effects.

Step 5
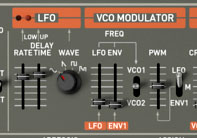
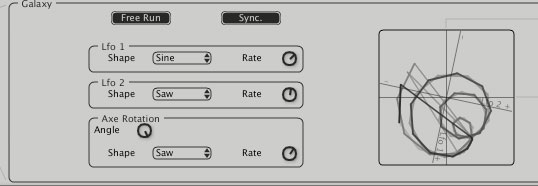
When clicking on the ‘Modulations’ tab you will be presented with a further 3 options, the one we are going to look at here is the ‘Galaxy’ section. The Galaxy modulator is basically 3 LFOs presented in an extremely innovative interface.
The three LFOs are listed along the left of the Galaxy interface, the first two (labelled LFO1 and LFO2) are for actually creating modulations and the third (labelled Axe rotation) is for rotating the axis of the X/Y display further to the right.
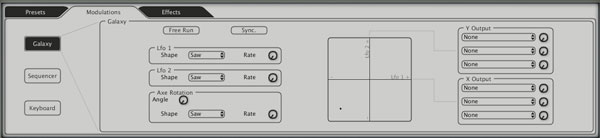
By default LFO 1 is represented by a moving cursor on the X axis of the X/Y display and LFO 2 on the Y axis. As soon as the LFOs are initiated and start moving you should see some pretty psychedelic patterns being created in the X/Y display, but until these movements are mapped to specific destination, you will hear no effect on the overall sound.
Step 6
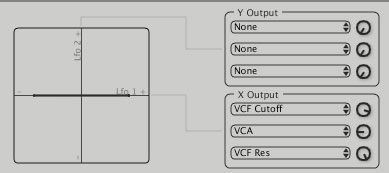
The first modulation to be mapped here is LFO1 to the filter cutoff and amp level. It is achieved by inputting the required destination and amount into the various menus within the ‘X Output’ box on the right of the galaxy’s interface. Of course the X/Y axis is currently static so only these parameters will be effected in this position.
It is important to realize that Galaxy is a very dynamic modulation environment and as soon as the X/Y axis angle is changed, so is the active LFO and parameter set. If you want your modulations to remain static, the trick is not to use any axis modulation. Of course, if you after a more random and chaotic effect then this won’t be a problem.
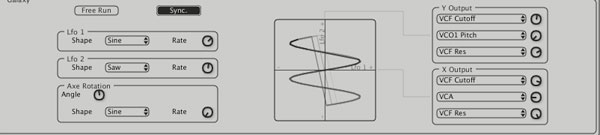
Once mapped you should be able to hear LFO1 effecting the filter cut off and amplitude level, creating a sort of tremolo effect. This can be synced to your host’s BPM by simply hitting the sync button. The timing will now be displayed as you change any of the LFO’s rate values.
Step 7
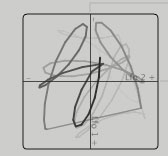
A second LFO is then employed using a different speed and waveform. This time a saw tooth waveform is used as opposed to a sine wave. The interaction between the two LFOs creates interesting new harmonics and the sound is instantly made much more complex.
Step 8
Next (if you feel you need it) you can add some axis rotation. Things can get a little crazy here, especially at high modulation rates, but these sounds can be great for synth effects and atmospheres.
I have added a saw wave LFO here rotating reasonably quickly. The effect is that further complexity and harmonics are added to the sound as we move closer to the area of noise! In some circumstances this can be really useful, but is maybe a little much if you are trying to create a patch to be used as an instrument.
Now you should see and hear the axis spinning, creating a switch between the LFOs in effect.
Step 9
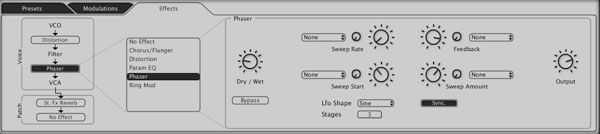
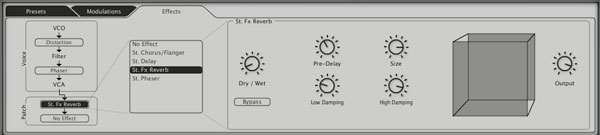
As a final touch, some effects are added to the sound. The effects can be accessed on the third tab in the extended parameters area. There are then several slots at various stages of the signal path where different processors can be inserted.
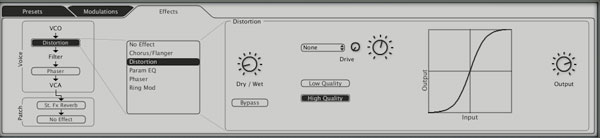
I have added some light distortion, a phaser and finally some reverb to open the sound up a bit. Obviously this patch doesn’t necessarily represent a sound that is going to be very useful in a project but more a demonstration of the Jupiter 8V’S extended abilities.