

Limiters are possibly the most simple dynamics processors there, with few controls and often simple metering. Saying this, I think it’s possible the humble limiter is often misunderstood, mistaken for a compressor or simply overlooked.
To try and clear things up, I thought it might be useful for me to show some examples of different limiters (some from DAWs and some commercial) in action. When it comes down to it, it’s all about using the correct intensity of treatment for the job. It also helps to have a few different flavors of limiter as some will offer features and functions others do not.
I’ve used a varied collection of plug-ins here to show that you should be able to achieve good results using pretty much any limiter and lets face it, it’s highly likely that most of us have a few to choose from in our collection.
Limiting versus Compression
Before we look at some audio examples of actual limiting its important that we clearly define how a limiter functions and in doing that hopefully clearly explain the difference between limiters and compressors.
Although limiters and compressors both work by applying gain reduction to attenuate (reduce) transients and dynamics, they do it in slightly different ways and it’s this difference that makes them suited to different situations.
A compressor uses a threshold control which lets the user decide where in the peak the gain reduction process starts, then a ratio control determines the amount the gain is reduced. This process is perfect for making the gap between low and high levels in your audio smaller and generally leveling the dynamic signature of your sounds. Compression is really at home treating vocals, drums and instruments that need some correction in their general dynamics.
Now limiters also use gain reduction and just to confuse you a little more, can often feature a threshold control but the main difference here is that the gain reduction occurring in a limiter is not decided by a ratio control but by an absolute output ceiling decided by the use. Basically this means you set the ‘limit’ and the level of the audio passing through the unit cannot go above this value.
Some limiters are stricter than others in this area, for instance some older analog limiters might of had a slightly relaxed approach to their upper limit, whereas modern mastering limiters are extremely precise and wont allow anything over their upper limit, once set. This type of limiter is known as a brick wall limiter but we’ll come to that later.
The amount of gain reduction that occurs in a limiter is set in one of two ways. Some limiters feature an input gain. With this method the sound is driven into the limiter and becomes denser and less dynamic as the gain reduction rises. Imagine water being forced into a pipe at higher and higher pressures, when the pressure reaches a critical point the pipe will become full, or in the case of the limiter you will have successfully turned your audio into meaningless noise!
Another way a limiter can decide the amount of gain reduction use is by utilizing a threshold control. Setting this will decide when the limiting kicks in and the limiter will then amplify the signal to be pushed against the upper output limit you have set.
Some limiters will often include a release control to fine tune the speed of its recovery. This is really useful for getting a transparent sound which is especially important when treating whole busses or during mastering. Occasionally you will see an attack parameter but this is less common.
Hopefully this helps differentiate between limiters and compressors and will help you to choose the right tool for the job in the future. Now lets look at four real world examples of limiting and the results we can achieve.
Safety Net — Transparent Limiting
A really simple use of a limiter is to create a sort of audio safety net on a specific channel. If you apply a lot of processing to a sound it can produce slightly erratic dynamics. Even some light compression can create these sorts of peaks and you will find that adding chorus, delay and reverb will only increase the chances of this occurring.
Of course in most cases we don’t want to lose the dynamics of a sound and try to keep the original feel of the audio intact but on the other hand, clips and overs are something we want to avoid at all costs. The answer is a limiter acting as a cap on the overall level of the channel. Placed last in the chain of processors a limiter with very subtle settings will ensure that no clipping occurs and will apply only small amounts of gain reduction when things get out of hand.
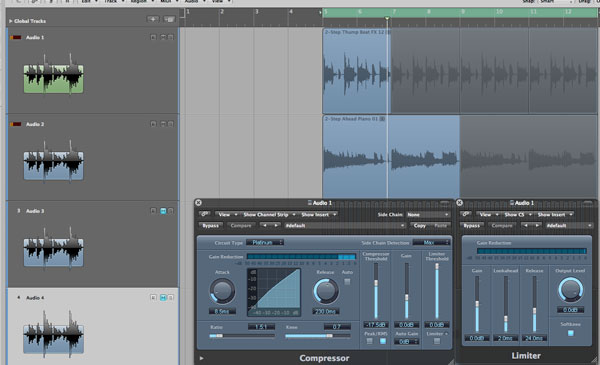
In this example a drum loop is playing with a electric piano riff, and after some compression was applied to the drum part it started to pump and was threatening to clip. The limiter stops this from happening without damaging the original dynamics of the loop. This kind of transparent treatment can be a lifesaver in a busy mix and gives you one less thing to worry about.
You can see that in this situation I have more or less matched the releases of the limiter to that of the compressor as it worked well here but of course this will be different every time and the release should be altered to match your program material.
Reducing Peaks
Taken a step further, limiters can be used to reduce the peaks of a sound, not just to stop clipping but to actually sculpt the sound’s dynamics. It’s really just a case of pushing the threshold of the limiter a little further. In doing this a dynamic sound with varying levels can be made denser and while everything is brought into line and the audio becomes denser, the illusion of the original dynamics can still be retained.
A really good example of this slightly more aggressive limiting being useful is when using side-chain compression. Often this sort of compression can add really enjoyable pumping effects but these can lead to issues in the mix, creating an uneven overall level.

By inserting a limiter directly after the side chain compressor the peaks can be cut off, bringing the lower level of the side chain signal up. You may think this would defeat the purpose of having varying levels but the feel of the side chain can be retained and your signal made a little more consistent and of course without the fear of any overs.
In this example I have used Fabfilters Pro-C compressor to create the side chain effect and a Sonnox limiter to reign things in a touch. You will notice you can still clearly hear the effect of the side chain.
Increasing Volume and Density in the Mix
Everyone loves a bit of volume but a mix would be a bit of a mess if every element was super loud. Not only would it give you a headache, but there would be no dynamics and therefore no definition. Saying that, there’s no harm in a few elements in your mix having a higher perceived volume than others, and this creates contrast and can actually work well as an effect.

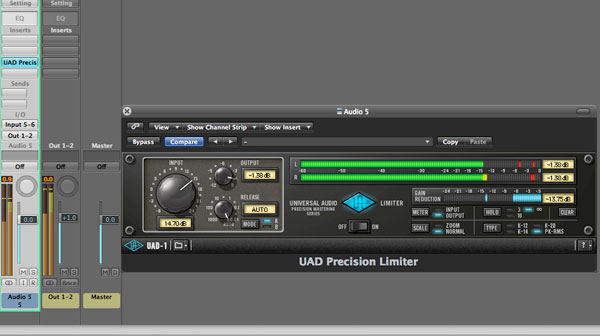
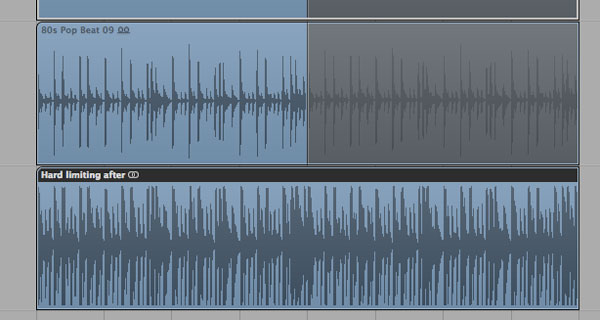
This technique does involve pushing your limiters pretty hard and in turn destroying some of your sound’s dynamics, so use it with caution and only on a few elements at a time. I’ve used a Universal audio precision limiter to treat a straight forward drum loop here and I’ve really pushed it hard so you can hear the effect. It’s actually a pretty exciting sound but it will become fatiguing to listen to after time and it may not gel 100% with other elements. Like anything else it’s a tool and there will be the right time and place for it.
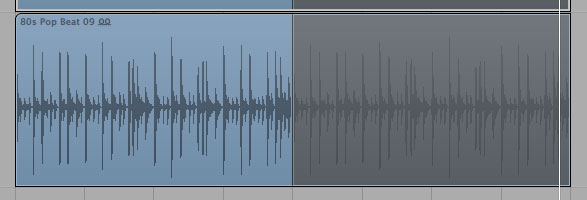
I have supplied shots of the before and after wave so you can see the effect the limiting is having on the dynamics. These sounds were actually peaking at the same level, believe it or not, but obviously the limiter has increased the sound’s average level a massive amount and therefore it’s volume.
Before
After
Limiters in Mastering
Limiters are often used for mastering to increase the perceived volume of an entire track. To achieve this, the limiter must be strapped across the master buss and really should be the last process you apply, bar perhaps dithering.

As in the previous example, this treatment will add considerable volume to your music but unlike the previous clip you really shouldn’t be pushing your limiter hard here. You are looking for total transparency and coloration of the sound should be avoided. When I first started mixing and mastering tracks someone told me that -3db was about the ceiling for gain reduction on your final mastering limiter and this seems to be a pretty good guideline, although some tracks call for a little more or a little less.
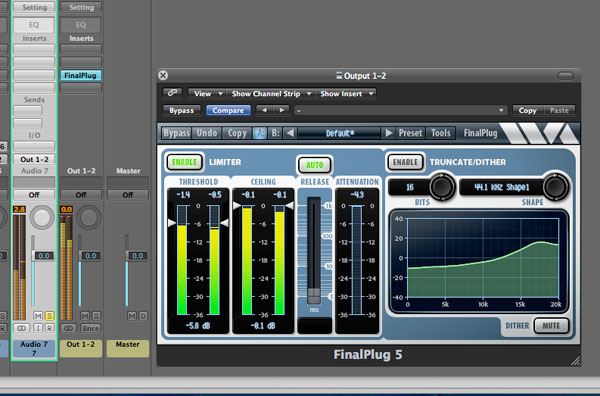
I have shown a clip of a track being treated with only a simple mastering limiter from Wavearts and you can see that the most gain reduction applied at any point was about -4db or so. This should increase the tracks volume without destroying its dynamics.


