")
Tutorial Level :- advanced illustrator tutorials
Techniques Used :- Live paint & Knife tool
Reference illustration :- Ella At Peace
STEP 1
Create and decide the Artwork you want to work on
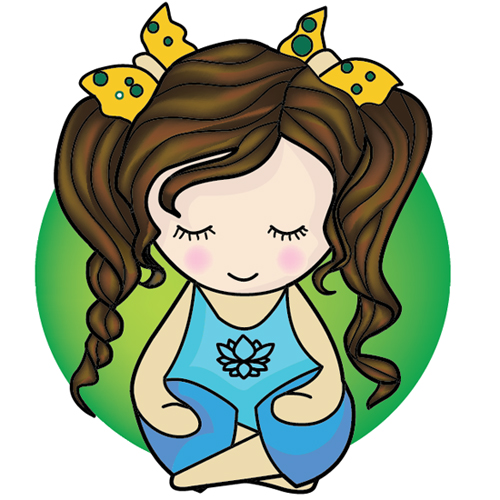
Since my aim here is just to share with you the process of coloring i will not be going much further in the details of drawing process but i will just elaborate my drawing a bit. I start by creating a sketch , then keeping it in front of me as a reference i turn to Flash . And start working with basic shapes circles and lines , here is a past tutorial on aivault which will show you how. After i am done i export the lines as illustrator 8 document . After opening it up in illustrator i have a clean crisp line which is exactly what i want. This little girl is part of a digital stamps series that i am creating for Aifactory Crafters community , her name is Ella and she is sitting in a yoga pose here 🙂 .
STEP 2
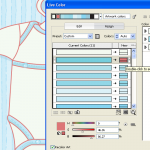
Choose Color Pallette
After I am done with the drawing I turn to color palette and decide on colors with a set of squares filled up with color tones for reference .
It is a good idea to convert your choice of colors into swatches if you are going to proceed with coloring using live paint.

In order to shift colors to swatches palette select a color and then from the tool bar drag and drop it into the swatches panel.

STEP 3
Coloring using palette
Once you have your color palette ready select your drawing which needs to be colored . you can easily navigate to next color by moving next arrow buttons on your keyboard. Select the color and then the paint bucket and start filling in the colors.

Keep on coloring selecting colors and filling spaces up, what fun!

After you are done filling in the basic flat fills you will now see a bounding box something similar to the one below . The whole drawing is at the moment one object , click on expand button you see on the top bar.

Right click and ungroup , this will break every section apart.

STEP 4
Shading
I love using mesh tool in my coloring it is a very handy and useful little shading tool , select a section and after selecting the mesh tool and your desired color click anywhere on the flat shaped area.

Continue with the shading wherever you require , more fun!!

Now i will be using another useful technique to give form to the body of the girl . I chose to start with the face click on the shape area and create and reserve a copy of it.

For her blushing cheeks create a circle with the same fill color as her face color . Select pink color and with mesh tool click anywhere in the middle of this circle.

Make a copy of it and place on both cheeks. simple hun?!

Now with the reserved face shape copy , using the knife tool cut out across the face somewhat like below

Discard the middle section and bring the cutout shape over Ella’s face. Give it a slightly darker tone .

you can further adjust it by reducing the transparency level as well.

Now for the shape and form of the body i will repeat the same step

Another way is just to choose the section , thanks to paint bucket and expand , we can easily select each section and slice it where it is and shade it.

I placed a green circle behind Ella and clicked in the middle while picking up a lighter tone . Below you will see i played with it a bit further and drew a flower on her shirt and clicked a few more times with mesh tool using another tone for hair. And i am done! Ella is all done , sweet and cute , i love her!
Ella is available for download through Aifactory store you can find her HERE

 Printables, graphics, backgrounds, vectors, illustrations, fonts, and design elements given on this site are for personal use only. You may not alter them or redistribute them for free or monetary gain without written consent from the author, Asma Murad. If you want to share these resources with others, please share the link to the blog post. Teachers/educators: You may share these with your classes and colleagues as long as they are not edited in any way, Cliparts & Resources shared for free are not to be used as printables for sale.
Related posts:
 Tutorial How to Create a Cute Hippo Character in Vector Character Tutorial Illustrator
 How to Create a Vector Diamond Necklace and a Chain
 How to Draw a Cartoon Duck , Character illustration
 illustrator Tutorials : How to create a Television Icon
 illustrator technique : How to Coloring Artwork Using Live Color advanced illustrator tutorials
 38 Step By Step illustration techniques and Adobe Illustrator Tutorials to Help you Become a Vector Expert
