

How to Remove the Desktop Background Picture Location History in Windows 7 and Windows 8
Information
EXAMPLE: Desktop Background Picture Location
OPTION ONETo Reset Picture Location to Default using a REG Download
NOTE: This option will reset the picture location drop down menu list back to only having the default folders removing any folders that you have added (Option Three below) by browsing to them.1. Click on the Download button below to download the file below.Reset_Desktop_Background_Picture_Location_History.reg2. Save the .reg file to your desktop.
3. Double click/tap on the downloaded .reg file to merge it.
4. Click/tap on Run, Yes (UAC), Yes, and OK when prompted.
5. When finished, you can delete the downloaded .reg file if you like.
6. Close and reopen Desktop Background in Windows 7 or Windows 8 to see the change.
OPTION TWOReset or Remove a Picture Location Through Registry
NOTE: This option will allow you to either manually reset the picture location drop down menu list back to only having the default folders removing any folders that you have added (Option Three below) by browsing to them, or only remove one or more folders listed in the picture location drop down menu list.1. Press the Windows + R keys to open the Run dialog, type regedit, and press Enter.
2. If prompted by UAC, then click/tap on Yes to approve or type in the administrator's password.
3. In regedit, navigate to the location below: (see screenshot below)HKEY_CURRENT_USER\Software\Microsoft\Windows\CurrentVersion\Explorer\Wallpapers\Images4. To Reset Desktop Background Picture Location HistoryA) In the left pane of regedit, right click on Images, and click/tap on Delete. (see screenshot above)5. To Remove a Listed Folder in Picture Location
NOTE: Images is restored automatically the first time that you add (Option Three below) a folder by browsing to.
B) Click/tap on Yes to confirm deletion. (see screenshot below)C) Go to step 6.A) In the right pane of Images, right click on one of the listed ID# (0-9) that you want to remove, and click/tap on Delete. (see screenshot below)6. Close regedit.
TipThe top 4 Windows Desktop Backgrounds, Pictures Library, Top Rated Photos, and Solid Colors default folders will not be included in the listed ID#'s.
The folders that you added will be listed in order under the default ones above with the same ID# order listed in the registry.B) Click/tap on Yes to confirm deletion. (see screenshot below)
NOTE: If you made a mistake and deleted the wrong picture location folder, then you can add it back by just browsing to and selecting it in Option Three below.C) Repeat steps 6A/B if you wish to removed another added picture location folder.
7. Close and reopen Desktop Background in Windows 7 or Windows 8 to see the change.
OPTION THREEAdd a Picture Location Through Desktop Background
1. Open Desktop Background in Windows 7 or Windows 8 in Personalization.That's it,
2. To the right of Picture location, click on the Browse button. (see screenshot below)3. Navigate to and select the folder you want to be added to the picture location history, and click/tap on OK. (see screenshot below)4. It will be listed in the Picture location drop down arrow box.
Shawn
Related Tutorials
- How to Change the Windows 7 Desktop Background
- How to Change Your Desktop Background and Slide Show in Windows 8 and Windows 8.1
- How to Create a Change "Desktop Background" Shortcut in Vista and Windows 7
- How to Allow or Prevent Changing Desktop Background in Vista, Windows 7, and Windows 8
- How to Specify a Desktop Background for Users in Vista, Windows 7, and Windows 8
Desktop Background - Remove Picture Location History
-
New #1
AWESOME Shawn! That is another great tutorial, That bugs me seeing those old ones there. You're the Man.
-
-
-
-
-
New #6
good job but do you know how to change the: how the pointer looks history
post a tutorial if you do
thanks Jack
-
New #7
Hello Jack,
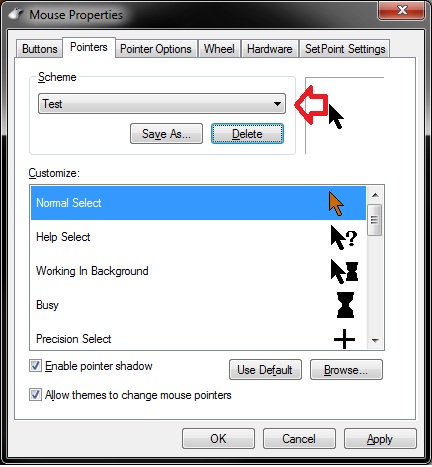
You should be able to just select a "Mouse Pointer" scheme that you had saved, and delete it to remove it from the list. You cannot delete the default schemes though.
Hope this helps,
Shawn
-
New #8
Can no longer add folder
So I know how to do whats described, yet somehow (in the last two weeks) I have lost the ability to add folders.
I Browse to one(any folder anywhere) and select it, and it doesn't work. Nothing happens, the folder is not added?? Any ideas?
How can I make it work again?
or
How can I manually(regedit) add in a new folder location? ++
Full add min rights etc.
-
New #9
Hello Debellator, and welcome to Seven Forums.
Interesting. Does the folder that you selected contain any images in it? Could you post a few screenshots of what you are seeing instead to see if something may stand out?

Desktop Background - Remove Picture Location History
How to Remove the Desktop Background Picture Location History in Windows 7 and Windows 8Published by Brink


 Quote
Quote
Related Discussions