Tutorial on Installing WordPress 3.0 from start to finish
WordPress requires a MySQL database in order to run. Prior to installation of WordPress, you need to create a database on your webhost.
If your webhost has cpanel administration interface, then you can create the MySQL database through the MySQL Database icon.
1. Log into your webhost’s cpanel
2. Click on “MySQL Databases” …
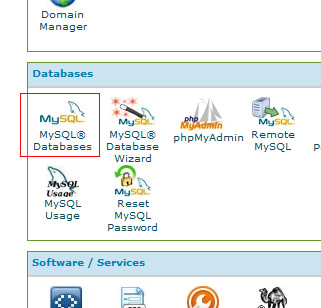
mysql databases in cpanel
3. In the “New Database” field, give your database a name. Here we give type in “wp” as part of the name.

create database name
In some shared webhosts, that name is prefixed with your webhost username. So the actual database name in this case is “username_wp”.
4. Click the “Create Database” button above. You should get a message saying “Added the database username_wp”.
5. Go back to “MySQL Database” page so that you can create the database user for this database. In the “Add New User” section, type in an arbitrary database username which may be prefixed by your webhost’s username.
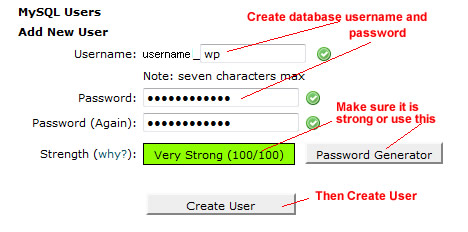
create database user
For convenience, we give our username the same name as our database name. So are “database username” will also be “username_wp”.
6. Type in an arbitrary password for this database user. Make sure it is a strong password. Or you can click “Password Generator” to have a random one generated for you. Write this password down in a safe location. This is the password for the database user to access the database. For short, we will just call it the “database password”. WordPress will need this later to access the database.
7. Then click “Create User” button. You should see a message saying that user was created with the password.
8. Go back to the “MySQL Database” page so that you can assign this user to the database.
9. In the “Add User To Database” section, select the user “username_wp” and select the database “username_wp”.
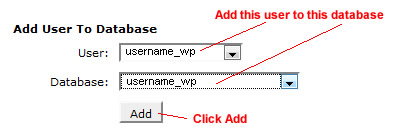
add user to database
10. Click the Add button. You should get the “Manage User Privileges” screen.
11. Checkmark “All privileges” so that all the checkmarks are checked.
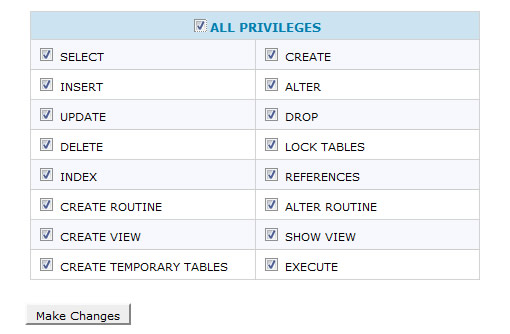
set all database privileges
12. Click “Make Changes” button. This will give the database user full access to the database. You should see a message saying the user is added to the database.
Now your database is set up and ready for WordPress. The three pieces of information necessary for WordPress to access this database are …
a) The database name. In our case it is “username_wp”
b) The database user. In our case it is also “username_wp”.
c) The password: This was what you had copied down.
Uploading the WordPress Files
Now we are ready to upload the WordPress files.
13. Download the zip file from wordpress.org to your local computer.
At the time of this writing the latest version is WordPress 3.0.3, so the file that got downloaded is wordpress-3.0.3.zip
14. Using an unzip utility, uncompress that zip file and you will get a folder named “wordpress” with contents that looks like this …
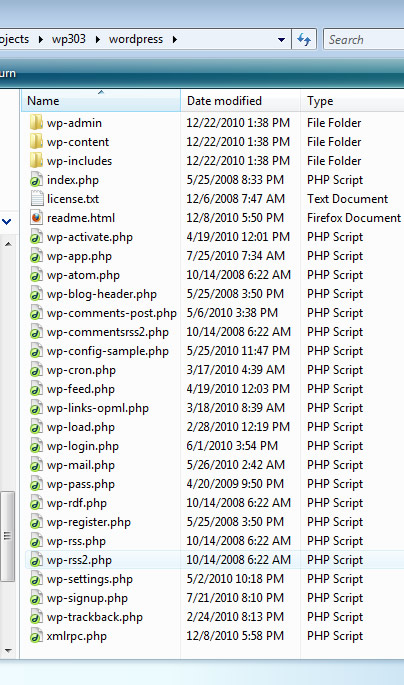
wordpress installed files
15. Upload the contents of the folder (but not the folder itself) up to your webhost at the home (or root) directory where you want your site to be installed.
Creating the WordPress Configuration File Automatically
Now we are ready to install WordPress. This part is what WordPress means when it says “5 minute install”. But note that we had to perform the above 15 steps in order to get to this point.
16. In your browser, navigate to the home directory of your site. You should get a page that looks like this…

Automatically create config file
We got this above page, because we do not have a WordPress config file set up. As mentioned in the displayed message, the more reliable way is to create the wp-config.php manually by copying the wp-config-sample.php file (see later section).
However, for now we first try to see if the WordPress setup can create this config file for us automatically. Click the “Create a Configuration File” button as shown above.
17. Now we get the following page.
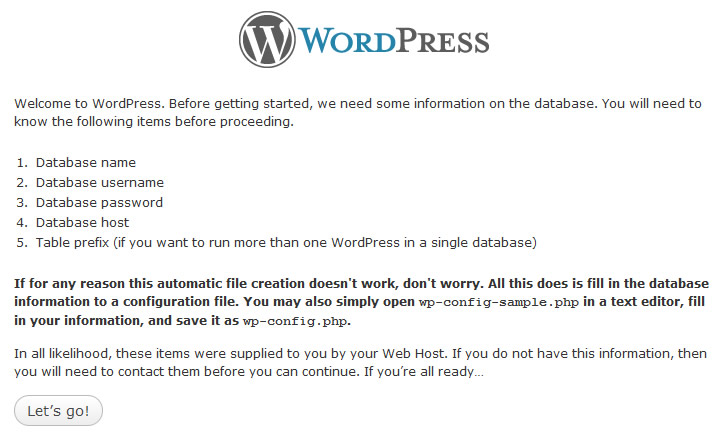
wordpress go
Click the “Let’s go” button.
18. Enter the database configuration values asked in the following screen …
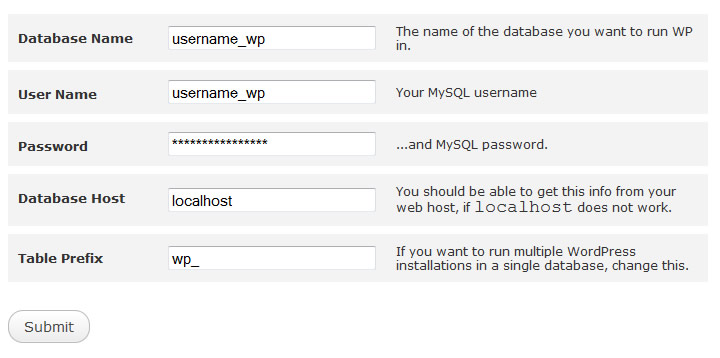
wordpress database configuration values
The first three fields is the database name, username, and password that we had used to set up for our database. See step 12 above.
The database host is typically “localhost” which means that your database is on the same server as the your web files. In most webhost, this is the case. But in some, the database may be on a differently named server. So in those cases, you would put in the server name of where the database resides. Try “localhost” first. And if that doesn’t work, ask your webhost.
The table prefix is the prefix that WordPress will create the wordpress database tables with. Typically, just leave it as they have it as “wp_”. This means that all your wordpress tables in the database will start with “wp_”.
17. Click the Submit button. And if you get the following page, that means that the install was able to create the wp-config.php file for you and is able to connect successfully to your database. If not, then you may have to create the wp-config.php file manually (see below section on “Creating WordPress Configuration File Manually”) or check your database configuration values.
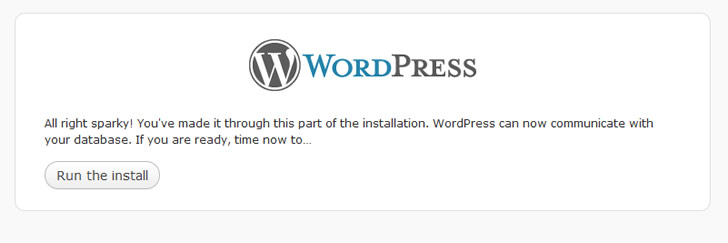
run wordpress install
Running the WordPress Install
18. Click the “Run the install” button as shown in the above screenshot.
19. You should now see the Welcome installation page.
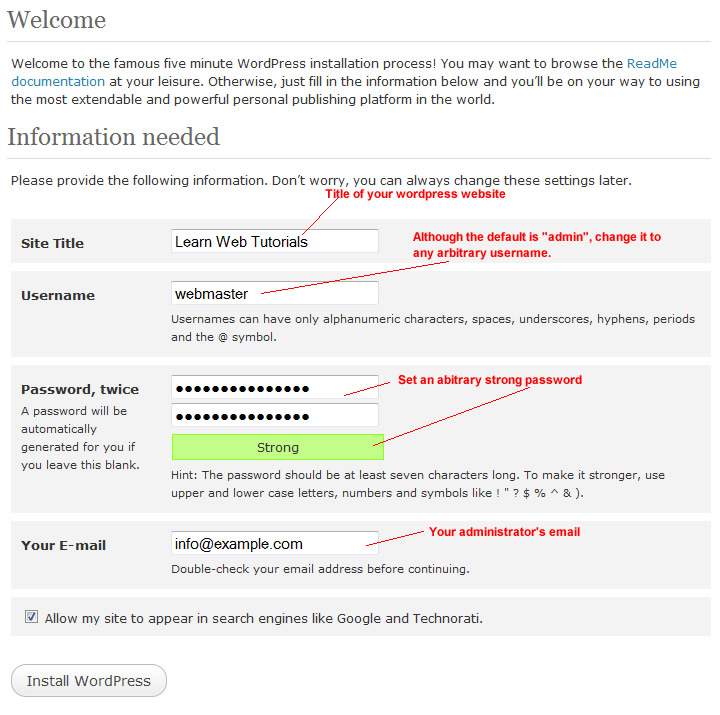
Wordpress admin settings
20. In the above screen, enter the title of your Wordpess website.
21. Although “admin” is the default value of the username, you should change it to something else. For security reasons, you do not want to use WordPress default “admin” username. This will be the username that would be used to log into the WordPress administration control panel to type blogs etc. Hackers using brute force method to try to gain access will start by using “admin” as the username. By not using the default “admin” as the username, you are making your site more secure.
22. Come up with an arbitrary strong password.
23. And type in the administrator’s email address. This is the email that WordPress will send notifications to about moderation of comments and other such things.
24. Checkmark whether you want the site to be found by Google and other engines or not. Usually you want this checkmarked.
25. Click “Install WordPress” button. You should get a message saying “Success!”
26. Click the “Login” button to test your login using the administrator’s username and password set in steps 21 and 22.
You can always get to the WordPress login page by enter your domain name followed by /wp-admin
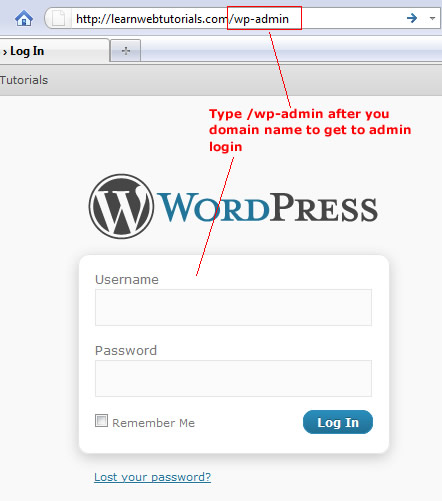
wordpress admin login
27. If you go to the “front-end” of your site, you should get something like this…

default wordpress site
This is the default WordPress theme. And it has one sample post and one sample comment created for you (which you can delete in the WordPress admin). In the “Meta” section, you see that you have a link called “Log in” to log into the WordPress administration backend.
Creating WordPress Configuration File Manually
In the event that the automatic configuration file creation was not successful, you can fall back and use the manual method of creating the WordPress configuration file.
In the WordPress file set, find the file wp-config-sample.php. Make a copy and call it wp-config.php. The wp-config.php will be the actual WordPress configuration file that you will upload to the server.
In the wp-config.php, input your database connection access information as shown by making the following changes …
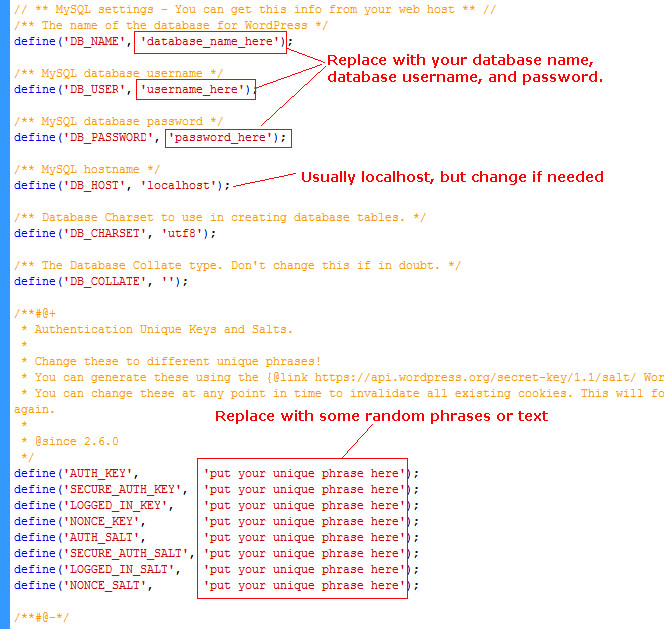
manual wordpress configuration
In the unique keys and salts section, you can replace the phrase with anything you like. You do not have to remember them. If you want to have these be randomly generated, you can go to https://api.wordpress.org/secret-key/1.1/salt/
where they will generate something random for you to copy and paste here.
Save this file and upload to the root of your WordPress installation on the server.


