This post was originally published in 2011
The tips and techniques explained may be outdated.
The skull and crossed pistons mark is a popular adaption of the tradition skull and crossbones symbol and is commonly seen in motorcycle culture, amongst other. Follow this Adobe Illustrator tutorial to create your own underground skull & crossed pistons graphic. We’ll start with a simple sketch, then build up the detail using a range of linework and vector shapes.
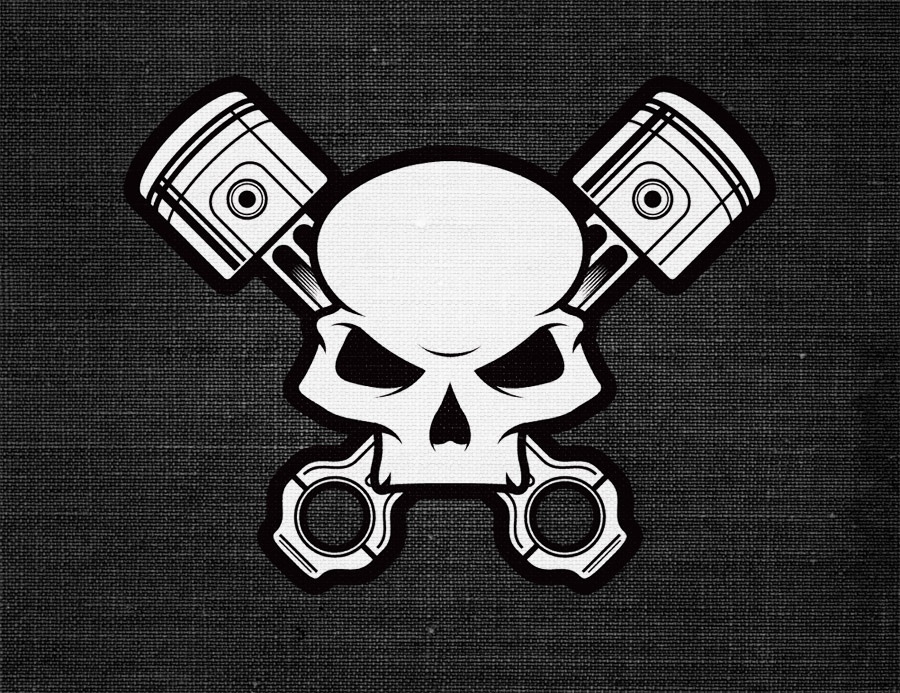
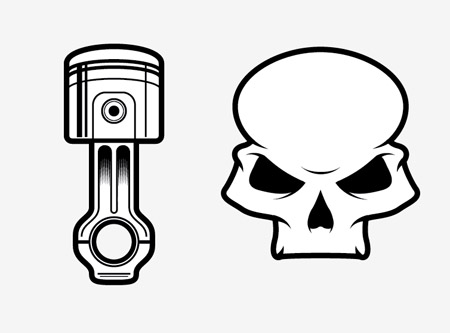
Here’s the graphic I’ve put together for this tutorial. The skull and pistons are both made up of simple linework, but with a couple of simple techniques they can really be brought to life. The final illustration would look perfect as a badge or emblem on a motorcycle helmet or the tank of a Harley.
View full size skull & crossed pistons illustration
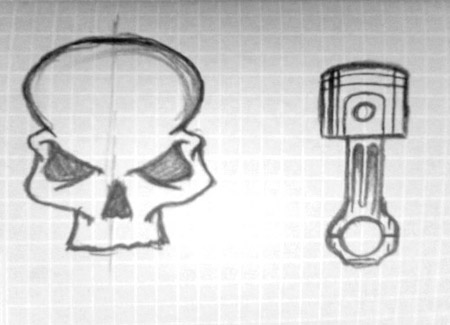
The illustration begins with a sketch with pencil and paper. Draw a centre line and pay close attention to the details of one side of the skull as this can be reflected in the digital stages. Both the skull and piston sketches will be used as a base for the vector illustration.
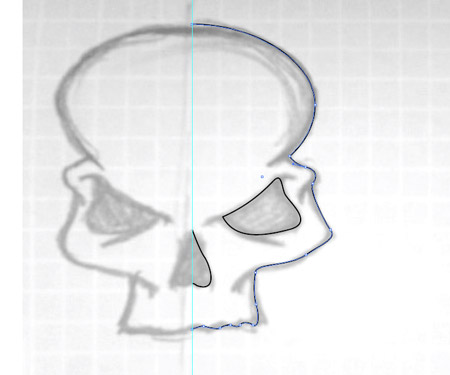
Place the scanned or photographed sketch in Illustrator and reduce the opacity. Press CMD+2 to lock it into place, then begin tracing the outline of one half and the facial features with the pen tool.
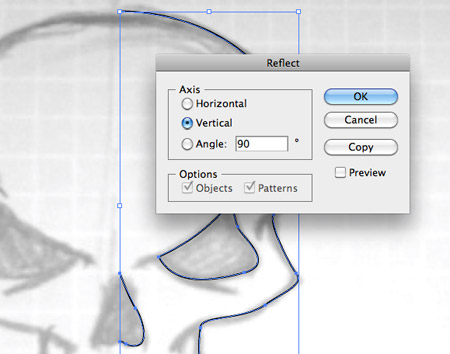
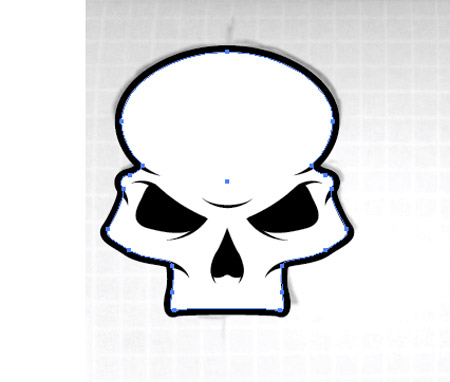
Select all the linework that makes up the first half, copy (CMD+C) and paste in front (CMD+F), then go to Object > Transform > Reflect to flip the design for the opposite side. Select the open point and press CMD+J to join the linework together to form complete shapes.
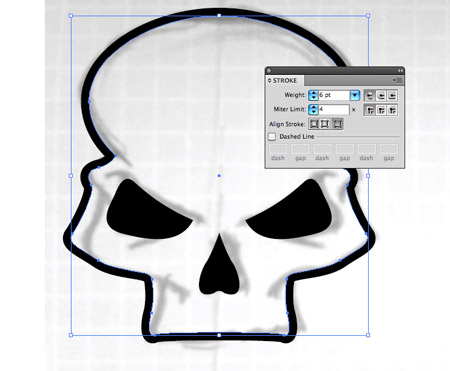
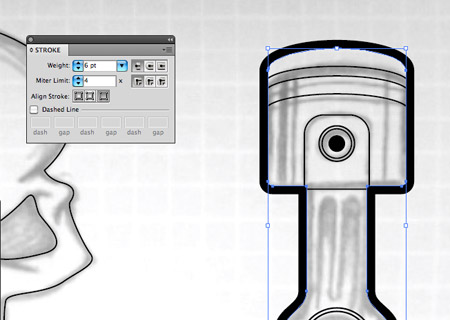
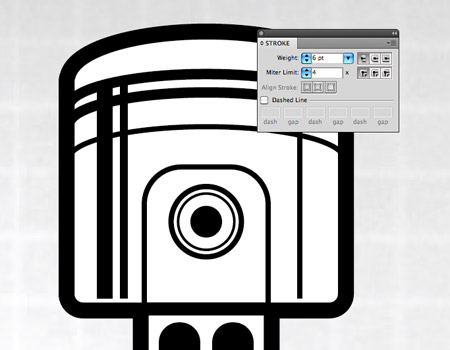
Increase the stroke weight to around 6pt and align it to the outside using the small icons. Switch the stroke/fill settings for the eyes and nose to fill them with black.
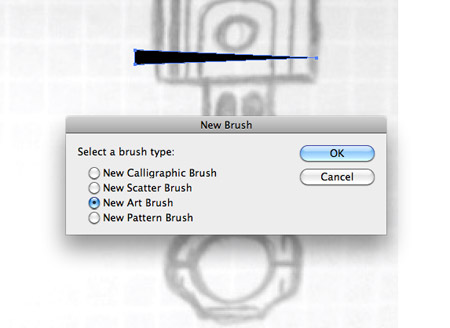
Elsewhere on the artboard draw a triangle. Stretch out the peak to create a long and thin shape. Press the ‘new’ icon at the bottom of the Brushes palette, then select the New Art Brush option. Make sure the arrow in the preview flows in the right direction then press OK.
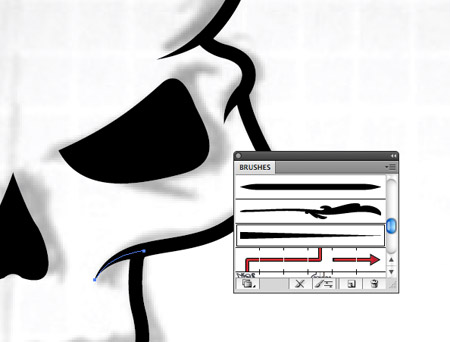
Draw short lines with the pen tool and add this newly created brush to the stroke. Reduce the stroke weight if necessary to scale down the brush size, then carefully position the paths so they flow seamlessly from the main outline.
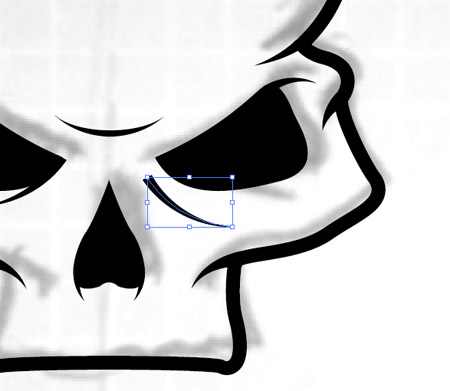
Add these short lines in key areas around the skull to give the impression of an inked appearance. This technique is one of those little touches that can really transform an illustration.
Select the main outline, copy (CMD+C) then paste behind (CMD+B). Clear out the stroke colour and give it a white fill to give the illustration a solid background. Group all the elements together.
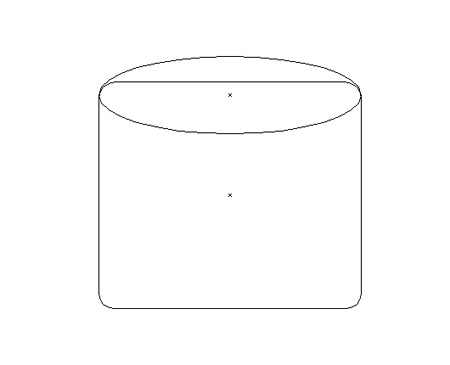
That’s the skull complete, let’s work on the piston. Draw a rounded rectangle and an oval to generate the basic shape. Toggle outline mode (CMD+Y) to accurately align the two then merge them with the Pathfinder palette.
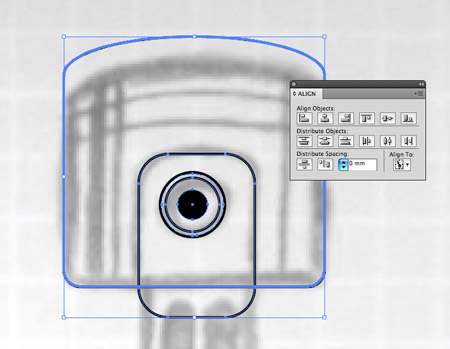
Use a range of basic shapes from rectangles to circles to fill out the detail of the piston. Select all the object then click the main outline again to make this the key object. Align the items vertically with the Align palette.
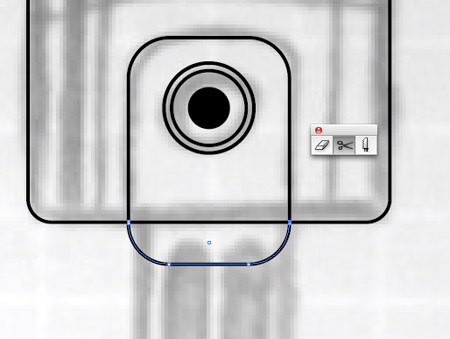
Select the Scissors tool and clip the paths where the inner rectangle extends beyond the main outline, then delete out this unwanted linework.
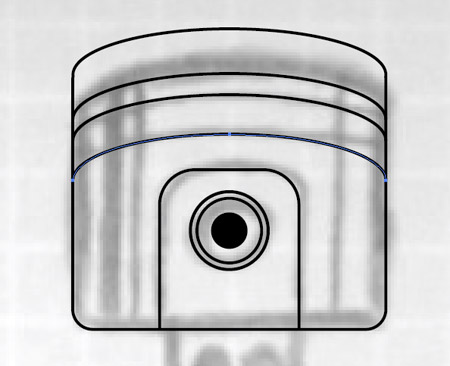
Select the upper most segment of the path with the Direct Selection Tool and make a copy. Paste in a few duplicates of this line and position them within the piston.

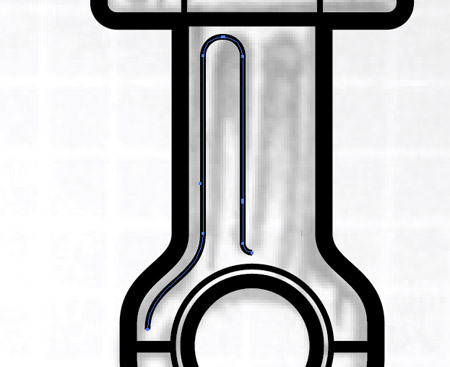
Use the Pen tool to draw a flowing curved line. Hold Shift while dragging out the bezier handles to keep everything accurately aligned.
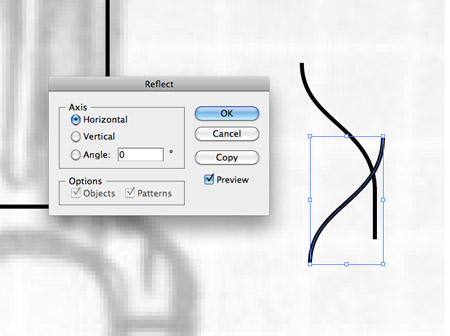
Copy and paste a duplicate of the line then flip it Horizontally with the Reflect option from the Transform menu.
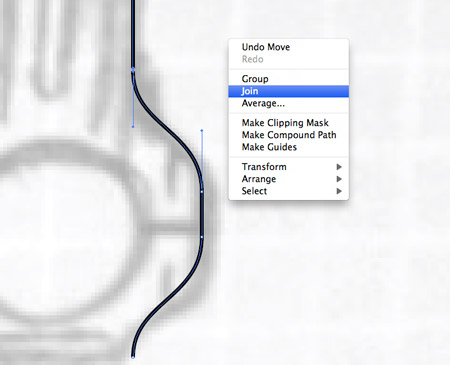
Select and join the two open ends, then extend the vertical line to the piston head, clip the line of the rectangle with the Scissors tool and join everything to make a complete outline.
The paths that make up the right hand side of the piston can be duplicated and flipped onto the left, then all the open points joined together.
Select the outlining path and give it a 6pt stroke weight with the stroke aligned to the outside.
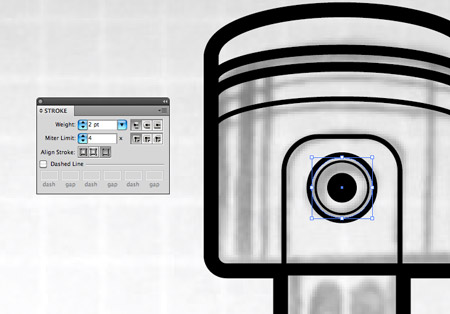
Adjust the stroke weights of the inner detail linework to add variation to the illustration. Use weights of 1pt, 2pt and 3pt for different elements.
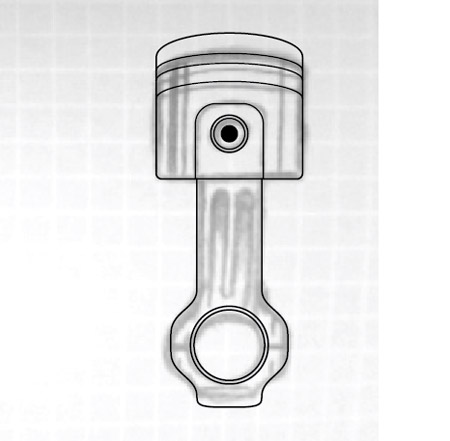
Use a long, thin rounded rectangle with max corner radius as a base for the detail on the piston shaft. Delete out certain points with the Direct Selection tool and extend them with the pen tool.
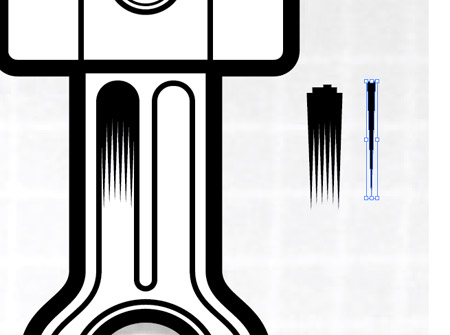
Duplicate a series of triangles and position them together to provide some basic shading to the piston shaft.
A couple of simple lines of various thicknesses on the piston head can help give the appearance of a chrome or shiny finish.
Duplicate the outline and send it to the back as a white background then group all the elements. We now have our complete piston and skull illustrations, let’s combine them!
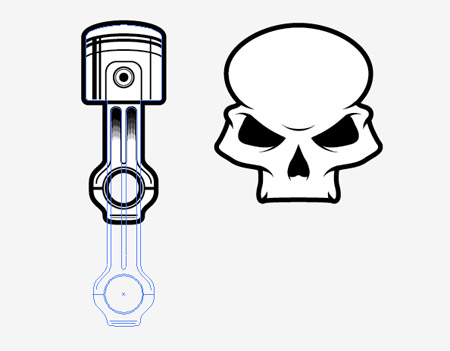
Our current piston is a little too short to balance well when overlapped, so use the Direct Selection tool to select and drag the points that make up the lower portion to lengthen the piston.

Hold Shift and rotate the piston by 45 degrees, then duplicate and rotate in the opposite direction. Position the skull centrally. Tip: Toggle the Scale Strokes & Effects option in the Preferences window to avoid altering the stroke weights of the skull when scaled up or down.
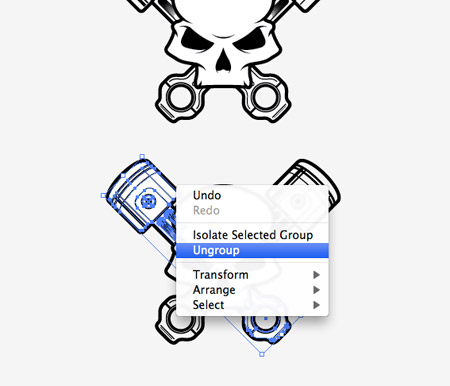
Select all the objects, then press the down cursor key while holding ALT and Shift. Count the number of times the key is pressed in order to remember the distance used to make the duplicate. Ungroup all the elements of the skull and pistons.

Select all three outlining shapes and merge them together with the pathfinder. Hold Shift while dragging a selection over all the objects to exclude this outline, then delete everything else.
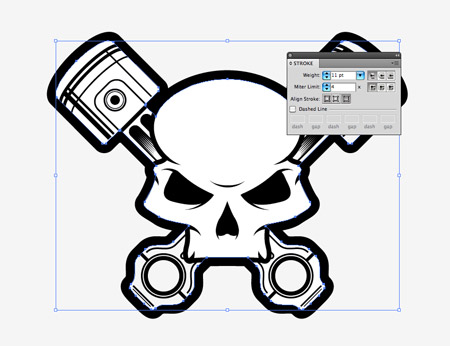
Hold Shift and press the up cursor key by the number you currently have in mind to reposition the outline exactly back into place. Alter the stroke weight to 11pt. This step basically ensures the thickest stroke outlines the whole illustration.
When mocked up on a dark fabric texture the illustration really starts to show off that underground style. Expand all the strokes to make the vector file ready for use as a logo, sticker or badge.


you are damn GREAT man !!!
you never fail to amaze me mr. spooner…
Greate tutorial. I love this style. Thank you for sharing, Chris. Here’s my skull art I created a while ago:
http://occasionallyxxx.deviantart.com/gallery/#/d2baoq7
Once again thank you for the tut.
Damn awesome!
Nice Tut! Gonna have to give it a try.
Great Tut Chris, Thanks
Great skull style ! It will fit perfect on the tank of my old bike :)
Everythings so awesome on this wesbsite!
The way you did the shading in the shafts with the lengthy triangles – really smart, never would have thought of that. Awesome tutorial.
Terrific!
This it’s great…!
Inspired me to create a book like this for my clients, explaining the whole process of web coding/desing.
Thanks…
Awesome tut Chris, nice job(again)!
Great tutorial Chris… as always!
Cheers
Well! skill needs to be Gothic look. And the designer must have the experience with the taste of metal. The power of metal music and metal world symbolize by the skulls. So the pure and proper design of skulls is very very important to grow the actual significant of it.
Thats more than sienbsle! Thats a great post!
Great stuff chris! love it.
Nice!
Excellent tutorial. I’m just starting out with Illustrator and your tutorials help me much more than reading books and following basic training videos.
Great! Very nice and easy tutorial.
Wow! Great stuff. I am new to illustrator, so is this how you create graphics on this software? i.e. from scanned images. cipro
Nice tutorial. I’ve used to design prospects for local Gothic party. Also, there was some great examples of Skull based vectors in labels for Need For Speed series. They inspired me for that prospects.
And by the way, Chris, can you answer me from where do you get inspiration? I’ll appreciate if you answer me that..
Best regards,
Haris Tahić
Chris, amazing tutorial as always, where did you get the background stock from, I’ve been looking for something like that for a while.
Cheers
Didnt know the forum rules allowed such bilrlanit posts.
hi guys thank your for this cool tutorial. i try to creat own skulls with this tut. but i think i must try every day to become this nice results.
That’s way more clever than I was expecting. Tanhks!
Very good. Congratulations.
Peace!
Wow, super cool !!!
Where did you find the dark fabric texture ?
Thanks
awesome tutorial, the result is very cool, thanks for sharing :)
Thank you so much for this! I’d definitely try this one, I’m itching to create something cool for my site.
great result
Thanks for the kind comments everyone,. For those asking, the background texture is one of the book covers from LostandTaken – I think it was originally red.
Thank you Chris for the info ;-)
Wow this is such a great technique. Will be entering into Illustrator this afternoon, hopefully I can take an hour out and mess around. This effect is so great!
Awesome! As always.. :-)
this was great help for me on working on scanned images.
thankful
Wouh, looks fantastic, I often draw skulls, but never did an illustration of them on the computer, didnt’t really know how to. But now I am going to give it a try :-)
Great tut. Keep up the good work.
Flawless!!!!!
Awesome! Thanks for sharing how to create the jagged (pointing) ends. I love the effect, but have never been successful in creating them.
Nice tutorial… Thanks for sharing.