Recover from a Crash! Adjusting Final Cut Pro’s Autosave and Undo Features

We’ve all had software crash, files get corrupted or worse, computer’s melting down…never to reboot again. Avoid the fallout of similar disastrous situations by making two very simple adjustments to your Final Cut Pro settings.
Adjustments to Final Cut Pro’s default autosave and undo settings can be made in FCP User Preferences and System Settings.
Adjusting Levels of Undo
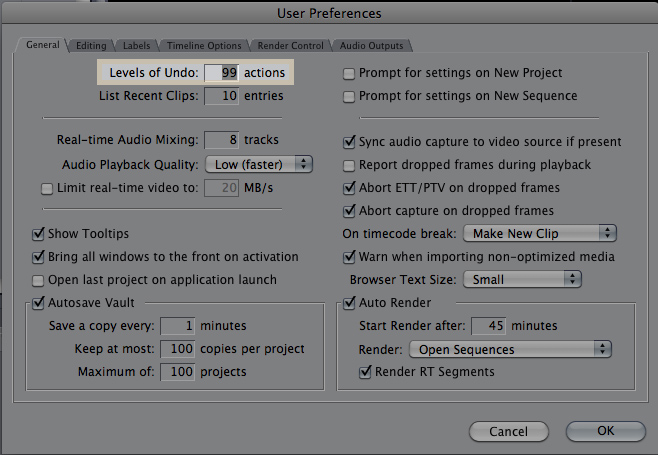
- Use the shortcut OPTION + Q to open up the FCP User Preferences window.
- In the top left-hand side of the window adjust the levels of undo from 10 to 99.
- Hit OK.
- Now, the next time you need to take a few steps back in your project, use the shortcut COMMAND + Z to undo.
When working with clients I often find we spend a lot of time experimenting with our projects — swapping out shots, trying different effects and plugins, sampling an assortment of music tracks. In these “trial and error” exercises I find myself taking full of advantage of the undo functionality in FCP.
By default Final Cut Pro is set to 10 levels of undo and if you’re working clients and doing similar experimentation in your project, you’ll quickly realize 10 levels of undo simply won’t cut the cake. Luckily, there’s an option in FCP to adjust the levels of undo up to 99…a much more realistic number.
Bumping up the level of undos will put a tiny bit more strain on your computer’s active memory, but it’s worth it! It takes up such a negligible amount of memory that you’ll likely not notice the difference.
Using undo is great to quickly jump back a few steps — however I should note, it is good practice to always create a duplicate sequence if you anticipate making major changes. Nothing is worse than using all 99 of your undos and still not going back as far as you’d like! I’ll often make a new sequence that I just use for experimentation — insuring I always have a good backup of my work.
Adjusting FCP to Autosave Frequency and File Location
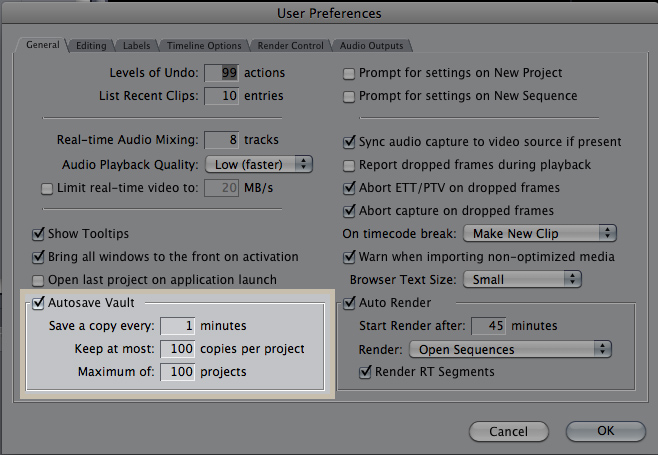
- Use the shortcut OPTION + Q to open up the FCP User Preferences window.
- In the bottom left-hand side of the window adjust the “Save a copy every ___ minutes” to 5 minutes.
- Hit OK.
- Now a new, unique project file will be created every 5 minutes based off the most recent changes.
You never know when the application or the computer could crash! Luckily, Final Cut Pro has a really nice autosave feature that can benefit you when optimally setup. You can adjust how often you would like FCP to autosave and where you would like the autosave files to reside.
By default FCP is set to autosave every 30 minutes. However, losing just 30 minutes of work can be incredibly frustrating if you’re under a tight deadline or you’re working one-on-one with a client. Although you can set FCP to save as quickly as once every minute, I like to setup my project to autosave every 5 minutes so as to not bog down my system with autosave project files.
You may have noticed in the User Preferences window that there were also options for the number of copies per project and max number of projects. Final Cut Pro uses a “first in, first out” method for saving and deleting project files. Basically, when it reaches the max number of projects you have specified for the autosave folder it starts to chronologically trash the oldest projects. The same holds true for the max number of copies per project. I like to leave both of these options set to 100 — the highest number available.
Lastly, we’ll want to setup where we would like all of the autosave files saved to. This is the folder where you would go to if you needed to restore a project after a crash. It’s good practice to keep your autosave folder in a different place than you keep your project files. If your FCP projects are on your internal hard drive, specify your autosave folder for an external storage device (hard drive, RAID, etc). This way, if your system melts down you’ll still be able to easily access a copy of your FCP projects.

- Use the shortcut SHIFT + Q to open up the FCP System Settings window.
- Click the “Set” button next to autosave vault.
- Specify the location, hit Choose and then OK.
By optimizing this functionality in Final Cut Pro you’re more likely to save time, preserve your creative work and stay out of editing trouble!