I've always been a huge fan of Photoshop tutorials, writing them and reading them; it's incredible that a program written by a group of people can have a near immeasurable variety of methods and techniques for design, it's literally limitless. Naturally, with such a popular product, it's hard to write unique or bespoke tutorials, so hopefully this will be something you haven't come across yet, or if it is, I hope this has a new twist to it at least. Below is a sample of what I hope your outcome will look like:
Step 1: Setting The Scene For the purposes of this tutorial, I will start with a canvas of 600x400 pixels, white background. This isn't necessary per say, you can use these techniques for a forum signature, banner, or even a whole website if you feel like adapting it. Let's select the linear gradient tool, foreground colour of perfect white (#FFFFFF) and a background colour of #d0d0ff. Click and drag your gradient tool from bottom to top.
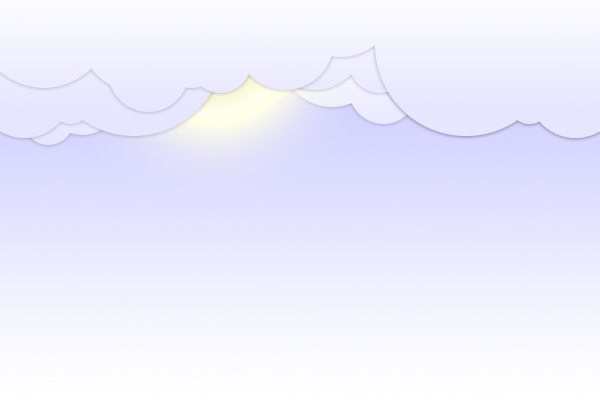
Step 2: The Sky First we're going to draw some clouds; the most effective clouds for a light hearted scene like this, in my opinion, are subtle, similarly coloured to the rest of the sky, with light shadows. Draw multiple circles with your elliptical marquee tool, using the shift key to make multiple selections, try and form a nice cloud shape, here's an example.
Create a new layer (ctrl+n), call it 'Clouds1', keep your foreground colour white, set your background colour to #e6e6ff and drag a gradient down from top to bottom of your clouds.
Ok, bring up the blending options of the layer by right clicking on it in the layers palette and selecting Blending Options.
The following should be your result:
Your next step is to add some depth, create a new layer called Clouds2, and repeat the previous steps to make a new layer of clouds above the previous, you can do this multiple times to add depth, for the purpose of the next step, I'd make a Clouds2 and a Clouds3 and drag these layers beneath your original cloud layer on the layers palette, here's mine:
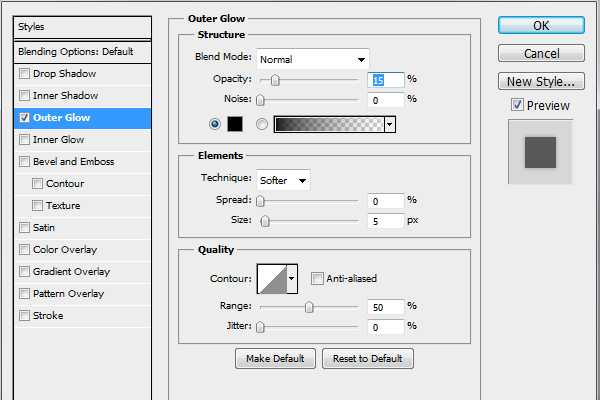
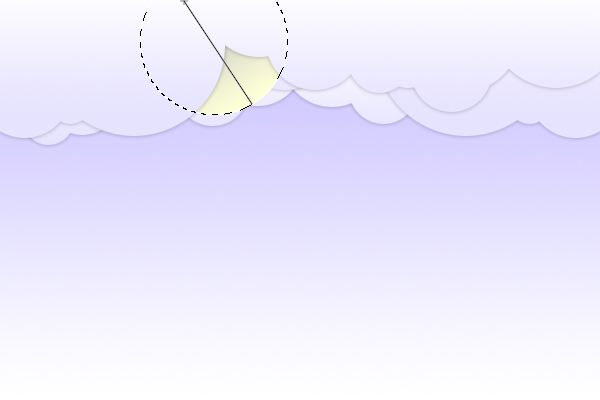
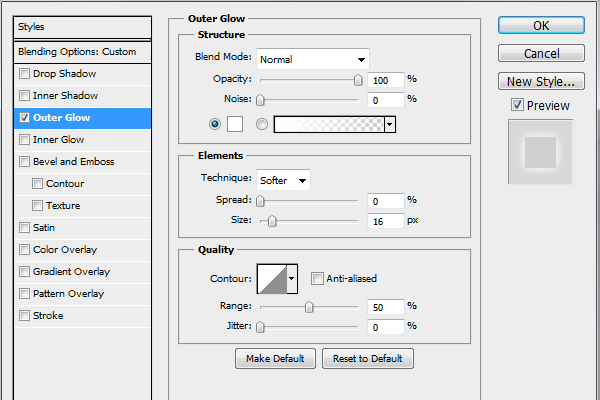
Ok great, so, what's a daytime sky without a sun? Create a new layer in the layers palette BETWEEN 2 of the cloud layers of your choice, call this layer sun. Create a circle selection that remains slightly hidden between your clouds. Set your foreground colour to #c7c7c7, and background to #fffdd9, create a gradient from corner to corner of your sun.
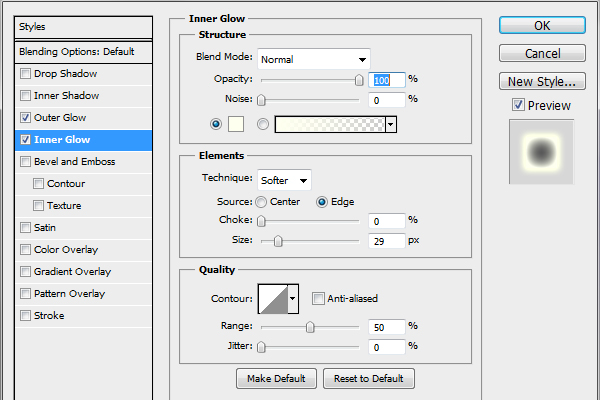
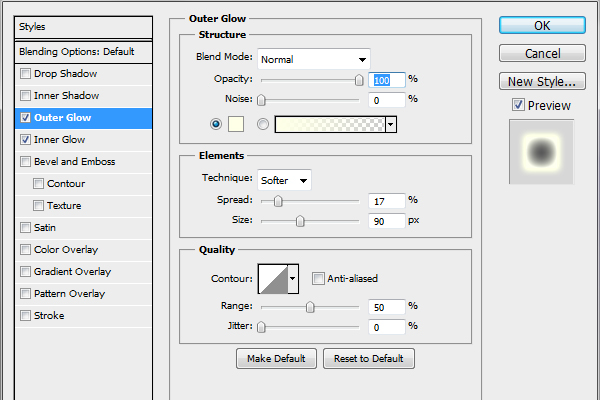
Set the following outer glow and inner glow settings for this layer in your Blending Options:
Since I'm writing this whilst doing it myself, I decided the sun looks a little too dark in the middle, so added a further cloud layer above to hide the centre somewhat.
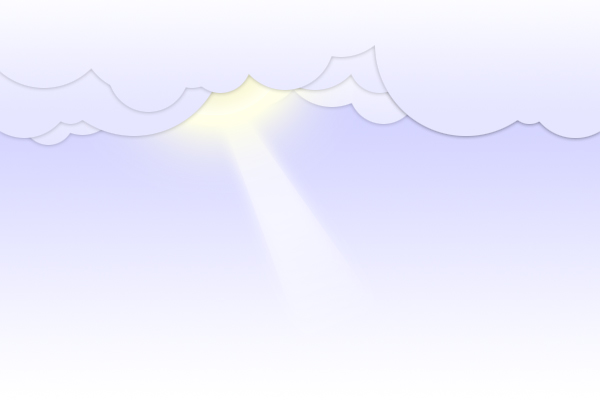
Ok, now we can add the rays of light coming from the sun. BELOW the sun layer in your layers palette, create a new layer called rays. Make a selection similar to the following a name it Rays. Fill it with white.
Set the layer style of this layer to OVERLAY and bring it's opacity down to around 60%. Go into your blending options and set the following outer glow:
With your rays layer selected, reset your foreground and background colours, (Hotkey D) and in your tool bar go to Layer > Layer Mask > Reveal All, and using your Linear Gradient Tool again, drag from roughly 1/3 of the way down the ray to the bottom, this should gradually erase the bottom.
Duplicate this layer once or twice, and using Free Transform (Ctrl+T) rotate the other layers so they form streaks.
Part 2 of this tutorial will use the same scene, so keep the .PSD handy! We will be covering the ground scenery.

Dig this tutorial?
Thank the author by sending him a few P2L credits!

BenCraven
My name is Ben Craven, I'm 21, from the UK, England more specifically, I've got a college education but not to do with graphic design or web development; the things I've learnt are self taught, and I'm thrilled to teach other people through my tutorials. 


|