

In this Illustrator tutorial, you will learn how to draw a pair of high-detailed roller blades from scratch, new useful drawing techniques and you could consider it a great chance to practice your Pen Tool skills. So let’s get to work and hope you will enjoy it.
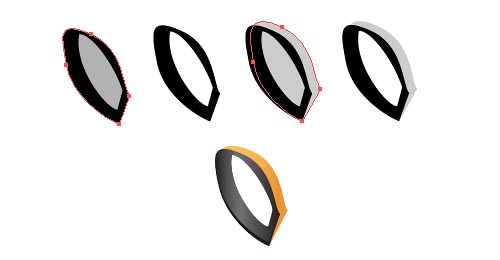
1. To get started, take the Pen Tool and draw a boot shape similar to the image below. Continue to draw the red and the green shapes too.

2. Color each shape with linear gradients using different dark gray tones and adjust the angles if needed.

3. Now draw the first red selected shape in the front and fill it using a similar gradient. To make it easier, you can draw the shape bigger and use the first boot shape to Intersect shape areas and Expand from the Pathfinder Panel. This way all the curves will fit perfectly. Next draw the other selected shape from the right and place it a bit on top of the one under so you can obtain the small stripe from below. Select them both, Copy and Paste in front then click Intersect shape areas and Expand. Adjust the gradient and the angle if needed.

4. The next step is to draw the red shape in the image below then Copy and Paste in front the first boot shape, select both and click Intersect shape areas and Expand. Fill the shape with a linear gradient using lighter gray tones.

5. Now use again the green shape made at step 1. Just save only the top part and delete the other points. Change the fill color to black and move it a bit up. Then draw the second shape in the image, send it to back and fill it with black also.

5. Draw 2 more shapes, Copy and Paste in front the black one, select both the red one and the black pasted one and click Intersect shape areas and Expand from the Pathfinder Panel. Copy and Paste in back the bigger shape and move it a bit up to obtain a small border and make the gray tones used for the gradient darker. Do the same in the other part then draw the small dark shape that you see below and send it behind all the other shapes made so far.

6. Copy and Paste in back again the bigger shape made above, change the fill color to black, go to Effect > Blur and apply a 1.4 px Gaussian Blur. Reduce the Opacity to 45%.

7. Take the Pen Tool and draw the shape from below then Copy and Paste it in back, change the fill color to black and move it a bit up.

8. Next draw the blue shape in the image and the red circle on top, select both and click Add to shape area and Expand. Now use again the blue shape and go to Object > Path > Offset Path to make the smaller orange one inside and then the darker one. Take the Pen Tool and draw the red selected shape on top of the others and then use again Offset Path to obtain the smaller blue one inside. Place all the shapes on top of the ones made earlier and use the Ellipse Tool to make 2 circles, one dark and one blue just change the gradient from linear to radial. Colors that I used for the gradients are: the blue tones (R=45,G=88,B=152), (R=41,G=41,B=121) and the orange tones: (R=234,G=149,B=52), (R=250,G=189,B=84), (R=234,G=149,B=52).
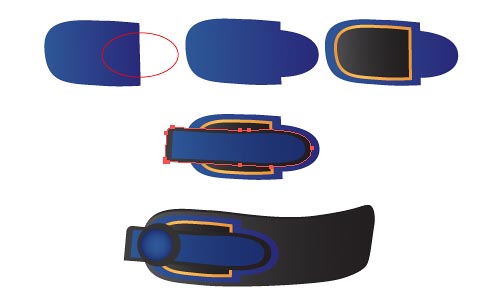
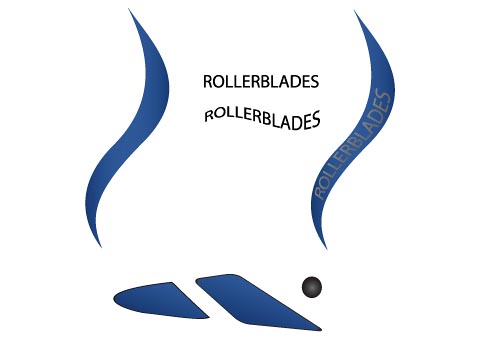
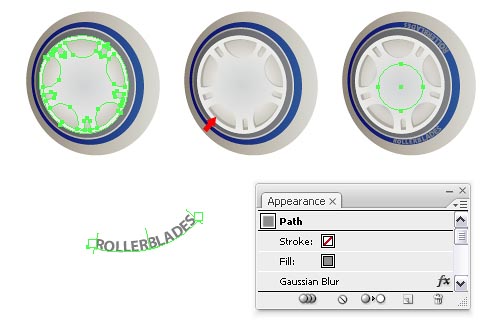
9. Draw a similar shape to the one below using the Pen Tool and fill it with the same orange gradient like above. Go to Object > Path > Offset Path and make the smaller shape inside then fill it with a linear gradient using the again same blue tones. Go again to Offset Path and make one more shape inside, delete the fill, select a 0.25 pt gray Stroke and a 0.7 pt Dashed Line. Drag the right side using the Selection Tool until that part goes over the blue one. Type the text and go to Effect > Warp > Arc and select a negative Bend value.

10. Now place all the shapes made above like in the image and use the green shape made at step 1 to mask them. To do this select all the shapes and the green one that should be on top and go to Object > Clipping Mask > Make.
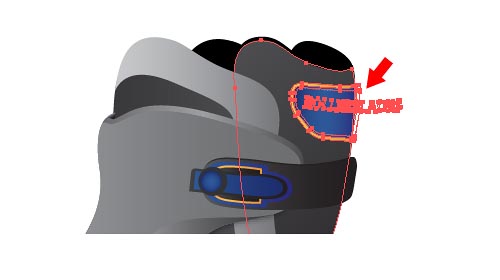
11. Take the Pen Tool and draw the first shape below then type the text and go to Effect > Warp > Flag and set the values like in the next image. Place the text on top of the shape and depending on your shape size adjust the warp values if needed and only when you are done go to Object > Expand Appearance. Next draw the other 2 shapes in the image, Copy and Paste them in back and change the fill color to a dark gray. The last one is just a small circle filled with a radial gradient from a dark gray to black.

11. See here how to place all the shapes made above and also draw one more circle filled with the same blue gradient then Copy and Paste it in back, change the fill color to a dark gray, apply a 1.5 px Gaussian Blur and reduce the Opacity to 50%.

12. Using the Pen Tool draw the shape that you see below and fill it with a linear gradient using different light gray tones then place it behind the shapes made at step 5. Use Offset Path to make a smaller one inside, change the gray tones from the gradient a bit or just the angle, select a 0.25 pt dark gray Stroke and a 0.7 pt Dashed Line.

13. Do the same and make the other shapes that you see in the next image and send them behind the shapes made at steps 2 and 3.
14. Draw the next shape or copy the one made earlier at step 10, use Offset Path to make the smaller one inside and change the fill to the blue gradient used so far then use again Offset Path to make the third shape. Delete the fill and just set a Dashed Line like earlier.

15. Group the 3 shapes, duplicate and place them like in the next image then draw the red selected shape on top.
16. Take the Pen Tool again and draw the boot strap shape from below then the small black one behind it. Also Copy and Paste in back the bigger shape, change the fill color to black, move it a bit down and to the right, apply a 1.5 px Gaussian Blur and lower the Opacity to 50%.

17. Select the boot strap and use Offset Path to make a smaller shape inside. Stroke it and set the Dashed Line like before. Take the Direct Selection Tool and select just the 2 points shown in the image and drag them because that upper part of the dashed line doesn’t have to be seen. Copy and Paste in front of the dashed line shape the first one made above, select both and go to Object > Clipping Mask > Make. This will clip away the unwanted areas.

18. Now let’s make the boot straps on top. For that we need to draw a smaller shape on top. Let’s use Offset Path again, to define the area where the stripes will be and which you will use at the end to mask the edges that go over it. Copy and Paste in front this shape and rotate it a bit to obtain the first stripe then select them both and click Subtract from shape area and Expand. Paste in front again the shape, move it and do the same to obtain the second stripe and all the others. When you are done Copy and Paste in front again the first shape, select it and all the stripes and go to Object > Clipping Mask > Make.

19. Draw a path using the Pen Tool to follow the shape made at step 3 or use that shape just delete all the other points that are not necessary. Give it a 1-1.5 pt Stroke, Expand it then fill it with a blue color used so far. Do the same for the upper edge of the step 3 shape and also make the dashed line shown in the image like you did for the others.

20. Draw the first red selected shape from below then scale it to obtain the smaller one on top, select them both and click Subtract from shape areas > Expand from the Pathfinder Panel. Duplicate the circles made at step 8 and place them like you see in the image. Next use Rounded Rectangle Tool to make the other shapes and place them like below.
20. Here is how to make the laces. First draw a path, give it a 2 pt gray Stroke and also press the Round Cap button in the Stroke Panel. Then Copy and Paste in front the path, change the Stroke weight to 0.75 pt and the color to a lighter gray tone. Select both, double click the Blend Tool in the Tools Panel and select Spacing: Smooth Color and then go to Object> Blend > Make.
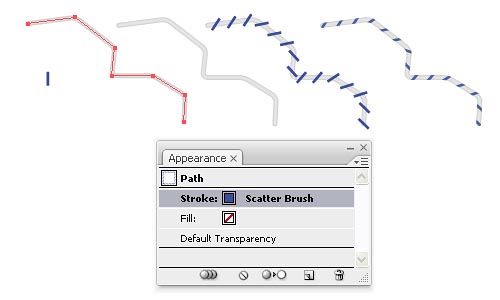
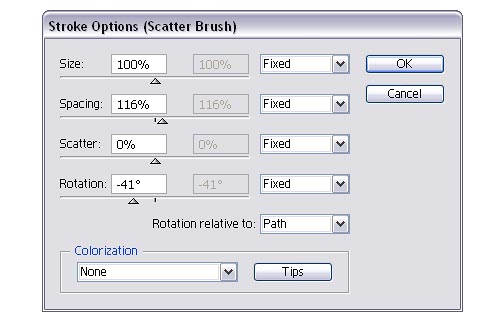
21. Take the Rectangle Tool and draw a small blue rectangle then drag it to the Brushes Panel and select New Scatter Brush. Paste in front of the path made above and stroke it using this Scatter Brush.Then double click on Stroke in the Appearance Panel to open the Stroke Options window and set the values like in the image below. When you are done Copy and Paste in front the Blend group made using the 2 paths then select both the path stroked with the Scatter Brush and the pasted group, go to the Transparency Panel and from the drop-down menu select Make Opacity Mask (the blend group should be on top of the stroked path).
21. Make the other lace pieces in the same way and when you are happy with the result select the paths stroked with the Scatter Brush and Expand Appearance. Here is a close up of the laces and how I placed them.
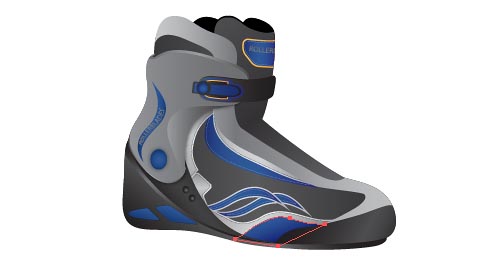
22. The rollder blade made so far should look like this.

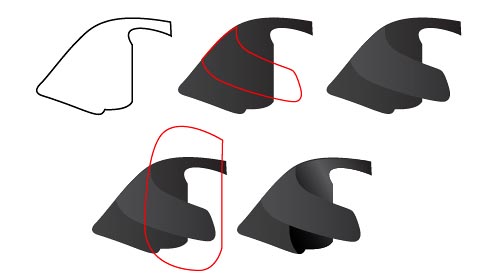
23. To make the hanger, draw the first red selected shape in the image below and then a smaller one on top. Select them both and click Subtract from shape area and Expand from the Pathfinder Panel. Now draw the second selected shape in the image similar to the first one, send it behind and use again the smaller one to Subtract and obtain the empty area inside. Fill the shapes with the same linear gradients used so far or similar. When you are done Copy and Paste in back the darker shape, change the fill color to black and move it a bit down.
24. We will proceed to apply texture for the roller blade. Copy and Paste in front the boot and the green shapes made at step 1, delete the fill gradient, open the Swatch Libraries menu, go to Patterns > Decorative > Decorative_Classic, find Knit and drag it into your working area. Resize it to make it small, then go to Edit > Define Pattern. Type a name and save it then fill the pasted shapes with this pattern. Also draw the green paths that you see in the next image and make more copies because you will need them at the next step.

25. Now we will make the empty areas shown in the image below. To do this take the green paths from above and use Subtract from shape areaand Expand to subtract all the shapes under them one at a time until you can see the texture applied earlier. For a depth look take each green shape Copy and Paste in back one more, move them a bit up and to the right and Subtract from shape area and Expand to obtain the small inside borders.

You are done with this part.
26. Take the Pen Tool and draw the next shape and then the red ones on top. Select all 4 shapes and click Subtract from shape area and Expand to obtain the empty areas.

27. To make it more attractive, draw the red path that you see below then Copy and Paste in front of the blue shape made above. Select both the red path and the pasted blue shape and Intersect shape areas and Expand. Fill the shape with the same gradient using orange tones or a similar one. Do the same for the second red path you see below and then you can be creative and make as many stripes and shapes as you want.

28. To make the rollers take the Ellipse Tool and start by drawing the first circle. Colors that I used for the gradient are: (R=138,G=131,B=116), (R=185,G=178,B=166) and (R=218,G=218,B=212). Draw the second circle on top and place it a bit to the left then draw the third circle and fill it using the same gradient shown in the image like for the first one. Use Offset Path to make the next circle lightly smaller and fill it with a linear gradient from (R=51,G=51,B=51)- 80% black to (R=102,G=102,B=102)- 60% black. Draw the last circle on top and fill it with a radial gradient from (R=255,G=255,B=255) to (R=195,G=192,B=182).

29. Take the Ellipse Tool again and draw a circle then 5 smaller ones and place them like in the image. The center of the circles should intersect the bigger one, this way you can be sure the result is symmetrical. Apply this for the small rounded rectangles also. Now select all 6 circles and Subtract from shape area and Expand to obtain the shape from the left. Place the small rectangles made with the Rounded Rectangle Tool in the same way and Subtract from shape area and Expand again.

30. Next draw the red circle around the black shape and use Offset Path to make the bigger one. Select both circles and click Subtract from shape area and Expand. Select the red circle just made and the black shape and click Add to shape area and Expand to obtain the final shape. Place the shape on top of the roller made at step 28 then go to Effect > Distort & Transform > Free Distort and drag the corner points to give it some perspective. When you are happy with the result and the shape fits perfectly on top of the roller go to Object > Expand Appearance.

30. Here is the shape placed on top. Now Copy and Paste in back this shape, change the fill to a radial gradient from (R=242,G=242,B=242)- 5% black to (R=163,G=158,B=149) and move it a bit to the right. Draw a circle in the center and fill it with gray. Send it behind the 2 shapes made earlier and apply a 2.8 px Gaussian Blur. Use the Type on a Path Tool to type the text, Expand it and place it on top of the roller and adjust the letters. Duplicate if you want to place more text.
31. Duplicate the rollers and place them like in the image. To make the wheels holder, take the Ellipse Tool, draw a light gray circle then Copy and Paste it in back, change the fill color to a darker gray and move it a bit to the right. Now draw the smaller circle in the center and fill it with a linear gradient from a darker gray to a lighter gray. Duplicate the circle 2 times and move one of them a bit to the right. Select both circles and Subtract from shape area and Expand to obtain the small selected shape below then fill it with a dark gray. Group all the shapes and make 3 more copies then place one for each roller. Next Copy and Paste the shape made at step 26, place it like in the image behind the rollers and change the fill to a linear gradient using different gray tones.

32. Take the Pen Tool and draw the next shape then draw the red path on top and fill them with gradients using dark gray tones. Now draw the other red path, Copy and Paste in front the first shape made, select both the red path and the pasted shape and click Intersect shape areas and Expand. Then fill it with a gradient using black and dark gray. Adjust the angles for all the gradients for a better look.
33. Draw the red path that you see below and use again the first shape made above to Intersect them then Copy and Paste in back the resulted shape. Change the fill color to a dark gray and move it a bit up and to the left. Next draw the 2 green selected paths and fill them with similar gradients then Copy and Paste in back the shape pointed by the second arrow, change the fill to a dark gray and move it a bit up and to the right.

34. Here is how to place all the shapes made above, send some of them to back and some in front of all the other parts except of the last holding element. To make some shadows Copy and Paste in back the shape made at step 26, fill it with black, apply a 1.5 px Gaussian Blur and lower the Opacity to 70%.

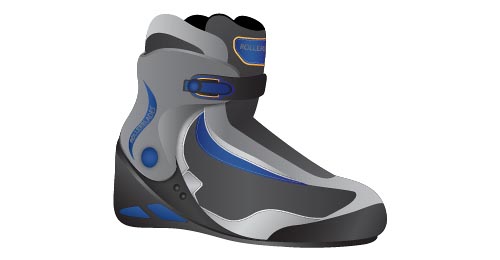
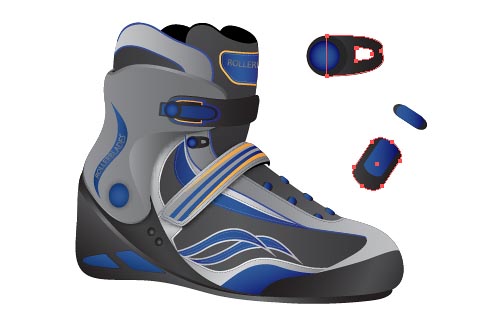
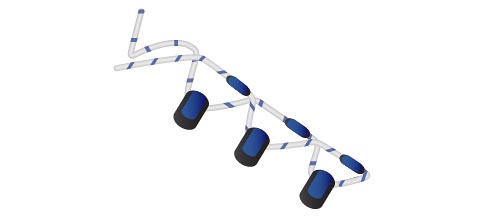
35. The work is done. Here is our final roller blade.

To download the source file for this tutorial, you will need to login as a member.
Sign up today to access all exclusive members content!
