As a photographer, taking a photo need technique and art. You don't have anybody take your photographswithout your permision. You can use this step to sell your photographs too. How you can do that? We will showyou step by step.
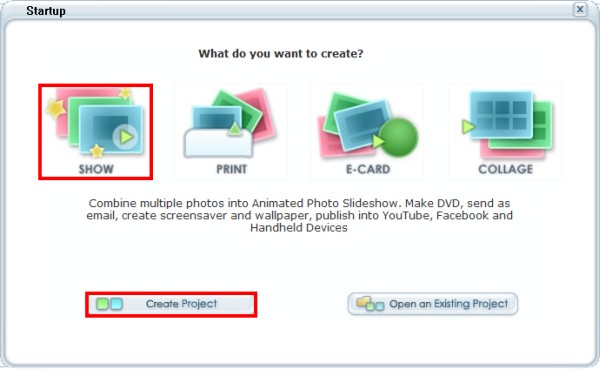
Step 1 Install and Run InAlbum from here Step 2 From menu, click on "create new Show" button.
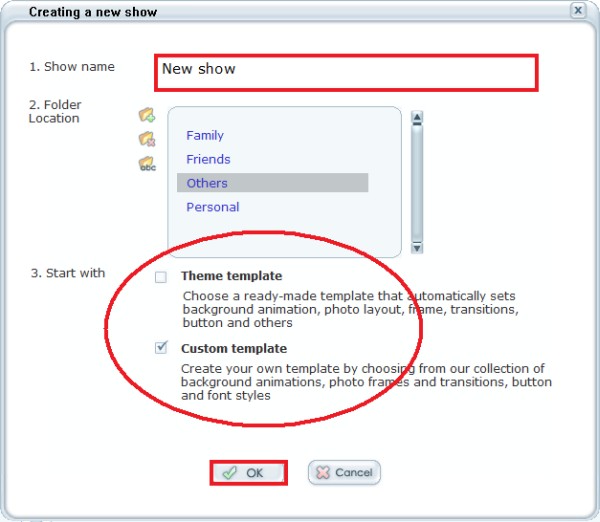
Fill in the "Show name". For this tutorial, we use a Custom template from InAlbum.Click on "OK" button to continue.
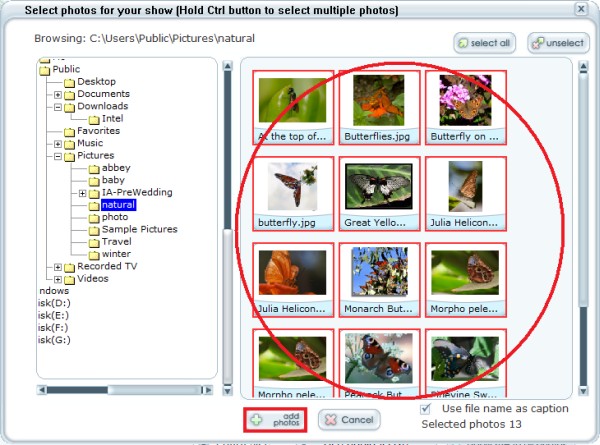
Step 3 Click on "Add photo" button and select photos from your computer.
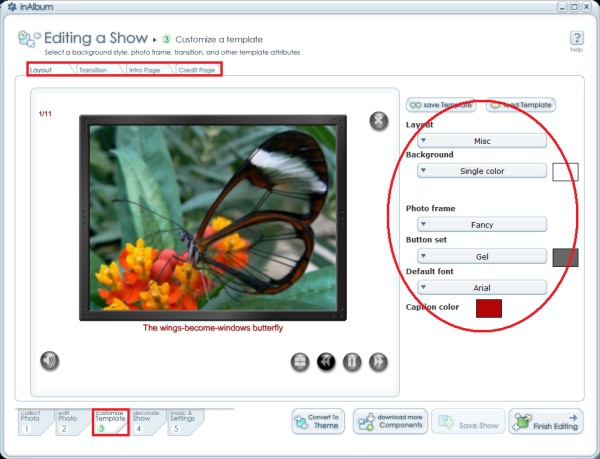
You can fill text to the caption. For this tutorial, we fill the caption. Step 4 Go to tab 3, "customize Template" to customize your custom template. You can edit the layout, background,frame, transition, etc.
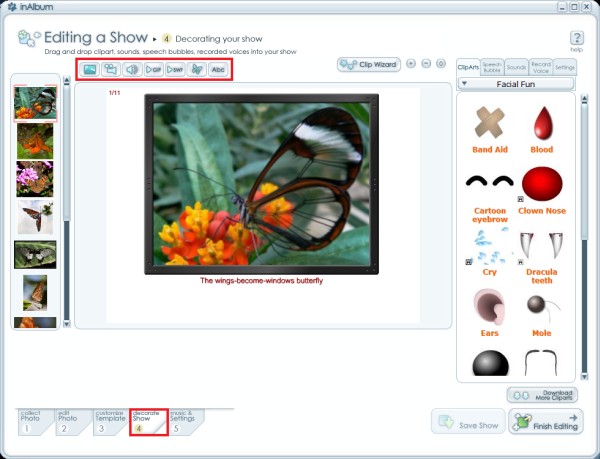
We edit the layout, use random transition, use intro page and credit page. Step 5 To add the other object, Click on tab 4 "decorate Show". You can add text, video, image, clipart, etc. Inthis case, we leave it as default.
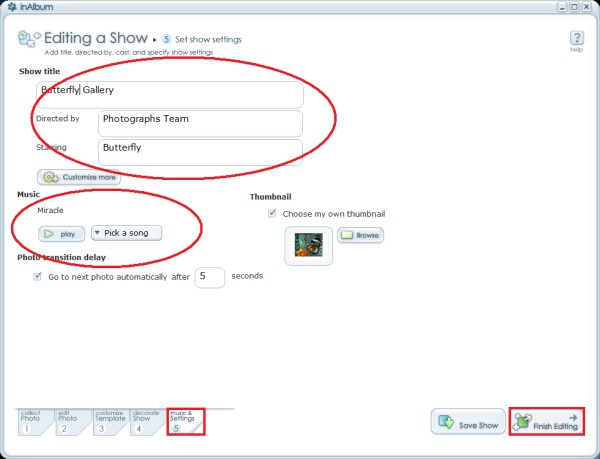
Step 6 Go to tab 5, "music & Settings" to fill in the show title, directed & starring. You can change the music too.We download the music from InAlbum's library. Click on "Finih Editing" button to play this slideshow.
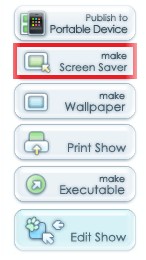
Step 7 Now, Your butterfly gallery is done. We will show you how to make Screen Saver with your project.
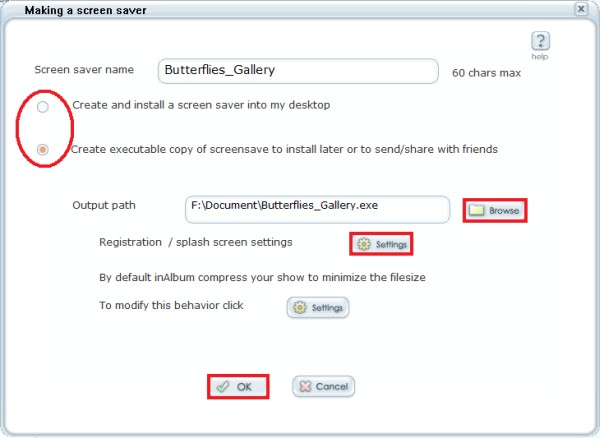
Clik on "Make Screen Saver" button. Choose "Create executable copy of screensaver to install later". You can changethe output path too.
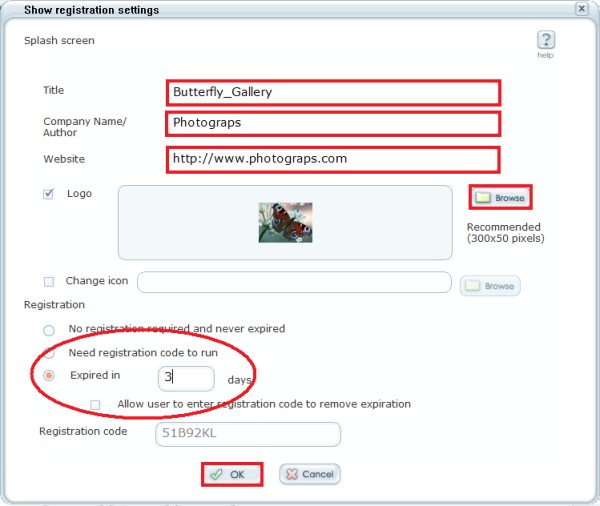
Click on "Settings" button to change the registration as shown below. For this tutorial, we make this screen saverwon't be active after 3 days. So if they want to use this screen saver again, they have to buy it from you. Thenclick on "OK" button.
After the process is done, Inalbum will give you windows confirmation that finish creating screen saver installerfile. Step 9 Congratulation, you can install and share your screen saver to your family, friends.

|