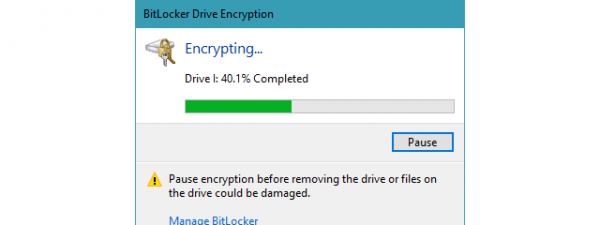
BitLocker is an encryption tool included in Windows that you can use to secure your data on any drive. Although by default, BitLocker requires the presence of a TPM chip in your computer to be able to encrypt the system drive, you can still use it without one. However, for that, you need to explicitly set Windows to allow BitLocker without TPM. In this article, we’ll explain to you what TPM is, why BitLocker requires TPM, and also how to bypass this requirement. So, if you want to use BitLocker without TPM, read on:
NOTE: This guide applies to Windows 11 and Windows 10. However, note that BitLocker is a feature present only in the Pro and higher editions of Windows. If you have a Home edition of Windows, you can’t use it. If you need help identifying your Windows edition, read this tutorial: How to tell what Windows I have (11 ways).
Why does BitLocker require TPM & What’s TPM?
To understand why BitLocker requires a TPM chip to function as intended, but also how you can bypass this requirement, you must first know what BitLocker is. The answer is relatively simple: BitLocker is an encryption feature found in Windows operating system that allows you to encrypt entire drives (partitions or volumes if you prefer). By default, it uses an encryption algorithm called AES and requires the presence of a TPM chip on your computer’s motherboard.
The next question we need to answer is “What’s TPM?”. TPM (or Trusted Platform Module) is a chip that can generate secure and unique cryptographic keys. These keys are encrypted too, and they’re stored on the chip itself. Furthermore, the cipher keys can be decrypted only by the chip that generated them in the first place.
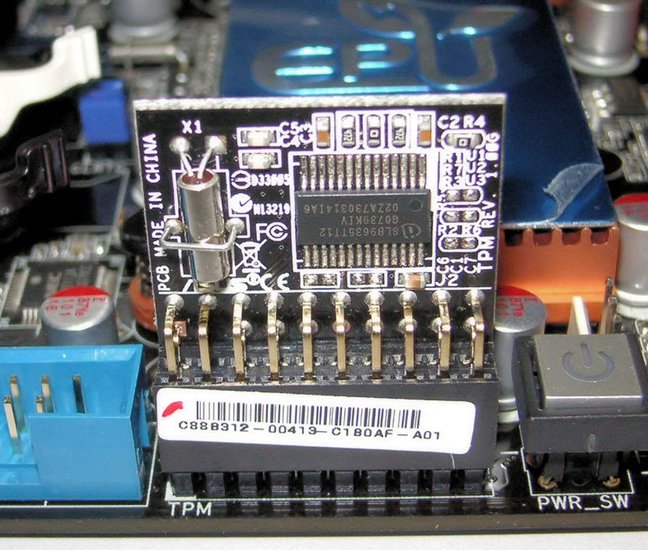
Trusted Platform Module installed on a motherboard
So why does BitLocker need TPM? When you encrypt a system drive in Windows using BitLocker, it uses the TPM chip on your PC to create and save the encryption keys. Your PC then uses those keys to authenticate and allow you access to the encrypted drives. If the original TPM chip used to generate the keys is not found on your PC, the encrypted drives are not accessible. In simpler words, once you encrypt a system drive with BitLocker and a TPM chip, nobody can take your encrypted drive, put it in another computer, and access the data stored on it.
Most computers and laptops sold these days have built-in TPM chips, as Windows 11 requires their presence. Even if your Windows PC or laptop doesn’t have a TPM chip, you can buy one separately from electronics stores. But, if your computer’s motherboard doesn’t support a TPM chip and you can’t mount one, there’s still a last resort option: use BitLocker without TPM. Although it’s less secure than using BitLocker with TPM, it’s undoubtedly cheaper and still better than no encryption at all. Here’s how:
What happens if you try using BitLocker without TPM (hint: BitLocker TPM error)
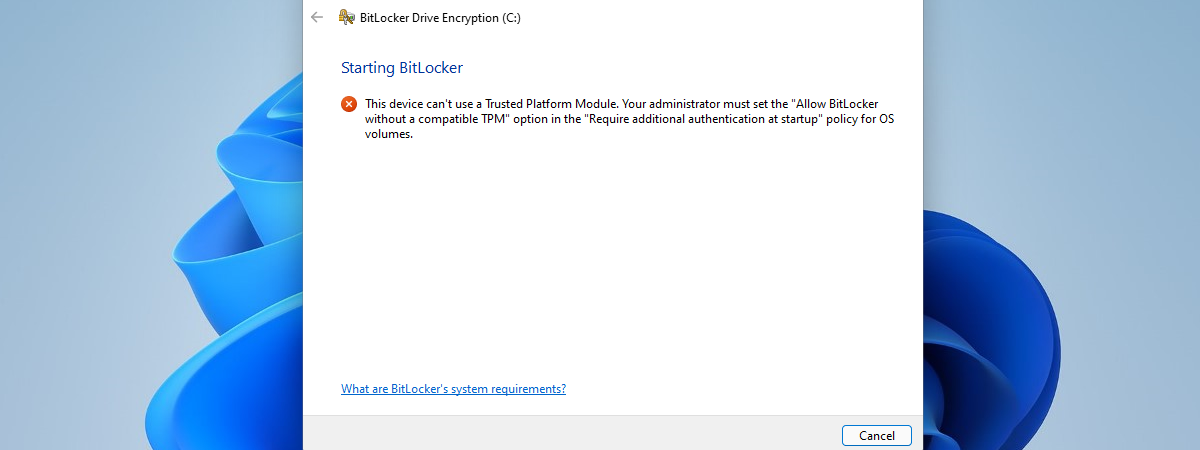
If you try to enable BitLocker on a system drive from a PC without a TPM chip, you’ll get an error: “This device can’t use a Trusted Platform Module.”
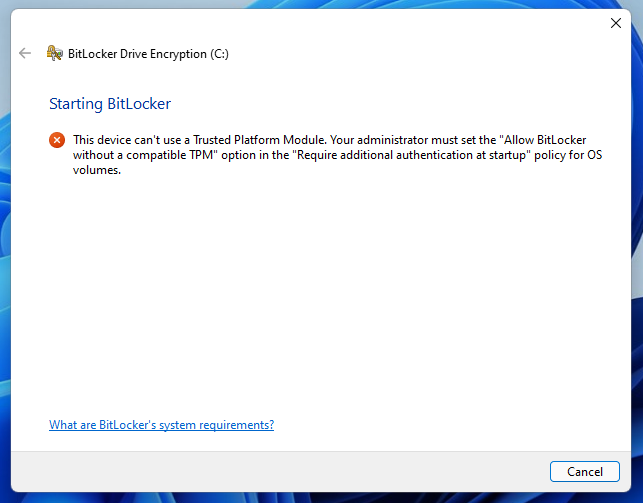
This device can’t use a Trusted Platform Module
But, it also points you in the right direction afterward: “Your administrator must set the ‘Allow BitLocker without a compatible TPM’ option in the ‘Require additional authentication at startup’ policy for OS volumes.” That’s what we’re going to show you how to do in the next chapter of this tutorial: use the Local Group Policy Editor to turn on the policy that allows the use of BitLocker without TPM.
How to use BitLocker without TPM
You can use BitLocker to encrypt your system drive even without a TPM chip. However, for this to work, you need to edit a Windows policy using the Local Group Policy Editor tool. One of the fastest ways to open it is to search for gpedit and click or tap on the “Edit group policy” result.
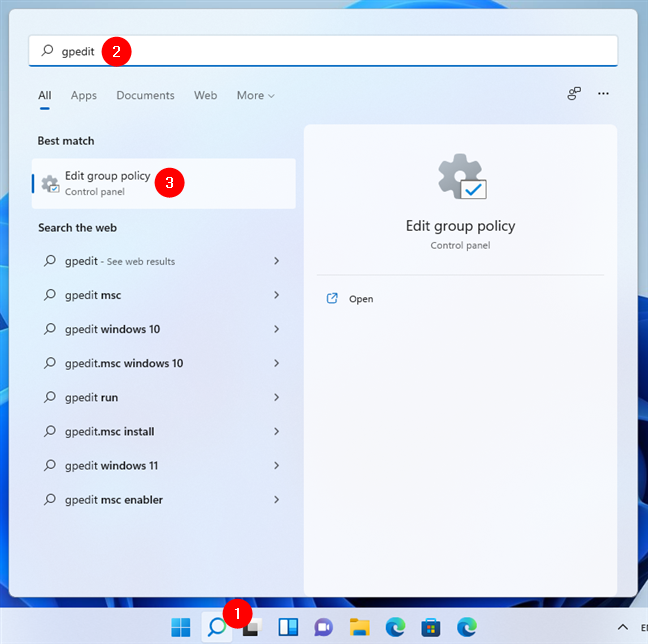
Search for Local Group Policy Editor in Windows 11
In the Local Group Policy Editor, open the Computer Configuration folder on the left and navigate to “Administrative Templates > Windows Components > BitLocker Drive Encryption > Operating System Drives.”
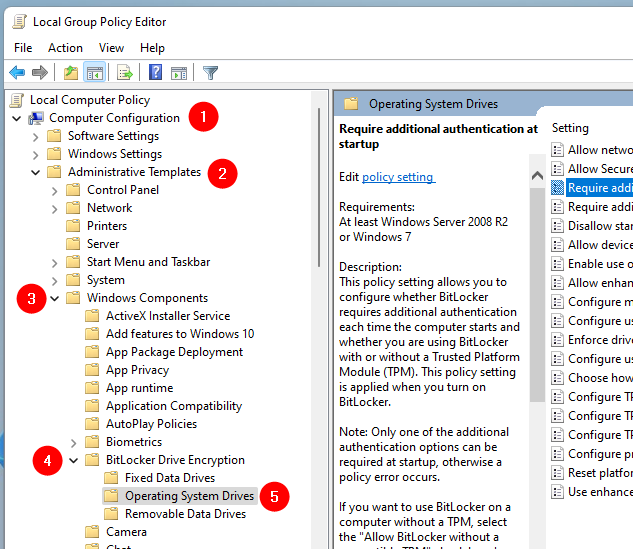
Navigating through the Local Group Policy Editor
Next, in the right panel, search for the setting named “Require additional authentication at startup.” Open it with a double-click or double-tap on its name.
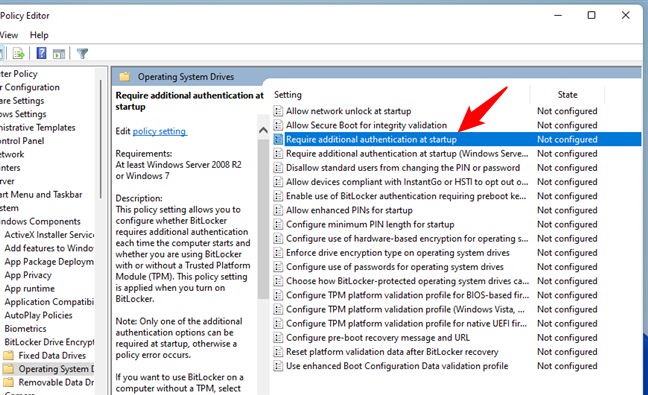
Open Require additional authentication at startup in Local Group Policy Editor
This opens a new window showing the properties of the policy. In it, set the policy’s state to Enabled and turn on the setting called “Allow BitLocker without a compatible TPM.” Then, press OK to save your changes.
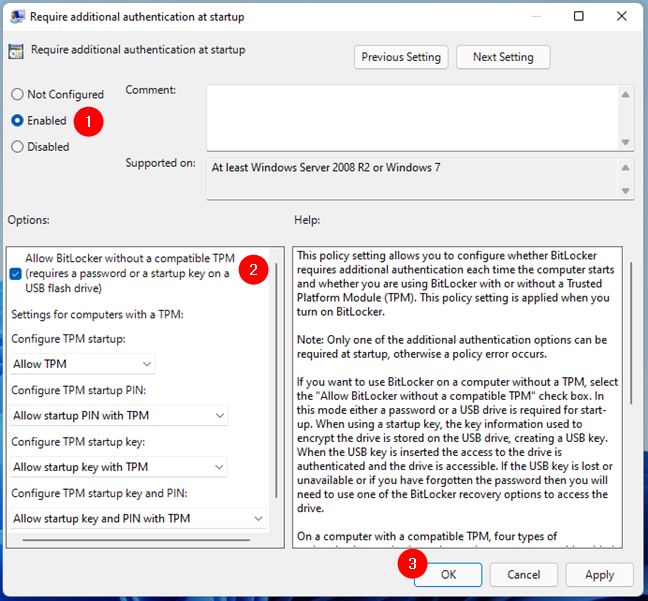
Set Allow BitLocker without a compatible TPM
Close the Local Group Policy Editor, and you can start using BitLocker without TPM for encrypting your system drive. From now on, you’ll no longer get the BitLocker error saying that “This device can’t use a Trusted Platform Module.”
NOTE: Later on, if you want to set things back to the way they were, follow the same steps and set “Require additional authentication at startup” to Not Configured.
Did you manage to allow BitLocker without a compatible TPM?
As you can see from this tutorial, it’s not hard to set BitLocker and Windows to allow you to encrypt the system drive even without a TPM chip. If you follow the steps we described, you should have no trouble at all. Leave us a comment below with your experience to allow BitLocker without a compatible TPM.