The Google Analytics SDK for Android makes it easy for developers to collect valuable statics about how the users are using their app.
Here are some features that Android Google Analytics SDK offers:
- The number of active users that are using the application
- Usage of specific features
- The number and type of application crashes
- From where in the world the application is used
- And many other useful metrics.
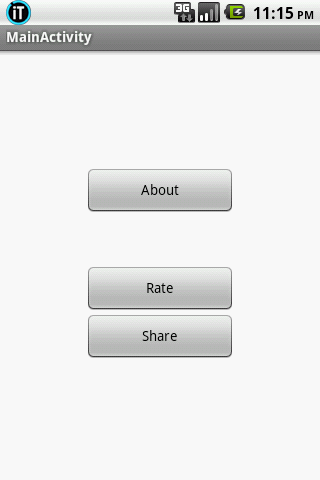
Just to illustrate the integration process lets create a simple proof of concept application with 2 activities: MainActivity and AboutActivity, and 2 buttons: Rate and Share.
Our mission is to integrate Google Analytics SDK with the application, to:
- track activity views, (MainActivity and About)
- track events (how many times the buttons “Rate”, and “Share” are clicked)
If you are searching for Google Analytics I’m assuming you are already pretty familiar with Android and could create the proof of concept application yourself, so I will skip this step and concentrate solely on integration.
1. Downloading the SDK
Go to downloads page and download GoogleAnalyticsAndroid.zip Version 2.0. Extract the archive and add libGoogleAnalyticsV2.jar to your project’s /libs directory.
At the moment of writing this post, Google provides two versions: version 1.5.1 (legacy), and version 2.0 beta. Still if the Version 2 of SDK is beta, I highly suggest you choose this version, over the 1.5.1 (legacy).
The reason not to choose SDK 1.5.1 is that it uses a tracking model that is designed to track visitors to traditional websites and interaction with widgets in traditional web pages.
The new “App” profiles and reports will only accept data from version 2 or higher of the SDK.
2. Creating a Google Analytics account
Before starting to use the SDK you first must create an account at: http://www.google.com/analytics/
- Sign in to your account.
- Click Admin.
- Click Account list (just below the menu bar)
- Click +New Account
- When asked what you would like to track, select App property.
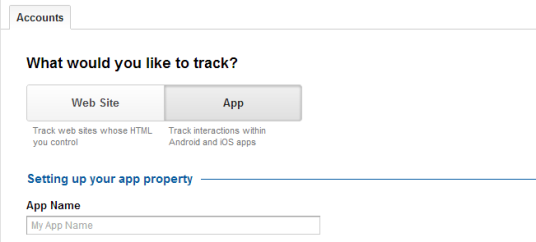
- Enter all the necessary information and click Get Tracking ID.
Now that you have a Tracking ID, you can begin the integration with the application. The first step is to update the AndroidManifest file.
3. Updating AndroidManifest file.
Add folowing permissions to the AndroidManifest file:
<uses-permission android:name="android.permission.INTERNET" />
<uses-permission android:name="android.permission.ACCESS_NETWORK_STATE" />
4. Creating the analytics.xml file
In version 2 of Google Analytics SDK for Android, the tracking settings are managed from an xml resource file called: analytics.xml. You will need to create this file in res/values directory, and add your tracking ID as well as other settings here.
<?xml version="1.0" encoding="utf-8"?>
<resources>

   <!-- Replace placeholder ID with your tracking ID -->
   <string name="ga_trackingId">UA-00000000-0</string>

   <!-- Enable Activity tracking -->
   <bool name="ga_autoActivityTracking">true</bool>

   <!-- Enable debug -->
   <bool name="ga_debug">true</bool>

   <!-- The screen names that will appear in your reporting -->
   <string name="com.testgoogleanalytics.MainActivity">MainActivity</string>
   <string name="com.testgoogleanalytics.About">About</string>

   <!--
   The inverval of time after all the collected data
   should be sent to the server, in seconds.
   -->
   <integer name="ga_dispatchPeriod">30</integer>

</resources>
5. Tracking activities.
To track activities add the tracking methods to the onStart() and onStop() of each of your activities.
// Example of tracking MainActivity
public class MainActivity extends Activity {
   @Override
   public void onCreate(Bundle savedInstanceState) {
      super.onCreate(savedInstanceState);
      setContentView(R.layout.activity_main);
   }

   @Override
   protected void onStart() {
      super.onStart();
      EasyTracker.getInstance().activityStart(this); // Add this method
   }

   @Override
   protected void onStop() {
      super.onStop();
      EasyTracker.getInstance().activityStop(this); // Add this method
   }
}
One thing to note here is that EasyTraker requires a context before you can use it. If you attempt to call any of its methods but did not pass first a context, you may end up with an IllegalStateException.
In the above example, in the onStart() and onStop() methods the context is passed as an argument to activityStart() and activityStop(), but if you need to make EasyTracker calls in other classes or methods, you’ll need to call EasyTracker’s setContext(Context context) method first:
Context context= this;  // Get current context.
EasyTracker.getInstance().setContext(context);  // Set context
// EasyTracker is now ready for use.
6. Tracking events
Tracking events is just as easy as tracking activities, you just need a Tracker object and call the trackEvent(String category, String action, String label, int value) method.
public class MainActivity extends Activity {

   private Tracker tracker;

   @Override
   public void onCreate(Bundle savedInstanceState) {
      super.onCreate(savedInstanceState);
      setContentView(R.layout.activity_main);

      // Set context
      EasyTracker.getInstance().setContext(getApplicationContext());
      // Instantiate the Tracker
      tracker = EasyTracker.getTracker();

      // Add tracking functionality to "Rate" button
      Button rate = (Button) findViewById(R.id.rate);
      rate.setOnClickListener(new OnClickListener() {
         @Override
         public void onClick(View arg0) {
            // The rest of your code
            tracker.trackEvent("Buttons Category", "Rate", "", 0L);
         }
      });

      // Add tracking functionality to "Share" button....
   }
}
In this particular example I don’t need a label nor a value, that is why I set for the last 2 parameters of trackEvent() method, an empty string a 0 (zero), but depending of your needs you may populate them with some data.
7. Debugging
Debugging helps you deal with troubleshooting, and make you sure that the data actually is sent to the server. To set the Google Analytics in debug mode, add the following setting in the analytics.xml
<bool name="ga_debug">true</bool>
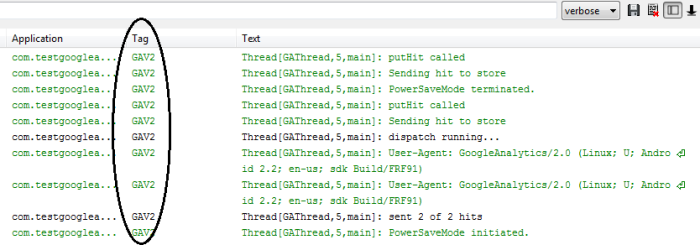
Once your are in debug mode, you can watch the log information in LogCat:
Waiting for the big moment!
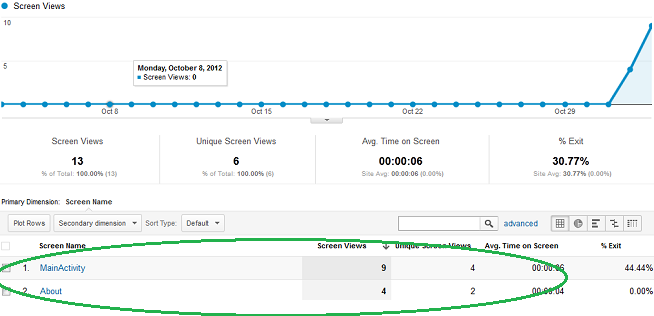
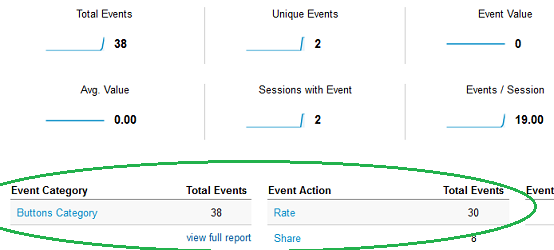
If everything is configured correctly, the reports should appear on live. Usually it takes about 24 hours to see the data in your account.
What happens if my application is used when no network is available?
Just in case you asked this yourself…, all the events are persisted in a local storage, and they will be sent the next time your app is running and dispatch is called.
Last but not least
One important thing not to be forgotten: you must indicate to your users, either in the application itself or in your terms of service, that you reserve the right to anonymously track and report a user’s activity inside of your app.
Android Google Analytics SDK offers more than tracking activities and events, see: https://developers.google.com/analytics/devguides/collection/android/v2/ to get the most out of it.

Thank you !!! I wasted a lot of hours finding help about this.
It works!
Thanks Andy Res, works perfectly, I have time trying to integrate Google analytics in my app.
Thank you so much, you are doing a great job for beginners.Its working for me and explanation is too good
can u mail me is their any need of internet ? I have problem “Unable to start Intent ” but my program is run successfully .
my mail id is : nikhildesale12@gmail.com
Thanks
Thanks for such nice tutorial,but can we track events in which data is fetched from database? Please reply with suggestion.
is their need of internet ?
Thanks, It was helpful information.
Thanks!
But this is necessary? –> 30
I read this paragraph completely on the topic of
the resemblance of hottest and earlier technologies,
it’s awesome article.
Hurrah! Finally I got a website from where I know how to really obtain useful data concerning my
study and knowledge.
This is an awesome article its straight forward ,…THANX hey,…..but pliz can you help now when am tracking events the method tracker.trackEvents(,,,,) when l implement it it cancel the method and then states that the tracker method is deprecated…..Where am l getting it wrong.
Hey Thanx this cleared some of my conflicting areas,I encountered a problem when l was tracking events,….after inserting the 4 parameters of trackEvent the compiler cancels the method and stats that the method trackEvent is deprecated.
Thank you so much
According to documentation, EasyTracker.getInstance() could return null. It is best to wrap that in a not null check before calling a method on the instance.
Good point, thanks!
It’s going to be ending of mine day, however before ending I am reading this impressive post to increase my
knowledge.