


Have you ever wondered how these great macro shots have taken? Maybe you have tried to take shots similar to these with a top-of-class macro lens but it seems to be impossible to gain that kind of a depth of field? The answer is simple: they are a stack of multiple exposures. And now we are going to learn to do the same.
First of all you need multiple shots of same subject, in this case I took a spider and made 3 different exposures with focus moving form back to front. So here is my starting point, as you can see the focus is set on 3 different spots of spider:    Now you need to stack these images to get the spider fully in focus and keep the background blurred. Normally you would just stop down the F number to somewhere about f/13 but this means that your background becomes more visible and isn't that smooth any more. To stack these images open up Adobe Bridge, you may also want to start you Photoshop, or you may let Bridge to open PS later. Now move to the folder where you have your source images and select them all at once.  Now while having 3 images selected go to Tools->Photoshop->Load Files into Photoshop layers  Bridge automatically loads these images into one Photoshop document and makes them separate layers. For stacking the focus you first need exactly align all the layers for features to match. Luckily Adobe has thought on photographers lazy enough to avoid doing it manually. So select all yours layers and then go to: Edit->Auto-Align Layers  Leave it on auto, it does the work on most of the cases, and click OK. Now Photoshop aligns layers automatically by matching features of the subject. Here is my result, as you can see, Photoshop has corrected also the change of my position while taking these 3 shots 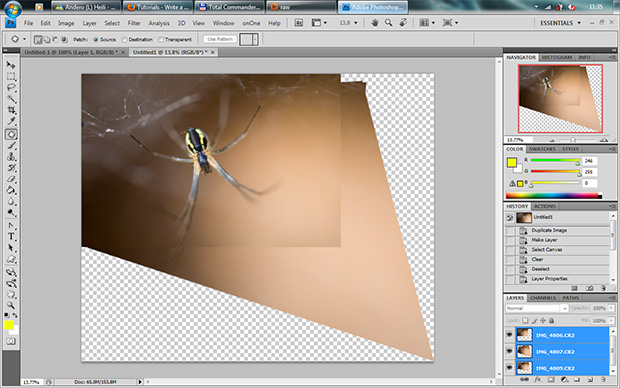 Now it is time for the most critical step, as this shows if Photoshop can automatically stack you shot or you have to do it manually. Anyway here it is. We still have all our layers selected and we are now going to Edit->Auto-Blend Layers and this time we'll choose Stack Images and make sure that Seamless Tones and Colors is selected, click OK, sit back, relax, and wait for a result.  Well you've done it, you now have a image with impossible depth-of-field and yet still the main subject is fully in focus 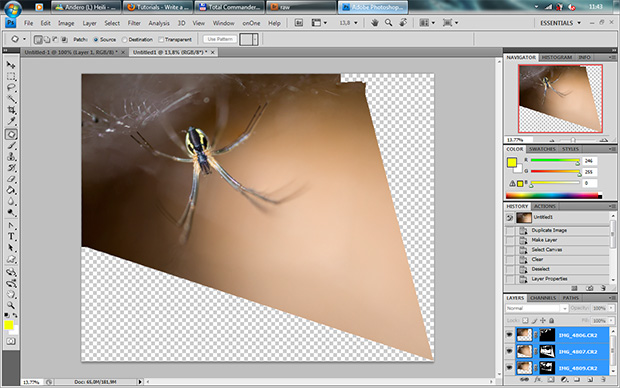 As you can see, you still have your layers selected and each of them has a layer mask now. It is a prime time to merge these 3 layers: Layer->Merge Layers. As you can see the image is not ready for any publishing. You have to crop it to fit the standards and look out nice enough, I use the size of a normal photograph to crop it i.e 3888x2592 px, size depends on the sensor size of your camera. With the image cropped feel free to edit it in a way you feel the best. Here is my final result: 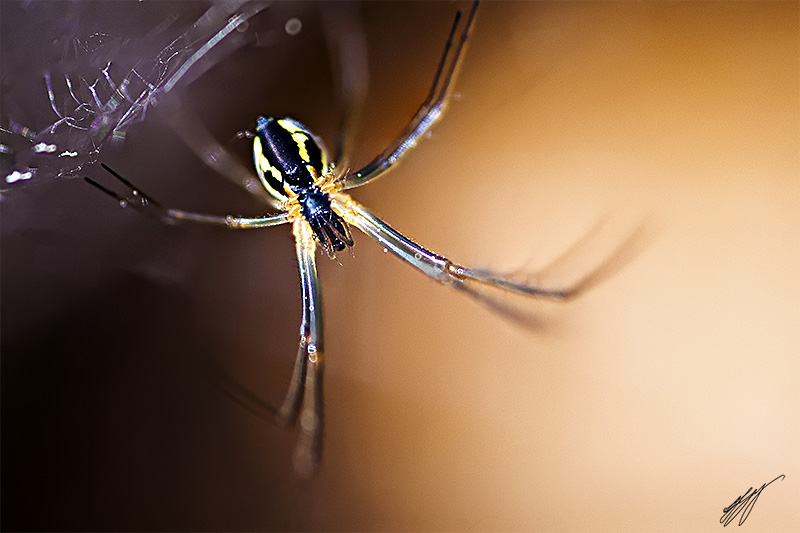 
Dig this tutorial?
Thank the author by sending him a few P2L credits!


|


