There are many ways to document a special moment in our life. One of the best way is by making a DVD. You can watch them on TV with your families and friends or senda copy of the DVD to them. We will show you how to make a graduation photo slideshow in a DVD easily.
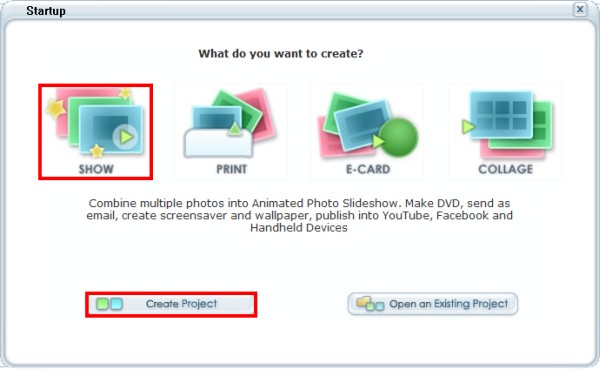
Step 1 Install and Run InAlbum from here Step 2 InAlbum will show you a startup menu, choose "SHOW" button, then click "Create Project" button.
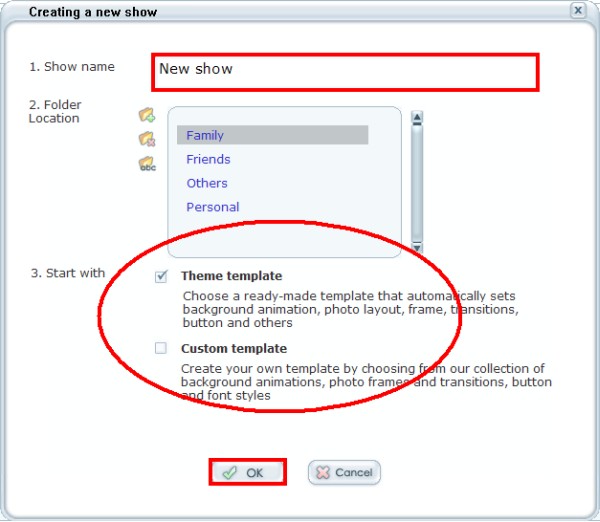
Fill in the "Show name". For this tutorial, we use a Theme template from InAlbum.
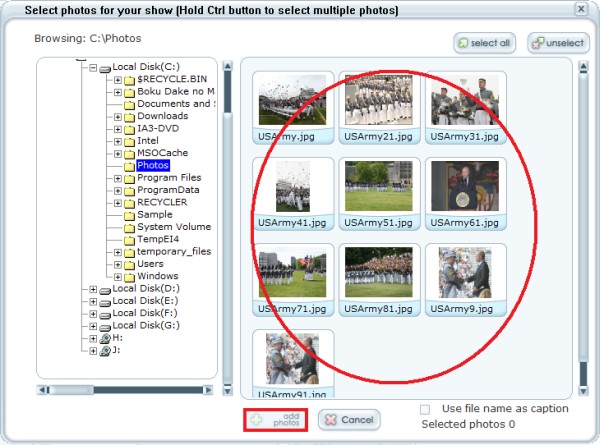
Step 3 Click on "Add photo" button and select photos from your computer.
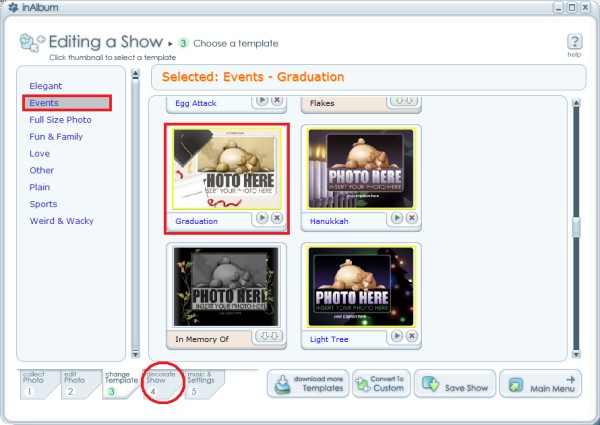
At the caption, we fill it. Step 4 Go to tab 3 "change Template", choose Event and Graduation Template.
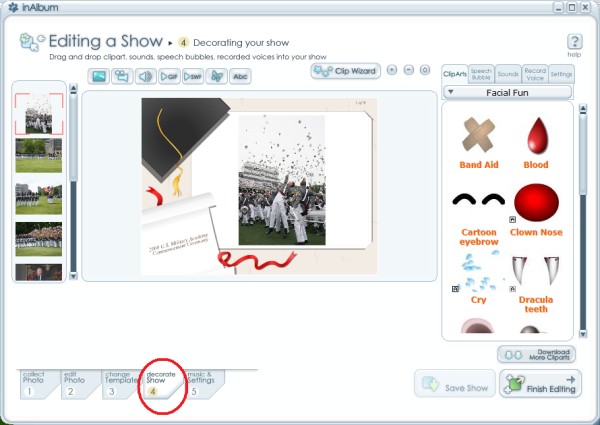
Step 5 To add the other object, Click on tab 4 "decorate Show". In this case, we leave it as default.
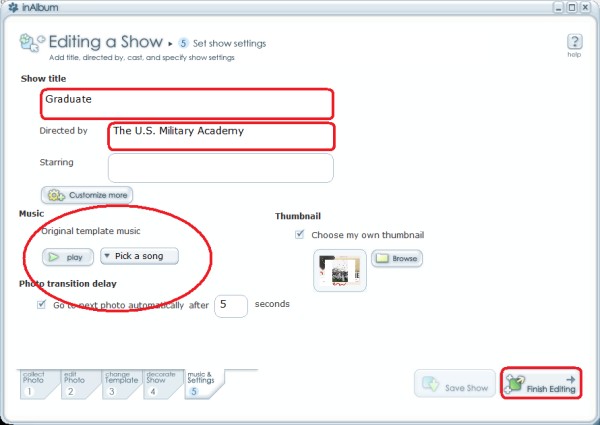
Step 6 Go to tab 5 "music & Settings" to fill in the show title, directed & starring. You can change the musictoo. Click on "Finih Editing" button to play this slideshow.
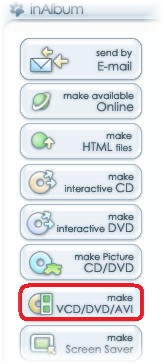
Step 7 Now, We will show you how to make your slideshow into DVD Movie. Click on "make VCD/DVD/AVI".
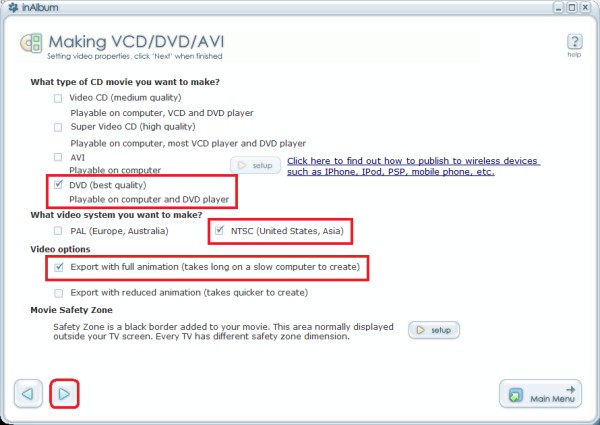
The program will let you to choose type of CD movie, video system, video options and movie safety zone.In this case, we leave it as default. Then click next button.
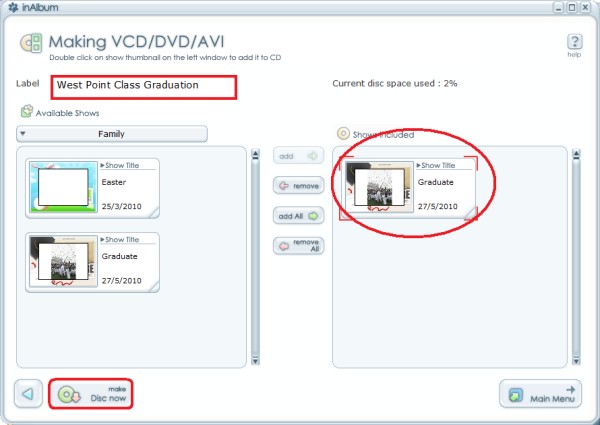
Step 8 You can add another project into this DVD if you want. For this tutorial we will be just making oneproject. To continue, click on "make Disc now" button.
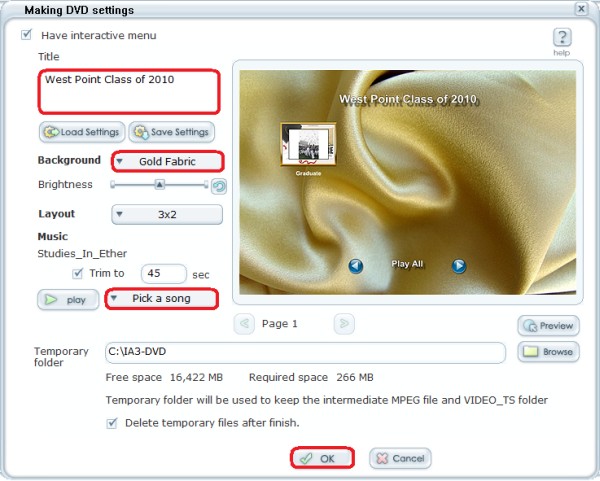
Step 9 Here you can customize the DVD menu with background and musics. We choose "Have interactive menu",type "West Point Class of 2010" for the title. Background with Gold Fabric, then pick a song. The rest we usedefault.
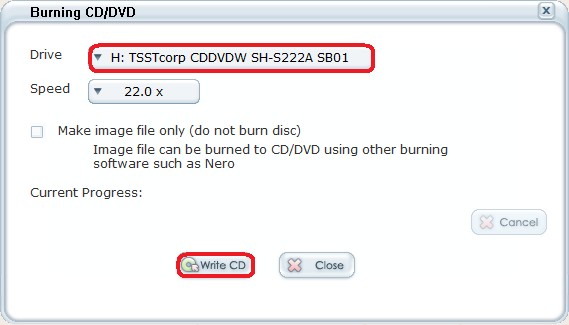
Step 10 The program will start making your DVD. After It is finished, you have to choose the drive of your DVDburner and speed. To write DVD, click on "Write CD" button.
Step 11 Congratulation, your DVD movie is done. You can watch them on TV with your families and friends or send acopy of the DVD to them.
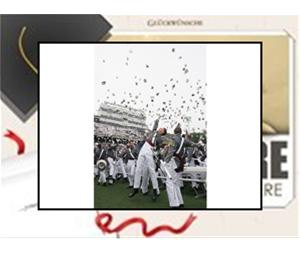
Here is the result:

|