


One of the success key of running a web store is how to manage its front page so that people whovisit the store feel pleased with the circumstence.
Step 1 Install and Run IncrediFlash XTreme program from here Step 2 Choose Blank project and set the Dimension to 800 x 700
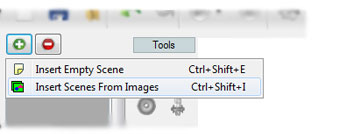
Step 3 By default there's aleardy one blank scene opened at the Scene list window. Delete it and then insert a newone by clicking "Add a new scene" button and choose "Insert scenes from images". At Browse window choosebackground.jpg as the scene 1's background.
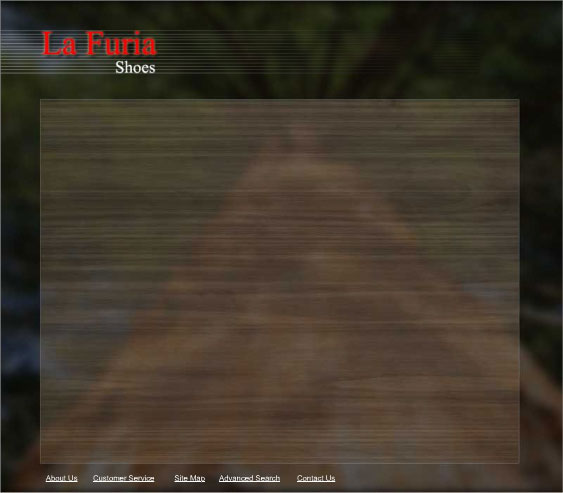
Step 4 Insert header.jpg into the scene, followed by 5 text objects with sound"About Us", "Customer Serive", "Site Map", "Advanced Search" and "Contact Us" respectively. Arrange them all as shown below
Step 5 Insertshoes01.jpg,shoes02.jpg,shoes03.jpg,shoes04.jpg,shoes05.jpg,shoes06.jpg,shoes07.jpg,shoes08.jpg,shoes09.jpg into scene1 and arrange them all ashown below:
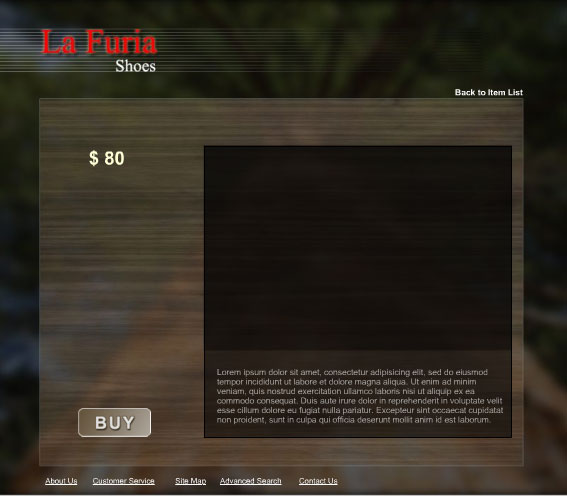
Step 6 Insert a new scene again as you did at step 3. This time, use backgrounditem.jpg as the background image. Step 7 Since there will be 9 shoes in this lesson, you should add 8 more scenes to the project file. Repeatstep 6 to 8 more scenes. Step 8 Go to Scene 2 then repeat step 4 to the scene, followed by adding "Back to Items List" and "$80" text as the price (you don'thave to be glued with this price text), and lastly insert buy_over.jpg image. Arrange all the items aboveas shown in the following picture:
The place where "Lorem ipsum..." text stands actulaly is for the decription of the shoes product. Step 9 Repeat step 7 above for the rest of 8 scenes onward. Step 10 For Scene 2 till Scene 10 insert the following image for each respectivelyshoes01.png,shoes02.png,shoes03.png,shoes04.png,shoes05.png,shoes06.png,shoes07.png,shoes08.png,shoes09.png. Step 11 Congratulations! You now have a front door of your own web store.
Here is the result:

|


