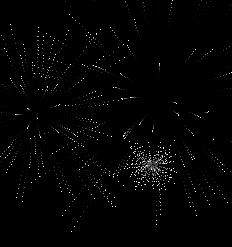
In this tutorial you will learn how to create two individual classes so you easily can implement a particle system (like a pixel explosion) into your application. The main class will be called BitmapStage.as �
� If you do not have an applikation to implement this system in and you still want to see the outcome then create a new .fla file named BitmapStage.fla and open the actions panel (F9). In here you can then write the code that you otherwise had to write in your own external script. � Let's begin. Since we work in an external script we will have to import some libraries. The most important libraries are the Bitmap and the BitmapData library. The core script should look like this: package {
import flash.display.Bitmap;
import flash.display.BitmapData;
public class BitmapStage extends Bitmap {
...
� We will need some variables that we later on can refer to. The class itself is the Bitmap so we'll only need a BitmapData. To be able to clear the stage for pixels so they do not stay on the screen we will need more than one BitmapData. Actually, we'll need at least 3. One to hold the data that the class itself will show and the other two to set the pixels and erase them again. Here is the BitmapStage.as script: package {
import flash.display.Bitmap;
import flash.display.BitmapData;
public class BitmapStage extends Bitmap {
private var bmd:BitmapData;
private var bmdDraw:BitmapData;
private var bmdClear:BitmapData;
public function BitmapStage(w:Number, h:Number):void {
bmd = new BitmapData(w,h,true,0xFF000000);
bmdDraw = new BitmapData(w,h,true,0x00000000);
bmdClear = new BitmapData(w,h,true,0x44000000);
this.bitmapData = bmd;
}
public function setParticles(pixels:Array):void {
for (var i:int=0;i<pixels.length;i++) {
bmdDraw.setPixel32(pixels[i].x,pixels[i].y,pixels[i].color);
}
bmd.draw(bmdDraw);
bmdDraw.draw(bmdClear);
}
}
}
� As you can see when we create the class it wants two arguments - width and height of the bitmap. You will usually set this to the width and height of the stage. The class contains one function, the setParticles(pixels:Array) function. This function takes an array containing the position of some points (we will create this class in a moment) and sets them on one of the BitmapData. The BitmapData linked to the class itself (bmd) then draws all of the pixels from the bmdDraw and the bmdDraw draws a clear background (though, I have not set the clear background to be completely clear, since it gives a cooler effect to have a trail behind the pixels). � You can change the color of bmdClear to change the length of the trail behind the pixels. You can also assign a filter to bmdDraw to add extra effect to the system. � Now we will create a simple class that will contain the point of a pixel. You could as easily just use the implemented Point, but by creating a simple class it won't demand as much CPU. Here is the final class Pixel.as: package {
public class Pixel {
public var x:Number;
public var y:Number;
public var vx:Number;
public var vy:Number;
public var color:Number;
public function Pixel(posX:Number,posY:Number,c:Number,vX:Number=0,vY:Number=0):void {
x = posX;
y = posY;
vx = vX;
vy = vY;
color = c;
}
}
}
� The Pixel class contains 5 variables. An x and y value - this is the ones the BitmapStage uses to draw the pixels. Then we assign a color to the pixel. And finally velocity so they can move around. � Remember to store the scripts in the same folder! � Now we are done. Since I do not want to confuse you, I have created an example using the two classes. I have created a new .fla file with a framerate of 32 and a size of 500 x 500 pixels. Remember to save it in the same folder as the external scripts (BitmapStage.as and Pixel.as). Inside the actions panel I have written the following code: var bs:BitmapStage = new BitmapStage(500,500);
addChild(bs);
var pixels:Array = [];
addEventListener(Event.ENTER_FRAME, movePixels);
stage.addEventListener(MouseEvent.CLICK, explode);
function explode(e:MouseEvent):void {
for (var i:int=0;i<10;i++) {
var p:Pixel = new Pixel(mouseX,mouseY,0xFFFFFFFF,Math.random()*10-5,Math.random()*10-5);
pixels.push(p);
}
bs.setParticles(pixels);
}
function movePixels(e:Event):void {
for (var i:int=0;i
pixels[i].x += pixels[i].vx;
pixels[i].y += pixels[i].vy;
}
bs.setParticles(pixels);
}
� First we create a new BitmapStage width the same width and height as the stage. Then we create an array to contain all of our pixels. The function explode will be triggered everytime the user clicks on the stage. 10 pixels will be created with the color of white and random velocity. We then update the the pixels position every frame in the movePixels function. � You can use the classes anyway you like. This was just an example. You can change the color of the pixels and the velocity and you have a whole new applikation. If you want some gravity simply add it to the velocity. � The engine/particle system should be able to handle up to 10.000 particles without dropping in fps. � Thank you for following along. If you need any additional help - contact me by mail. Lewinzki.com 
Dig this tutorial?
Thank the author by sending him a few P2L credits!

Lewinzki
I'm still young - no oracle. But, I do know a lot about ActionScript 3.0, so if you need any help please write. Recently I launched my website "lewinzki.com". It's still under construction - so please visit it and leave some comments to help me improve it 


|